Showing posts with label Craft Ideas. Show all posts

Kitchen Safety Tips for Kids


How to Keep the Kitchen a Safe Place 


Thinking of doing a kitchen remodel? As parents, we need to remember to always put safety first. This is especially true when you have toddlers. Little ones often get into mischief, and you want to know that they’re out of harm's way. To toddlers and preschoolers, the kitchen is a magical place. When they wander into the kitchen, they also wander into an area that has several safety hazards. So, how do you keep the kitchen a safe place for your kids?


This post contains Amazon Affiliate links.


kitchen safety tips for kids toddlers


Make your kitchen kid-friendly by paying attention to the small details. Ensure things like
fires, injuries from sharp objects, and slip and falls are avoided whenever possible. Below are some ways that you can help you  learn how to keep the kitchen a safe place for toddlers and adults alike!


Kitchen Safety Tips 


Invest in Good Lighting 

As simple as it may sound, having good lighting is a great way to make your kitchen safe for kids. When you have good kitchen lighting, you can see what you’re doing and reduce the risk of accidents. The fun thing about choosing lighting for your kitchen is that there are so many different types to choose. Good kitchen lighting should complement your interior design as well, as, give you enough light to use your space in all the ways that you want. We use our kitchen as our homeschool room, so lighting is a key factor. To modernize your kitchen for better safety, under cabinet lights often serve double duty as spotlight lighting for preparing food on the worktops, and as softer lighting in the evening when the main lighting is switched off. 


Keep a Fire Extinguisher Nearby 


Fires are a common occurrence, and because there are so many hazards in the kitchen, everyone should have a fire extinguisher in their kitchen. It has been said that over 150,000 fires take place in the kitchen every year, so you want to be prepared in case it ever happens to you. Place the kitchen fire extinguisher near your stove so that it’s easy to grab quickly. You’ll also need to learn how to use it, There are many online resources that teach how to use a fire extinguisher or contact your local fire station . Lastly, note that fire extinguishers have inspection dates that expire, so ensure that you’re up-to-date.  


Store Objects in Cabinets 


If you have sharp objects or ones that could harm your toddlers, you should put them into cabinets. This will ensure that they’re out of reach and minimize the risk of accidents. If you don’t have cabinets, or the kitchen cabinets that you have aren’t secure, you should install new ones. Cabinet Doors ‘N’ More sell quality cabinet doors; their replacement cabinet doors are made from solid woods, such as hard maple, paint-grade hard maple, red oak, and cherry. 


Slip-Resistant Flooring 


Slips and falls happen all of the time, but there are several ways to help prevent these kitchen accidents. The kitchen is especially prone to accidents like water spillage and cooking grease. So, you should get slip-resistant flooring installed in the kitchen. Some examples are wood with a flat finish, textured vinyl, or laminate flooring. Kitchen laminate happens to be somewhat easy to install and it's very durable. 


First Aid Kit 


In the event that an accident does happen, you should have access to a quality first-aid kit. Keep it in a cupboard, on a shelf ,or in your kitchen storage pantry for easy access. Some items you should have in your kitchen first aid kit include: bandages for cuts, dressings, and burn ointment. 


Whether you're giving your kitchen a quick makeover to make it safer for the kids, or a full kitchen remodel, we hope you find these kitchen safety tips for kids, especially toddlers, helpful. For more family activities and safety tips, please follow us on Pinterest.


Recommended:

Toy Safety for Toddlers

Get First Aid Kit for Kitchen

Gift Ideas for Child's First Birthday

Get Kitchen Fire Extinguisher

Firework Safety Tips for Kids


Countdown to Christmas Gift Advent Calendar with Toilet Roll Tubes and Wrapping Paper

Toilet Roll Cardboard Tube Advent Calendar for Kids

Make an Advent calendar from recycled cardboard tubes and wrapping paper. It is an Easy Christmas craft for kids. Enjoy!

How to make an Advent Calendar from recycled cardboard tubes and wrapping paper
Easy Preschool Advent Calendar from cardboard tubes.
So, we save our toilet tubes. Yes, I am one of those people (I save my jars too) here is a post from one who is not, it made me LOL. Just imagine the possibilities?

Jar lids make great messy spoon holders, paint mixing trays, and chimes. Jars make amazing things! When I was a kid, my Dad had a glass cutting kit, and he'd make all kinds of "fancy" glasses from jars. (You know, just like Waterford Crystal.) 


Toilet Tubes are even better. They just cry out for re-purposation. Do you like that word? I just invented it. There, now I copyrighted it too. 12/2012. Maybe, I can trademark it?  "You're fired!" Wait, what was I saying? Toilet Tubes and Cardboard Tubes = Awesome craftability.

So... we save our toilet roll tubes. Except we moved, and then we didn't, so I had to start all over. I barely had enough for 25 days, and they were all different diameters and lengths. We had fun, but it wasn't perfect. Remember, it's the fun that counts.


To make our Advent Calendar tree, we took an idea from something similar we saw on Pinterest and it sparked an idea.  You know, how that goes. Hmmmmm, very pinteresting. I wonder how I can recreate it to make it my own?  


Cardboard tube Advent Calendar Tree.
Ow, my brain just exploded a little! I'm going to get my crafty blogging buddies together and make a contest. I'll call it, "The American Crafter" and we'll find something pinteresting and give everyone an assignment to make it their own and you can vote but not by phone- maybe just by comments. Copyright, Trademark, and Hashtag that please.

Digression


He digressed so often that it was hard to follow what he was saying. 


To turn aside especially from the main subject of attention or course of argument.


I do that a lot when I write on Sundays. It's my little form of meditation. So who's in? Are you up for a Voice/American Idol style Crafter contest? 


I'll make the winner a handmade, toilet tube crown with a fancy jar torch. (wink, wink)


What? You came here to make an Advent Calendar or a cute holiday decoration?  Here goes:


You will need 25 Toilet Roll Tubes minus the toilet paper, but I guess you could use the toilet rolls, now wouldn't that be pinteresting?


Tape or a Hot Glue Gun


Wrapping Paper or Scrap

(Yes, of course, I save the little bits of paper from the previous year that aren't big enough to wrap a package. They are so pretty, I can't bare to throw them away. No, I talk about hoarding, but I'm not really a hoarder not yet anyway. My cat is alive and well, The food in my fridge isn't expired, and you can walk through the rooms of our house just fine. Well, most of them.)

Construction Paper


1.  Cut little squares of wrapping paper and roll onto your tubes. Attach with tape.


2.  Decide how many will be in each row to taper to one on top.


3.  Attach the bottom row together with a little piece of tape inside the end of two tubes.


4.  Stack the next row. Repeat step 3. Choose to glue first row to second row or use tape.


5.  Repeat.


6.  Cut out a Star or Angel from Construction Paper and glue to top of Christmas Tree.


7.  Fill each slot with little gifts or fun notes until Christmas Day.


Recommended Reading:


Holiday Party Favor Basket Ornaments


Turkey with Fall Leaves

New Year's Eve Rocket Popper

Look What You Can Make With Tubes: Creative crafts from 
everyday objects


ADS DISCLOSURE: We've partnered with some wonderful advertisers who may sponsor blog posts or send us samples to test. Some companies pay us to review their products.

*We also use affiliate links, if you make a purchase we get a tiny commission. Kids Creative Chaos participates in the Amazon LLC Associates Program*, an affiliate advertising program designed to provide a mean for blogs to earn advertising fees by linking to Amazon properties, including, but not limited to, amazon.com, endless.com, myhabit.com, smallparts.com, or amazonwireless.com. We also offer Tapinfluence, Google Adsense, SoFab, and Izea ads here. Thanks so much for helping us keep the lights on! :)


Jake's Art - Homeschool Weaving Lesson - Make your own Loom - DIY Arts and Crafts

How to make a loom for weaving scrap fiber: A Homeschool Art Lesson

Jake's Journey in Art goes under the sea in this DIY weaving Homeschool Art Lesson we learned to Renew. Enjoy!


How to weave for elementary make your own loom
Our loom has both warp and weft framework to better illustrate 
the concept to young children.

To weave a textile, threads (or scrap fabric) are woven on a frame called a loom. The first vertical threads on the loom are called warp threads. Threads that are woven horizontally in and out of the warp threads are called weft threads.


Cut notches in the cardboard frame to keep yarn in place.

Recycle a piece of cardboard from a cereal box or a foam tray to make your loom. You might also like Native American Paper Bag Dress

Cut small notches into the top and bottom of your cardboard(ours are about 1/2", but 1" works well). Make them about 1/2" inch apart. Alex Toys has a great PDF on weaving here.


Spongebob Fabric for Toddler bed tent.

Warp your loom with yarn or string by taking the thread and taping one end to the back middle of your board.  Now, starting with your first notch on the left, begin wrapping through each top and bottom notch without skipping a notch until you get to the right side of the board.  Only the warp frame is required.

Now your are ready to weave your weft. Cut or tear scraps of fabric into strips. Your strips of fabric should be about 1" thick and at least 12"  long. You will need about 20 strips. 


The cat enjoyed the tearing of fabric strips so much 
he needed a nap after playing with them.

For extra ease for smaller children, we added a weft frame as well. Now the scraps of fabric can be pulled through the little squares for guidance. Pull your scrap fabric under the first warp, over the next, and so on. The yarn guide will help younger children see any mistakes made.

When you have completed your weaving tie off all scraps in groups of two at the edges of your cardboard loom, then you can cut your your thread/yarn framework.


How to make a loom - Elementary Weaving Lesson Scrap Fibers Make your own
Spongebob has his eye on you.

This is an easy way to get littles started in weaving. It is also helpful to cut a piece of cardboard about 1" by 3" with a notch in the end. Attach your scrap fabric by inserting it in the notch and use as a tool to weave the fabric through the loom, this is called a shuttle.


Alex Toys Native American Bead Loom Kit for weaving bracelets.

Once you advance your skills, you can weave many beautiful projects. Alex Toys has a Native American Loom for weaving bracelets.  It is a professional quality loom that makes incredibly authentic bracelets.  We are working on our patterns and will share them soon.


Kid's room cartoon character theme (that way we don't have to worry about matching or new fads).Check out the automobile sun visor we used as a headboard. 
It is simply nailed to the wall.

Jake loved the idea of using his toddler tent cover as scrap fabric for this project. We renewed an item that was dear to his heart. It had been ripped from rowdy play and was no good as a tent, but we saved it anyway in hopes to repair it or transform it into a pillow or some other creative endeavor. The SpongeBob fabric was the perfect accent for his room. 


Yep, we need a hanging stick, but the kids love it.  
Use favorite t-shirts, pillow cases, or doll clothes for your scrap fiber.

To display your beautiful work of art weave a "weft" stick horizontally through the top row and hang on a wall.  Jake loved his creation and couldn't wait for the stick. He wanted to see how it looked right away, so we hung it by a nail. A little droopy, yes, but he loves it.

Did he love the process?  Not so much.  Much patience is a necessary requirement of weaving. So, Mommy made the loom, got it started and Jake weaved the inner pieces to gain an understanding of the process.  Mommy tied and cut it off making sure Jake watched and understood. This is somewhat time consuming, but the end results are worth it.


Mayhem saw the weaving on his wall and wanted it for her room. Score! This project journey ended on a very happy note.   


Recommended Reading:


Learning How to Weave*

Party Time: SpongeBob SquarePants*


ADS DISCLOSURE: We've partnered with some wonderful advertisers who may sponsor blog posts or send us samples to test. Some companies pay us to review their products.

*We also use affiliate links, if you make a purchase we get a tiny commission. Kids Creative Chaos participates in the Amazon LLC Associates Program*, an affiliate advertising program designed to provide a mean for blogs to earn advertising fees by linking to Amazon properties, including, but not limited to, amazon.com, endless.com, myhabit.com, smallparts.com, or amazonwireless.com. We also offer Tapinfluence, Google Adsense, SoFab, and Izea ads here. Thanks so much for helping us keep the lights on! :)


How to Decorate Kid's Room with Rubber Stamps

Whimsical Kids' Room Decor with Rubber Stamp as the Tool


How to decorate kid's room with rubber stamps: Purchase some cute rubber stamps, your favorite color of ink, and stamp a border around your kid's room. Color it in with crayons for a whimsical flare or use permanent markers. If you want the crayons to last, you can cover with a strip of clear contact paper or spray with a clear sealant. We're sharing our kids bathroom decor ideaEnjoy!

This post contains affiliate links.


Whimsical Rooms: How to decorate kids room with rubber stamps and crayons


The Rubber Stamps make an artsy outline to color with crayons or paint to decorate as a border for a whimsical kid's room.

Whimsical Decor: How to Decorate Kid's Room with Rubber Stamps.


Velcro is attached to the wall and to the back of the book, glue ribbon to flaps and tie closed for wall art, and then you can pull the book off the wall to read.


Creative and Fun Ideas for Winnie the Pooh kids room


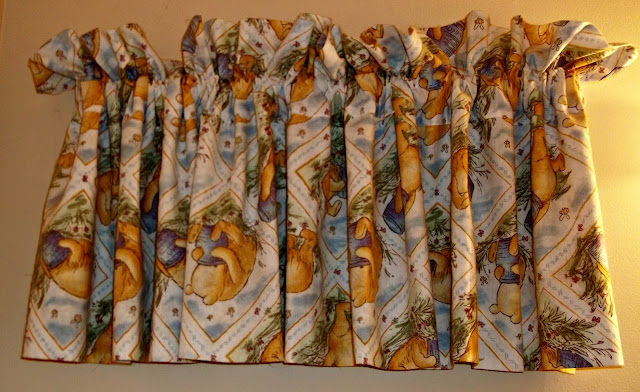
A lone valance in my favorite color periwinkle was the inspiration. Hang a curtain rod over the toilet and add a fun kids curtain for a splash of color. We have high ceilings, so we hung fabric flowers from the ceiling and let them dangle at 7 feet.  

What's your whimsy? Tell us you two cents and share your ideas in the comments.


Recommended Reading:

Under the Sea Bathroom Theme for Kids

The Complete Tales of Winnie-the-Pooh

Whimsical Room Decor

Universal Design for Kids Room


Pin-it Online Scavenger Hunt 5/14/2012: Patriotic Snacks for the July 4th

Join the fun and find great classroom curriculum on Pinterest: Patriotic Fruit Kabobs and More.

Have you checked out our Pin it Online Scavenger Hunt on Pinterest yet? It is full of fun ideas for preschool activities or ways to celebrate holidays and special events. The Patriotic Fruit Kabobs for Independence Day and Salt and Flour Paint were a big hit!

Winner is always chosen by you: The pin with the most re-pins is showcased here each week and the ORIGINAL pinner wins! 

And the Winner is (5/07)... Carole M. and Jennifer O. tied for the most pins at 25. Remember to allow 4-6 weeks for delivery. Please send address info to the hollyjollyone@yahoo.com.  


Wanna join? Leave a comment on Pinterest to be added to the board as a collaborative pinner (under the purple tack). Or here ~Below this post is a divider bar, on the left side you will see the words, "Tell us your two cents" click here to comment and get your invite to join the game! Any comment on any post will do, just let us know you'd like to join the hunt :-)

Most pinned (25 repins) pinned by Jennifer O. on the blog, TinkerLab (Creative Experiments for Kids), Salt and Flour Paint.


How to make paint with salt, flour, and food coloring from TinkerLab.


Most Pins, pinned by Carole M. (25 repins) from the blog, Giggles Galore, Patriotic Fruit Kabobs.


Patriotic Fruit Kabobs for the Fourth of July from Pinterest.

4th of July Recipes*

History for Kids: The Fourth of July for Kids - The Incredible Story of Independence Day - Including an Interactive Fourth of July QUIZ! (History for Children)*


Snowman Craft for Kids out of Egg Shells by Mama Mia

Snowman Crafts for Kids Eggshell Snowman

One of my old blogging buddies came up with this cute snowman craft. You could make a whole day of learning with preschoolers or homeschoolers with this little project. For a science lesson, discuss the properties of an egg, boil some eggs, remove the shells, eat the eggs, and craft with the shells! Imagine the possibilities if you colored your eggs with Easter egg dye first. You can make egg shell mosaics for an art lesson for kids. We've got a flock of chickens, so I am always looking some activity to do with eggs.


Snowman Crafts for Kids Eggshell Snowman makes a fun science lesson for kids.
Preschool snowman craft with egg shells from Mama Mia's Heart to Heart.

Recommended Reading:

Snowman Surprise

Sneezy the Snowman