Showing posts with label easy desserts. Show all posts

Easy Cheesecake Recipe Chocolate Chip Gluten Free Crust

Chocolate Chip Cheesecake with Gluten Free Chocolate Crust


Has there ever been an easier way to make a delicious dessert? Absolutely not! If you're gluten free or keto, or you just love food in general, you have to try these gluten free veggie crusts by Kbosh! They make these gluten free crusts for pizzas and dinner food, and they also make dessert crusts too! It's the craziest thing, we started with their gluten free chocolate zucchini crust and got creative. Scroll down for our easy, gluten free, chocolate chip cheesecake recipe.

This post contains affiliate links.


Easy Cheesecake Recipe Chocolate Chip Gluten Free Crust


Are you on a gluten free diet? Do you do all things Keto? These veggie crusts from Kbosh work as tortillas, crackers, pasta, pie crusts, pizza crusts, and so much more. You'll never know you're eating veggies. The kids loved this simple cheesecake roll. It makes a great after school snack, and the kids can make it on their own!


How to Make Gluten Free Crustless Cheesecake Recipe


Start with an easy, no bake cheesecake mix or get fancy and make your own cheesecake filling from scratch. It doesn't matter, it's all delicious! We used a Jell-O, No-Bake Cheesecake in a box. Ditch the graham crackers, you don't need them and they're full of gluten and extra sugar. Yes, there's sugar in the cheesecake mix. Shh...

Easy Cheesecake Recipe Chocolate Chip Gluten Free Crust
Make a gluten free chocolate cheesecake with a Kbosh dessert crust.


So, all you really need is a bag of chocolate chips, a Kbosh Chocolate Zucchini Crust, and the Jell-O Cheesecake mix. Make the cheesecake according to package instructions.


Next, remove your Kbosh Crust from the freezer and place it in the microwave for 40 seconds. After your cheesecake mix sets, spread it on the chocolate veggie dessert crust.


Chocolate, gluten free pre-made dessert crust with cheesecake spread.

Sprinkle on chocolate chips.

No crust, gluten free cheesecake roll.
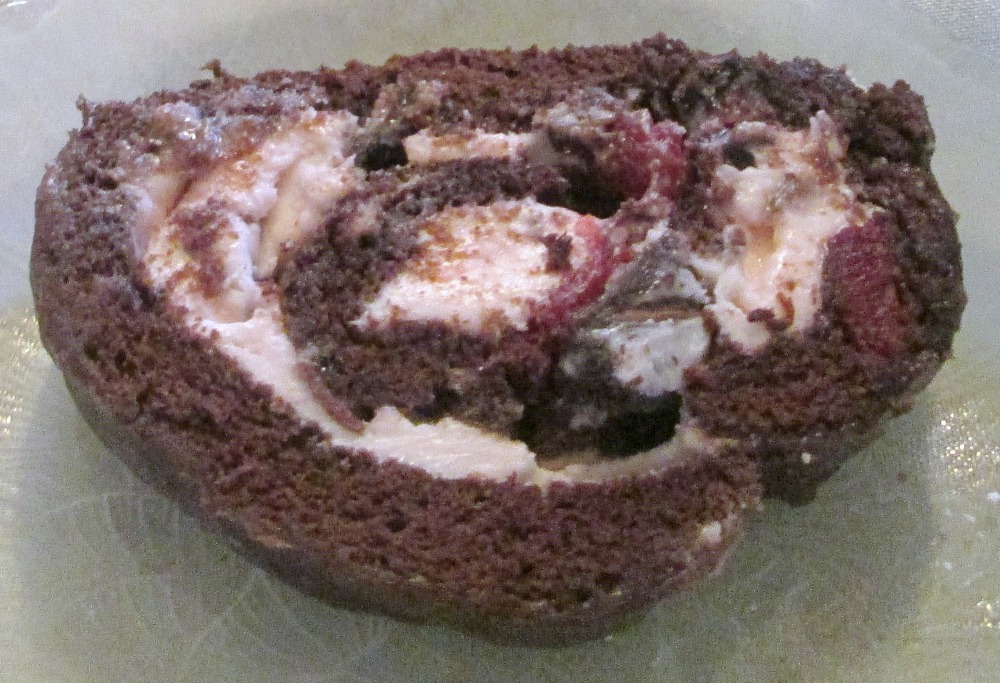
Carefully, roll it into a Swiss Roll and then slice in 1" pinwheels to serve.

Seriously, that's all there is to it. Imagine how great this gluten free chocolate chip cheesecake will be when you add strawberries and whip cream on top! Did someone say, time to eat?

For more gluten free, veggie crust recipes follow Kbosh on Pinterest. We're on Pinterest too, follow us for more easy family recipes.


Recommended:

More Easy Dessert Recipe from Kids Creative Chaos

Did Someone Say Gluten Free?


Black and White Dessert Recipe Indy 500 Race

Easy Dessert Recipe for Indy 500 Race Day Parties


When May arrives in Indiana, we start thinking about the Indy 500 Race. Similar to the Kentucky Derby, people have race theme parties. The checkered flag is center stage. This Black and White Delight Cheesecake Dessert Recipe is perfect for those black and white race day theme parties. It's the Next Best Thing to any Andretti. Enjoy!!

This post contains affiliate links.
Black and White Dessert Recipe Indy 500 Race
Easy Black and White Dessert Recipe Indy 500 Race

Easy Black and White Dessert Recipe Indy 500 Race


To Make the Crust:

12 oz. Refrigerated Sugar Cookie Dough, 3 T Cocoa, 1 T Butter

Mix together above ingredients. Then, grease an 8 in. square baking pan. Pat the dough into the pan. Bake for approx. 15 minutes in a preheated 350 degree oven. Let the crust cool completely.

To Make the Cheesecake Layer:
8 oz. Cream Cheese, 1/2 C. Milk
Let 8 oz. cream cheese come to room temperature. Beat in 1/2 C. powdered sugar. Layer the cheesecake mixture on top of the cooled crust.


Easy Dessert Recipe for Indy 500 Race Day Parties


To Make the Chocolate Pudding Layer:
1 Package Dark Chocolate Pudding, 1/2 C. Milk
Whisk above ingredients together until thickened. Spread on top of the cheesecake layer.

To Make the White Pudding Layer:
1 Package White Chocolate or Vanilla Pudding, 1/2 C. Milk
Whisk together above ingredients until thickened. Spread on top of chocolate pudding layer.

Top with whipped cream and a strawberry. 


Tip: Chill for 1 hr.


Recommended:

More Cake Recipes from Kids Creative Chaos


Pin it!

Black and White Dessert Recipe Indy 500 Race Party

Traditional Yule Log Recipe

Easy Yule Log Recipe


Ahh, Ye olde Yule Log. What's a Yule Log, you ask? Depends who you ask. Are you hungry or do you want to keep warm for the holidays? Find out the history of the Yule Log. Is it food - yes and also no! Apparently, the dessert cake, Chocolate Yule Log, was created after the one you place in your fireplace. This traditional Yule Log recipe is delicious, but it also serves as a great family tradition when you make it with your children. Watch the Yule Log video below while you bake. Enjoy!


Traditional Yule Log Recipe


How to Make a Yule Log


This spongy, oil-less Yule Log cake comes from Taste of Home as part of its Chocolate Cherry Cream-Filled Log Recipe. We made a few adjustments. Instead of the whipped cream filling, we used a Cherry Almond Buttercream with chopped Chocolate Covered Cherries folded in. Top your cake roll with chocolate ganache, melted milk chocolate chips, or just dust with some powdered sugar. We made our Yule Log festive by adding green paper leaves that adorn the cherries. You can also make the leaves with edible ganache.


Hallmark's Yule Log Video You Tube


Yule Log Cake:


Ingredients:
4 eggs, separated
1/3 c. plus 1/2 c. sugar, divided
1 t. vanilla extract
1/2 c. all-purpose flour
1/3 c. baking cocoa
1/4 t. baking powder
1/4 t. baking soda
1/4 t. salt
1/3 c. water
Confectioner's sugar

Directions:
1.  Place egg whites in a small bowl and let stand for 30 minutes at room temperature. Line a greased 15 in. x 10 in. x 1 in. baking pan with waxed paper.  Grease the paper and set aside. Preheat oven to 375 degrees F.
2.  In a large bowl, beat egg yolks on high for 5 minutes or until thick and lemon-colored. Gradually beat in 1/3 c. sugar. Beat in vanilla.
3. Sift the flour, cocoa, baking powder, baking soda, and salt together twice.  Gradually add to the yolk mixture alternately with 1/3 c. water. Beat well after each addition.
4.  In a small bowl with clean beaters, beat egg whites on medium until soft peaks form. Gradually beat in 1/2 c. sugar, 1 T. at a time, on high speed until stiff peaks form. Carefully fold egg whites into batter. Spread evenly into prepared pan.
5. Bake at 375 degrees F for 12-15 minutes or until cake springs back when lightly touched. Cool for 5 minutes. Dust a kitchen towel completely with confectioner's sugar. Invert the cake onto the towel. Carefully peel off the waxed paper. Roll up the cake in the towel, starting with the short side.  Cool completely on a wire rack.
6.  Prepare Cherry Almond Buttercream.
7.  Unroll cake. Spread filling evenly over the cake to within 1/2 in. of the edges. Roll the cake again, without the towel. Place seam side down on a serving platter. Top as desired. Slice off the uneven ends of the cake before serving.


Cherry Almond Buttercream with Chocolate Covered Cherries:

Ingredients:
3 c. Confectioner's sugar
1 stick butter, softened
3 t. almond extract
2 T. milk
2 T. maraschino cherry juice
6 chocolate covered cherries, coarsely chopped

Directions:
1.  Beat butter until creamy.
2.  Add confectioner's sugar and beat until combined. Add almond extract and cherry juice and beat until combined. Add milk, if necessary, for consistency.  Beat until smooth.
3.  Gently fold in chopped candy.


Recommended:

Christmas Holiday Recipes and Activities


Pin it!


Easy Yule Log Recipe


Salted Strawberry Smoothie with Banana Recipe

Sugar Free Smoothie Recipe: Salted Strawberry Banana

Are you a fan of the Salted Caramel Recipe Trend? Why should Caramel get all of the love? Sea Salt your smoothies for a delicious dish! This Salted Strawberry Smoothie with Banana Recipe is sugar free and gluten free. Serve it for breakfast, brunch, or as a low cal dessert. Enjoy!


Salted Strawberry Smoothie with Banana Recipe
Salted Strawberry Smoothie with Banana Recipe.


This post contains affiliate links.

Easy Cinnamon Scones Recipe

This Scone Recipe is Easy to Make

French Scones. They sound so fancy schmancy, don't they? Whether you eat them as dessert or for breakfast, these Easy Cinnamon Scones are a special treat. This yummy scone recipe is flavored with chopped dates, nuts, cinnamon, and cloves. They are perfectly paired with your favorite coffee on a cold winter morning. Enjoy!

This post contains affiliate links for your convenience.


Easy Cinnamon Scones Recipe


Ravioli Recipe with Creative Twists

Make Mealtime Meaningful this Holiday Season

This is a sponsored conversation written by me on behalf of Lipton. The opinions and text are all mine.

Refreshing iced tea is the perfect accompaniment to a meaningful mealtime with family and friends. Bring your family together to make a fun meal and take a break from the hustle and bustle the holidays. Slow down, and laugh together over a bottle of Lipton Peach Tea Flavored Iced Tea and these ravioli recipes with a creative twistEnjoy!


Ravioli Dessert Recipe Reinvented
Ravioli Dessert Recipe Reinvented.

S'more Party Ideas: Savory

Savory S'mores

Looking for ideas for a s'more party? Mmm S'mores, everyone loves them. If you have a more sophisticated palette, you might want to try savory s'mores. In the mood for something a little different at your next bonfire or when you cozy up in front of the fireplace? Try these simple savory s'mores.

This post contains affiliate links for your convenience.*


S'more Party Ideas: Savory
S'more Party Ideas: Savory S'mores.

What is Yummly?

Wondering How to use Yummly?


Yum. Yummy. Yummly. What the heck? Have you heard of Yummly but have no idea what it means? What is Yummly? If you are wondering how to use Yummly, we've got answers. Enjoy!

What is Yummly? Get Recipes
What is Yummly? Get Recipes!

Yummly is a social media platform for sharing recipes. We'd seen it floating around the internet. We even had quite a few nice referrals from Yummly. But, time. Oh time. There just weren't enough hours in the day for Yummly. Until one day...

One of our friends in the real world, who doesn't do a lot with social media, mentioned that she would rather use Yummly than Pinterest to find recipes. Huh. That's weird... What is Yummly?

She started writing recipe posts for us, and we started Yummly-ing them. Well, will you look at that! Yummly is giving us some nice referrals. More referrals than some of the major search engines. And, since Pinterest referrals are down- what happened Pinterest?We decided to try our hands at Yummly!

How do you use Yummly?
How do you use Yummly? This is our recipe box.

Like everything, there is a learning curve. Somehow on our recipe box, we have posts that aren't recipes. So, by the time you've read this, we'll have cleaned those out of there (hopefully).

So, what is Yummly?

Yummly is your recipe box, the one you have on the kitchen counter, but now you can have it on your kitchen counter or in your tablet or phone and save counter space! 

Here's what Yummly has to say:                                                      How does Yummly work?
Yummly puts every recipe in the world in your pocket. The most powerful recipe search, the recipe sites you love, your digital recipe box, recipe recommendations just for you, and a smart shopping list - all with you wherever you go. Yummly has the #1 iPhone, iPad and Android apps in addition to millions of website visitors. As recipes get more Yums, they get exposed more often throughout all of our platforms and features.

How to use Yummly

To use Yummly, go here and sign up: Yummly Sign Up.

Great, but now your recipe box is empty. How do you get recipes on Yummly? How do you get them into your recipe box?

Here's what Yummly has to say:
How do I get my recipes on Yummly?
The best way to get your recipes on Yummly is to add the Yum button to your blog or website. Once the Yum button us up, make sure you or your readers Yum your recipes so we can make sure to get them all on Yummly.

How do I Become a Yummly Publisher?

This seems like a good question. Why do you want to become a Yummly Publisher? More Traffic. More Notoriety. More Yum!

Here's what Yummly has to say:                                                      How do I get featured on Yummly?
Follow the steps above (add the Yum button, announce to your readers, and then fill out this form). Once you have taken all of the steps, you will be eligible for inclusion in various features on our website, apps, social channels, and email.
What are some best practices to increase the exposure of my recipes?
More Yums on your recipes equals more traffic. Bloggers who educate their readers, encourage use of Yummly, and promote their Yummly publisher page see more Yums and more traffic. Volume of recipes is also a factor. More recipes on Yummly will lead to more referral traffic from us.
How do I manage my publisher page on Yummly?
Currently, there is not an option for you to access and change your publisher page, but we plan to add this feature very soon. In the meantime, we will update your page for you if you fill out this form.
How do I find my blog's publisher page?
If you've added the Yum button and started yumming your recipes, a publisher page will be automatically created for your blog on Yummly. To find this, you can go to your personal user profile on Yummly and check to see if the recipe you Yummed has processed yet. Once it has processed, it will show a link on the recipe card to your publisher page. If you need help finding this page, email publishers@yummly.com.
Have a question that isn't already answered on our help desk? Email publishers@yummly.com

Important Note:
We read how to add the code for Blogger on another blog. It was missing a few steps. So, our code didn't work. Carefully, follow the instructions here and be sure to look for two instances of 'post-header'. We found 3, but only the two with this text matter:
'post-header-line-1' .


That's it, your own your way to Yummly recipes!


ADS DISCLOSURE: We've partnered with some wonderful advertisers who may sponsor blog posts or send us samples to test. Some companies pay us to review their products. *We also use affiliate links, if you make a purchase we get a tiny commission. Kids Creative Chaos participates in the Amazon LLC Associates Program*, an affiliate advertising program designed to provide a mean for blogs to earn advertising fees by linking to Amazon properties, including, but not limited to, amazon.com, endless.com, myhabit.com, smallparts.com, or amazonwireless.com. We also offer Tapinfluence, Google Adsense, SoFab, and Izea ads here. Thanks so much for helping us keep the lights on! :)


Easy Baklava Recipe with Inexpensive Ingredients

Easy Peanut Butter Baklava

Baklava is a traditional Middle Eastern dessert made from layers of phyllo dough and chopped nuts. It's a lot of work and can be quite costly, depending on the type of nuts chosen. This easy mock Baklava recipe allows you to make a baklava-inspired dessert more easily using inexpensive ingredients. If peanut allergies prohibit the use of peanut butter, other nut butters can be substituted. Enjoy!

This post contains affiliate links for your convenience.*

Easy Baklava Recipe with Inexpensive Ingredients
Easy Baklava Recipe with Inexpensive Ingredients.

Learn more about Baklava history.

Baklava Ingredients

   Syrup
       1/2 c. sugar
       1/4 c. honey
       1/2 c. water
       1 T lemon juice
       1 cinnamon stick
       2 whole cloves
       1/2 t vanilla

  Filling
       1/4 c. crunchy peanut butter
       1/4 c. butter
       1/4 c. chopped peanuts (opt.)
       1 t. ground cinnamon

1 carton flaky biscuits


Easy Peanut Butter Baklava Recipe
Easy Peanut Butter Baklava Recipe.

1.  Bake biscuits at 350 degrees F until no longer doughy but not golden brown.  If the tops get hard, you can just discard the top layer later.  Allow the biscuits to cool.  Leave the oven hot.
2.  While the biscuits are baking, start to prepare the syrup:
      a.  Combine all ingredients in a small saucepan.
      b.  Turn the stove to medium.  Stir until the sugar dissolves.
      c.  Continue to heat with occasional stirring until the syrup reaches 225 degrees F, or until the syrup thickens.
      d.  Remove the syrup from the heat.
3.  Prepare the filling:
      a.  Melt the butter in a small bowl in a microwave at low power.
      b.  Stir in the peanut butter, cinnamon, and extra peanuts, if desired.
4.  Prepare the baklava:
      a. Lightly grease a small baking dish.  I used a 6" x 6" square dish.
      b.  Peel about half of the biscuits into layers.  Cut them in half if using a square dish.
      c.  Put a layer of biscuits in the bottom of the pan.  Be sure to fill up the edges of the pan so the syrup doesn't pool at the edges later.
      d.  Spread a thin layer of filling on top of the biscuits.
      e.  Continue to alternate biscuit layers and filling until the filling is consumed, layering more biscuits if needed.  End with a layer of biscuits.  I did not use the whole container.
      f.  Pour the syrup on the baklava.
5.   Bake in 350 degrees F oven for 10 minutes.
6.  Allow the baklava to cool completely.  ut the baklava into desired shapes.


Recommended:


Don't want to make it? Buy Baklava*


ADS DISCLOSURE: We've partnered with some wonderful advertisers who may sponsor blog posts or send us samples to test. Some companies pay us to review their products. *We also use affiliate links, if you make a purchase we get a tiny commission. Kids Creative Chaos participates in the Amazon LLC Associates Program*, an affiliate advertising program designed to provide a mean for blogs to earn advertising fees by linking to Amazon properties, including, but not limited to, amazon.com, endless.com, myhabit.com, smallparts.com, or amazonwireless.com. We also offer Tapinfluence, Google Adsense, SoFab, and Izea ads here. Thanks so much for helping us keep the lights on! :)


Chocolate Quotes

Quotes about Chocolate for the Chocolate Lover

Chocolate, chocolate, chocolate! Do you know where your chocolate is? Do you have a secret stash? These chocolate quotes memes are fun to share on Facebook, Instagram, and Pinterest. Enjoy!


Chocolate  Quotes to share on Facebook Pinterest Instagram
Chocolate  Quotes.

Love to eat chocolate? Check out Chantbou Chocolates and Danish Cookies.

What is your favorite kind of CHOCOLATE?

*This is not a sponsored post.


Recommended:


Edible Art and Recipes


ADS DISCLOSURE: We've partnered with some wonderful advertisers who may sponsor blog posts or send us samples to test. Some companies pay us to review their products.

*We also use affiliate links, if you make a purchase we get a tiny commission. Kids Creative Chaos participates in the Amazon LLC Associates Program*, an affiliate advertising program designed to provide a mean for blogs to earn advertising fees by linking to Amazon properties, including, but not limited to, amazon.com, endless.com, myhabit.com, smallparts.com, or amazonwireless.com. We also offer Tapinfluence, Google Adsense, SoFab, and Izea ads here. Thanks so much for helping us keep the lights on! :)


Mock Baked Alaska Cake Recipe

Baked Alaska Recipe with Optional Fillings

How do you make Baked Alaska Cake? What is Baked Alaska? Try this Mock Baked Alaska Cake Recipe adapted from Pampered ChefEnjoy!

This post contains Amazon Affiliate links.


Mock Baked Alaska Cake Recipe
Mock Baked Alaska Cake Recipe with optional fillings.

How to Make Baked Alaska Cake 


  • 1 package (18.25 oz) Devil's Food or Chocolate cake mix (plus ingredients to make cake)

  • 1 cup mini semi-sweet Chocolate Chips, divided

  • 1 package (8 oz) Neufachtel Cheese or Cream Cheese, softened

  • 1 cup powdered sugar

  • 1 container (16 oz) frozen whipped topping, thawed, divided.

Baked Alaska Recipe with Optional Fillings
Baked Alaska Recipe with Optional Fillings.

Directions: 
Preheat oven to 325° F. Grease and flour Classic Batter Bowl.

Prepare cake mix according to package directions; pour into batter bowl. Bake 1 hour, 10 minutes to 1 hour, 15 minutes or until cake tester inserted in center comes out clean. 


Remove from oven to cooling rack; cool 15 minutes. Run spatula around outside of cake and gently turn out onto cooling rack, large end down.

Cool 3 hours. Using serrated bread knife, trim large end of cake to level. Place cake, large end down, onto cake plate. 


To slice cake into four equal layers, slice cake horizontally in half. Then, slice each half into two equal layers.

Chop 1/4 cup of the chocolate morsels using food chopper; set aside.  


Place remaining chocolate morsels in microwave, uncovered, on high 20-60 seconds or until melted and smooth, stirring after each 20-second interval. 

In clean Batter Bowl, whisk cream cheese until smooth using stainless steel whisk. Add powdered sugar; whisk until smooth. 

Stir in melted chocolate; mix well. Fold 2 cups of the whipped topping and chopped chocolate into cream cheese mixture using spatula. 

Using spreader or butter knife, spread bottom layer of cake with about half of the filling, forming a 3/4-inch layer.

Repeat with remaining layers and filling, ending with the top layer of cake. Spread any remaining filling over outside of cake to create a smooth surface. 


Frost cake with remaining whipped topping.

*To form decorative peaks, press spreader into topping and pull away. Repeat over entire surface of cake. For easier slicing, refrigerate cake at least 30 minutes.  


To easily cut cake into servings, cut cake into eight wedges from top to bottom using utility knife. 

Carefully insert spatula horizontally into each wedge, dividing into two equal portions. 

Options for Filling:

Red Kool-Aid Strawberry Splash: Omit chocolate morsels. Add 1/2 teaspoon unsweetened strawberry drink mix powder to cream cheese mixture. Stir 1/4 cup chopped strawberries into cream cheese mixture. Proceed as recipe directs. Use
 strawberry flavored whip cream or regular with red food coloring.

Christmas Green Mint Splash: Omit 1/2 cup melted chocolate. Add 1/4 teaspoon peppermint extract and 3-4 drops green food coloring, if desired, to cream cheese mixture. Proceed as recipe directs.


Recommended:


Pampered Chef: Kids in the Kitchen


Baked Alaska Recipes

Angie's Recipes


Organic Strawberry Raspberry Smoothie Recipe

Healthy Organic Strawberry Smoothie Recipe Kids Like

Kids like shakes. If only they knew healthy yogurt smoothies are just as good. This healthy, organic, strawberry-raspberry smoothie recipe is fun to make at home and delicious too. Enjoy!


Healthy Kid-friendly Strawberry Smoothie Recipe
Healthy Kid-friendly Strawberry Smoothie Recipe.


Healthy Kid-friendly Strawberry Smoothie Recipe
Cascadian Farm sent us coupons and a little book of 
recipes to made our Strawberry Smoothie.

Blend the Strawberry Smoothie.

To Make a Strawberry Smoothie at Home you will need:

Fresh or Frozen Strawberries and Raspberries
Crushed Ice (We tweaked the recipe.)
Plain or Vanilla Yogurt.
Whip Topping (Added that too...)

Cascadian Farm Spa Smoothie Recipe 


So good, kids will love to drink smoothies.

Fun Try It:

We also made a Smoothie with Frozen Virgin Strawberry Daiquiri Mixer, Frozen Strawberries, and Vanilla Yogurt. Tastes great, but the Mixer is sweetened with High Fructose Corn Syrup. Grown-ups can add the rum for a little extra kick. :)


Recommended Reading:

Kids' Fun and Healthy Cookbook*

Kids Creative Chaos Cooks (Kitchen Kids Book 1)*


ADS DISCLOSURE: We've partnered with some wonderful advertisers who may sponsor blog posts or send us samples to test. Some companies pay us to review their products.

*We also use affiliate links, if you make a purchase we get a tiny commission. Kids Creative Chaos participates in the Amazon LLC Associates Program*, an affiliate advertising program designed to provide a mean for blogs to earn advertising fees by linking to Amazon properties, including, but not limited to, amazon.com, endless.com, myhabit.com, smallparts.com, or amazonwireless.com. We also offer Tapinfluence, Google Adsense, SoFab, and Izea ads here. Thanks so much for helping us keep the lights on! :)


Microwave Strawberry Cheesecake Cake Recipe

Strawberry Cheesecake Recipe for Mircowave 

Angie's Corner: What could be better than a cake recipe you can microwave? Yes, please. This Strawberry Cheesecake CAKE recipe is microwavable. Enjoy!

Strawberry Cheesecake Recipe for Mircowave
Mircowavable Strawberry Cheeesecake Cake Recipe with garnish.
Easy Strawberry Microwave Cheesecake Cake Recipe Pampered Chef
Microwave Strawberry Cheesecake 'Cake' Recipe.

Strawberry Cheesecake Microwave Cake Recipe

Ingredients:

1 strawberry cake mix (if you can't find strawberry- Pillsbury and Betty Crocker makes one you can use white, add red food color, (not much, like one drop) and add an extract tsp of strawberry extract.

The strawberry cake mix is prettier it has pink cake with red speckles, plus you're putting in the white chip is very pretty.


1 tsp. strawberry extract (only if you cannot find the strawberry cake mix)

½ cup white chocolate chips
1 (3 oz. box) cheesecake pudding mix
16 oz. sour cream
½ cup oil
3 eggs 

Garnish: whipped topping and fresh Strawberry Fans. 


  • 1. Spray your Stoneware Fluted Pan or Deep Covered Baker lightly and dust with flour (works best with Baker's Joy).
  • 2. Whisk eggs and pudding mix together in Classic Batter Bowl.
  • 3. Add remaining ingredients, blending well with Mix N' Scraper.
  • 4. Drop batter into Fluted pan and microwave on high 12-14 minutes. 
  • 1. (Watch your cake after 10 minutes if you microwave runs hot.) Works best if your have a turntable in your microwave. If not, rotate every 4-5 minutes. 
  • 5. Invert cakes immediately, but leave pan over the cake for 10 minutes. Cool. Garnish (Flour Sugar Shaker filled with powdered sugar, fresh strawberry fans made with your Egg Slicer Plus or Paring knife, fresh mints snipped with your Kitchen Shears) as desired.

How to Make Strawberry Fans:


To make the Strawberry fans gently slice a 3/4 of the way down and fan apart. Then with any leftover strawberries, put them in the Manual Food Processor and chop til desired sized and put in the center of cake, If using the fluted pan fill hole in center of cake first with leftover whipped topping before adding the strawberries

Recommended:

Fun Family Recipes


ADS DISCLOSURE: We've partnered with some wonderful advertisers who may sponsor blog posts or send us samples to test. Some companies pay us to review their products.

*We also use affiliate links, if you make a purchase we get a tiny commission. Kids Creative Chaos participates in the Amazon LLC Associates Program*, an affiliate advertising program designed to provide a mean for blogs to earn advertising fees by linking to Amazon properties, including, but not limited to, amazon.com, endless.com, myhabit.com, smallparts.com, or amazonwireless.com. We also offer Tapinfluence, Google Adsense, SoFab, and Izea ads here. Thanks so much for helping us keep the lights on! :)


PB and J Brownie: Peanut Butter Recipes

How to Make PB and J Brownies Recipe

Do your kids love PB and J? How about Brownies? This peanut butter recipe by Angie combines the two for a yummy sensation. Read on to learn how to make peanut butter and jelly brownies. Enjoy!

Peanut Butter and Jelly Brownies PB & J Recipe
How to make Peanut Butter Jelly Brownies.

Peanut Butter Jelly Brownies Recipe

With this pan you can make 12 individual brownies or in this case brownie sandwiches, which kids and adults alike are sure to enjoy!

Non stick cooking spray with flour
1 C. semi sweet chocolate chips
1 box (10.25 oz) brownie mix
1/2 C. flour
2 eggs
1/2 C canola oil
1/4 C water
1/2 C powdered sugar
1/3 C creamy peanut butter
1/4 C butter softened
1/4 C. seedless raspberry jam (or any jam of your choice)
2 Tbsp dry roasted peanuts

Preheat oven 325.  Spray Brownie Pan with non stick spray.  Line cooling rack with parchment paper.  Place 1/2 C. chocolate chips in small microwavable bowl; microwave uncovered on high for 1 min or until mostly melted, stirring every 20 sec..  Combine brownie mix, flour, eggs, oil, water and melted chocolate in Classic Batter Bowl; whisk til smooth.  Using Large Scoop, divide batter evenly into wells of pan.  Bake 14-17 min. or until wooden pick inserted into centers comes out clean.

Meanwhile, for filling, combine powdered sugar, peanut butter and butter in Manual Food Processor; cover and pump handle until smooth, scraping down sides as necessary.  Spoon filling into resealable plastic bag; secure and set aside.

Spoon jam into Decorator Bottle ( or resealable plastic bag)fitted with round tip.  Chop nuts using Food Chopper.  Place remaining 1/2 C. chocolate chips in small microwavable bowl and microwave, uncovered, on high for 1 min or until mostly melted, stirring every 20 sec..  Spoon melted chocolate in small resealable plastic bag, secure and set aside.

Remove pan from oven. Invert parchment lined cooling rack over pan; flip over and remove pan.  Slice brownies horizontally in half using bread knife.  Place brownie bottoms onto serving platter.  Distribute filling evenly over brownie bottoms.  Top with jam and brownie tops.  Drizzle chocolate over sandwiches; top with peanuts.