Emergency Cash Sources Every Mom Should Know About
Everyone needs a rainy day fund. Don't get me wrong, being a full-time mom is great, but raising children is very expensive. Especially, when you're a single mother. Whether you've raised many children from birth to adulthood or you're taking care of your first child, there are always extra expenses that don't fit into your weekly budget. With the price of childcare rising, along with all of the other unexpected expenses you'll experience as a parent, you need to know about available emergency cash sources. Here are some tips on how to save for a rainy day fund and ensure that you have access to extra money for your family should the need ever arise... And, you know it will.
If you try to save on every purchase that you make, you might be able to store away a little extra money for a rainy day fund. For example, utilizing coupons is a great way to see your weekly grocery bill go down. With the money that you don’t spend on household expenditures, you can start your own ‘mattress money’ fund. Of course, you don’t actually need to keep your savings under the mattress, but keeping tangible funds somewhere in your home will come in handy during an emergency. Alternatively, using a credit card when you are in a pickle isn’t a bad idea so long as it is for an absolute emergency. In fact, having a couple of credit cards with large available balances is great for when you have an unexpected, last minute child related expense.
A lot of people still think that the only types of personal loans available are the ones that are offered by local banks. The truth of the matter is that there are all sorts of lenders who regularly make short term personal loans. At loanpig.co.uk, for example, small to mid-sized personal loans are often approved online in minutes. So, if you have a big expense that you only have a few days to come up with the money to pay, a short-term loan can save the day. These types of loans also come with manageable repayment terms, so you don’t have to worry about your debt skyrocketing. While you may not want to take out a short-term personal loan to pay for a child’s birthday party, it's certainly reasonable to take advantage of a small loan to help deal with emergencies or to help bridge the financial gap between pay periods.
There isn’t anything wrong with accepting or even asking for a little financial help whether you're a busy mom or anyone else. There are charities that help moms furnish their nurseries, aid them in rebuilding after tragedies, and just give a hand where needed. A friend might start a fundraiser for a working mom who has always been frugal and yet still is barely managing to make ends meet. There are charities that help moms get toys and clothes for their children during the winter holiday season as well as fundraising efforts that have given working class families the ability to go on amazing international holidays. Find what funds might be available to your family for emergencies and more.
It is often very difficult for moms to think clearly when facing a financial emergency. You may go whizzing about looking for ways to pay an expense when the solution is right below your nose. Take a breath, relax, and think back to all of the ways you have prepared yourself and your family for the future when seeking a solution. These days, there are all kinds of ways to earn money online. Got stuff to sell? Give Facebook Marketplace a try!
One of the main parts of being a parent is nurturing your child’s hobbies and aspirations. This way, they can make their dreams a reality. However, for this to happen, a lot of work needs to be done behind the scenes. You can put things in place that can help to support your child as they work toward their goals, both in the present and the future. As a result, you can feel proud knowing you did all you could to be there for them when they were young and fledgling.
Financial Goals
Many goals and dreams that a child might have may also require some form of financial backing, whether this be gaining a qualification, starting a business, getting married, or even going on a nice holiday vacation. Rather than them needing to find the money in a short space of time, you may be able to use the entirety of their childhood to start putting money aside for their future. You can achieve this in the form of ajunior stocks and shares ISA in your child’s name. A parent can open an account when their child is born and continue depositing into it until that child is an adult (in the eyes of the law.) At this point, they may be able to withdraw the money to use as they see fit. Hopefully, "as they see fit" will mean it will be spent on helping them achieve the important goals you both had dreamed up when they were merely small children.
Getting your child involved inextracurricular activities while they are young can also aid them with their future endeavors. This may especially be the case if some of those extra curricular activities match what your child would like to do in the future. If not, there might be some skills or tools that your child could take from these activities that could allow them to get ahead. For example, a child who is on the debate team now might have some of the skills required for job interviews, or even being able to make a convincing argument without the need for dramatics or raising their voice when the two of you have a disagreement. A child who explores 4H or the Future Farmers of America, might learn skills to help them have a future career in Agriculture.
Self-Esteem Goals
Above all, give children positive reinforcement. This can include theuse of positive phrases that boost their confidence. While you may not want your child to be cocky, improving their self-esteem helps them to speak up for others, have the courage to pursue their dreams, and it gives them the drive to not give in when things get difficult. With a good measure of self-confidence, no matter how many setbacks they face, they will continue to look for different ways to achieve their goal, simply because they have a good foundation of perseverance and know that someone out there has their back.
While some (many) of your child's dreams might be unrealistic, realistic dreams can be achieved with hard work and dedication. As a parent, think about the many ways you can support your child to have the money and skills they will need to make those dreams come true. Whether you start a rainy day fund with your kids or just go play in the rain, it's never too late to be present in your child's life; and that is the best way to help your child achieve anything.
Learn how to make a real fall leaf wreath for your door. Get out today, and take your kids on a hike to enjoy the beautiful outdoors. It's great exercise and a wonderful opportunity to enjoy your children. Collect the brightest, healthiest leaves to make this together. Once preserved, it makes a perfect gift for Grandma or even a centerpiece for your Thanksgiving table. Scroll down to learn how to preserve the glorious fall-foliage, color and all. Enjoy!
This post contains Affiliate Links for your convenience.
To make this leafy wreath you must hurry; the colors fade fast!
How to make a fall leaf wreath with real leaves.
So easy to make.
The fall wreath craft turned out incredibly colorful and beautiful.
How to Make a Fall Wreath from Leaves
Fall Wreath SUPPLIES: Paper Plates Tacky Glue or Hot Glue Gun Lots of colorful Leaves from your yard (you can buy fabric leaves at Jo Ann's.) Raffia Ribbon or Colorful Fabric Ribbon. Glitter, if you want to make it sparkle.
Poke a hole in the center of a paper plate,
cut the center out, leaving only an outer ring.
Glue the leaves around the plate
in a colorful arrangement.
Voila a super easy, cute craft project.
We hung these leaf wreaths above the fireplace
but they would look great on the front door!
My kids enjoyed collecting the leaves in various shapes and sizes. We found very tiny ones and gigantic ones that made the search lots of fun. This project was so easy, with fantastic results. My 2 year old's wreath is beautiful, and she did it all by herself! I know the leaves will turn brown soon, but it was a great bonding experience. If you want to make a wreath that will last thru the season, buy a bag of fabric leaves at Jo Ann's Fabric. They work just as well and last forever! We had limited money and spent $8 at the dollar tree. We have tons of supplies left over and made 3 separate projects! The girls had a wonderful time today! Sam loved using the hot glue and Amanda loved using tacky glue while smearing it all over the plates. We spent nearly two hours working on various projects and nobody's attention wavered. This is a fun one! Unfortunately 4 hours later and Amanda's are starting to wilt and turn brown. I don't know if it was the tacky glue, the fact that she kept 'painting' them with water, or that she just liked to use the brown ones. Anyway, I will keep you posted on that - it is our side project: The science of leaf disintegration in the house. Will they turn brown more quickly or more slowly?
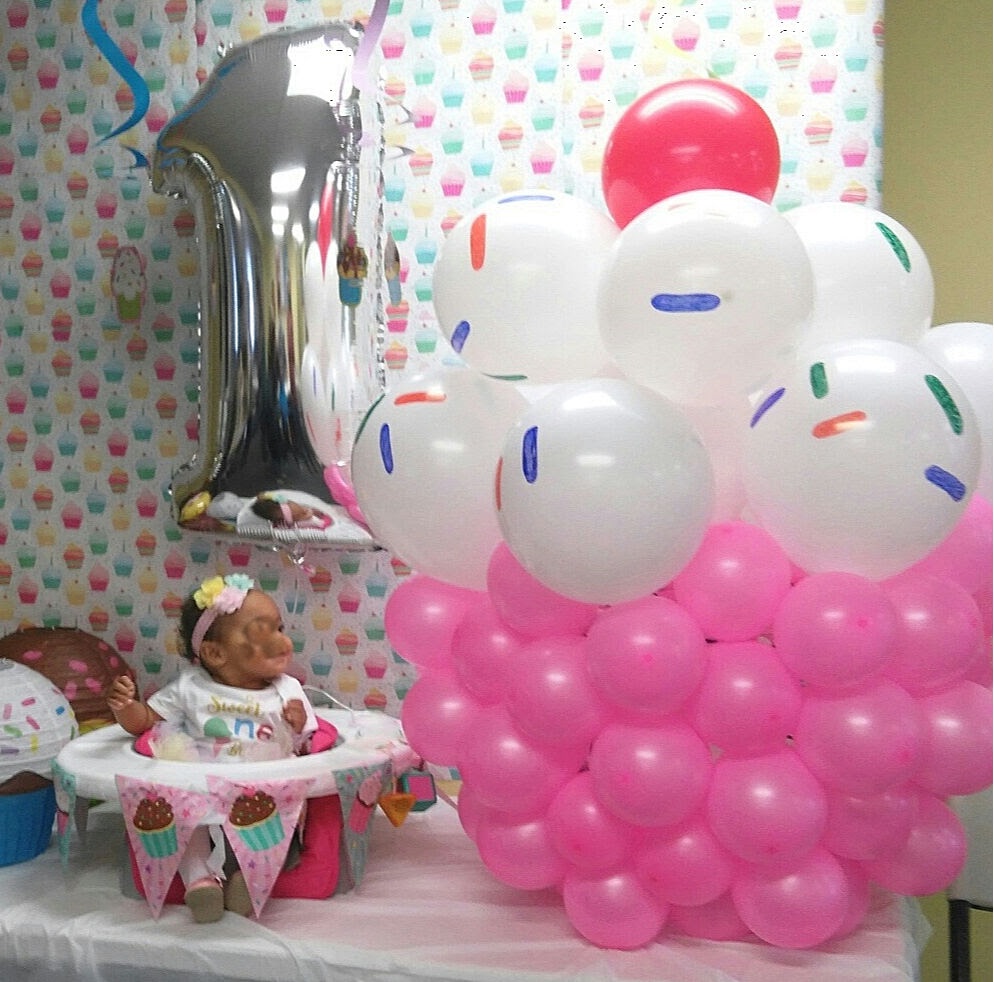
First, I'll share my process in making the balloon birthday cupcake decoration. You know, the giant balloon that's all over YouTube and Facebook? You'll need to pack a party load of patience to make that balloon cupcake decoration. If you're a mom who drinks wine, maybe step one should be a few sips of a nice Riesling. If you want to make a giant balloon birthday cupcake for baby's first birthday party, even with my simplified method, you're going to need a few hours and at least one faithful friend. Ready? Read on for my Balloon Birthday Cupcake Tutorial!
This post contains Amazon and other affiliate links.
If you click and make a purchase, I may get a commission.
How to Make Balloon Cupcake for Birthday Party YouTube
This was my process, it's real. If you want to cut to the chase, scroll down for detailed instructions on how to make a giant balloon cupcake.
Step One
Refuse to take money from your friend. She offered $75 and dinner. Plan in your head how they must've created the giant balloon cupcake. Draw it out on paper. Watch the videos below. Realize you got it all wrong. Decide you can't do it. Give up.
Balloon Birthday Cupcake Seen on Pinterest YouTube Tutorial
Step Two
Think about it some more. Try it your way. Realize it is going to be tedious. Give up, but remember your blog's motto is, "You can do it!" He's a professional, he must know the easiest way to do it, right?
Maybe this one is easier? (It's not,)
Step Three
Watch videos again. Decide to really pay attention. Have a glass of wine Use the easiest steps from each video. Realize this is completely ridiculous and only a professional balloon designer can make these. This is why the florist said they'd make one for you for $300.
Think about it some more. You're no quitter! You can do it! After all, that's what this blog is all about. Try it your way again. This time with more confidence. Start with a tiny prototype. Watch one more YouTube tutorial on how to make a giant balloon cupcake like the ones on Pinterest. Decide you deserve a nap.
Wow, she seems fun and nice. This isn't a cupcake, bur realize the concept is the same. The skill level is still difficult. It doesn't look easy when they do it. Think about that. They are trying to make it look easy! It's not...
Step Five
Share your tiny prototype with friend who hopes to have the best one year old's first birthday party ever! She's so patient. She trusts you. She has complete faith in you. You find this rattling. But, you're determined. Go back to STEP ONE. Create the balloon cupcake, the way you imagined it was constructed. Listen to friend cheering you on, "See, I knew you could do it." Think friend is nuts. This looks nothing like those giant balloon cupcakes. She's tired, she's over it, she just wants something after all of this effort. You know she's thinking, $300 would've been a lot easier.
Realize it's not perfect, but it will do. Just show it's good side. Reconsider making these for a living. Realize $75 is a great price, understand why the florist wanted to charge $300. THEY ARE SMARTER THAN YOU ARE, THEY DON'T WANT TO DO IT!
Refuse to ever make another one, even though you know full well, that the next one will be better. You learned from your mistakes. You know how to make it straight. You know the ins and the outs. Baby, there isn't enough wine in the world...
What you say? Where are the tiny balloon sprinkles? Well, I ought a.... We bought tiny balloons, we taped them on with duct tape. They looked dumb. I'm sure you need the tiny, long balloons used for balloon animals. I didn't feel like another trip to the store! Sharpies, worked just fine. Pink and purple Sharpies would've been nice though.
Step Six
Take it to the giant balloon cupcake to the party. (That seems like a simple step doesn't it? Well, it's not!) Disassemble the giant balloon cupcake in as few pieces as possible. Place it in the trunk of your hatchback, crossover SUV. Ha, ha. ha. Jokes on you. Panic. You're going to be late to the party. Read text from very patient friend, "Where are you?" Panic some more, don't answer text. Notice your Dad's Trailblazer in the driveway (he left it there so you could get some giant rolls of carpet for the house.) Open the hatch, say a little prayer. It fits! Thank goodness the party is less than five minutes away.
It's three pieces!
Step Seven
Pull up at the church. Rush to get the balloon inside the door. The door, yet another obstacle. See everyone ooh and ahh as you enter. If you've ever been on stage, you know how applause feels. This feels like that. Think, maybe you could make these for a living. After all, this was the first attempt. Surely, it would get easier each time? And, you certainly know what NOT to do.
Don't worry, I had to blur baby's face, she's a beautiful baby in the process of adoption.
So, now you've seen the videos, you've read my process leading up to it, here's the UNCONVENTIONAL giant balloon birthday cupcake tutorial. May the force be with you!
Sit down with the laundry basket in your lap. Starting with the second column of holes, tie a PINK balloon to the vertical weave in the basket (between the holes.) Skip every other hole. Do this all the way around the basket. Our basket had vertical line holes, some have circular holes.
Balloons will move, don't worry about this now. Depending on the spacing of your basket's holes, you may need to skip the next row. If you see the basket between the balloons, use every row. If not, use every other row. Got it? You will after a few rows.
Note there are only two rows of holes, I tied two balloons to each vertical strip to get a line of four balloons tall.
The balloons want to escape, the don't stay orderly. Don't worry about this until you've got them all tied down.
Once all pink balloons are tied down, you can then gently push them to arrange them in a straight (ish) line. For the balloon's white cupcake frosting top, I used the process in the ice cream cone video from above. I connected six white balloons together to create somewhat of a circle. I made a separate grouping of four white balloons for the topper and then tied the red balloon in the center with fishing line.
Balloons are willy-nilly, but can be arranged at the final stage.
Here you can see, that the cupcake is 3 separate pieces.
So, how do you attach the balloon sections together? I was going to tie them with fishing line as demonstrated in the first Balloon Cupcake YouTube Tutorial, but that proved too complicated for me. Also, I kept popping the balloons. I tried duct tape, but you could see it. In the end, I didn't connect the pieces at all and was thankful for this when it was time to load the balloon for delivery.
Get the Cupcake lanterns and Pinata from Oriental Trading. Baby's face is blurred to protect identity.
The cupcake's purpose was for a photo shoot for a very special baby's first birthday party. The cupcake wasn't perfect, it had a bad side, but we just turned it to the good side! Photo shoot was amazing! Baby is beautiful, but we aren't permitted to share her face here. Just know, she was tickled to death with her giant cupcake!
If you're looking for math for homeschoolers online, you'll want to check out Make Math More Fun by Shenek Altson. She teaches homeschool math classes online. Check out her guest post to make math more fun by playing simple math games. Enjoy!
This post contains affiliate links.
Make Math More Fun by Playing Simple Math Games
Keep It Simple Mommy
As a homeschool mom, if I don’t get anything else done in a day, I like to get some type of reading and math done, because I know those two subjects form the foundation of so many other things. For me, I’ve seen just how beneficial being good in math is, particularly as a homeschooling mom who sometimes needs to help out financially. There’s always someone who needs a math tutor! But many times our kids don’t see the benefit of being a Math Ninja, and they need a lot of convincing that this subject is worth spending tons of time on. So, what can we do to help them learn a subject that has gotten a bad wrap for being boring and tough at the same time? Play simple math games with your kids. Make math fun through games! And you don’t have to come up with these complex, mind blowing games. You’ll be amazed at how much fun you can have with your kids playing simple games.
I find that one of the best ways to make math more fun is by using games. It’s amazing that our young children love spending time with us. I’ve heard that one day this may change, but for right now, one of the number one things my kids like to do, is to spend time with me. And they really enjoy it when we are able to play a fun game together during this time. A huge tip though is to keep things simple. As a homeschooling mommy who has other subjects to cover, lunch to fix, dinner to start prepping, errands to run, bills to send off, appointments to make, you already have a lot of things on your plate. So having simple go-to games that you can play with your kids on a regular basis, can help you to make math more fun while not having to re-invent the wheel (because no one has time for that.)
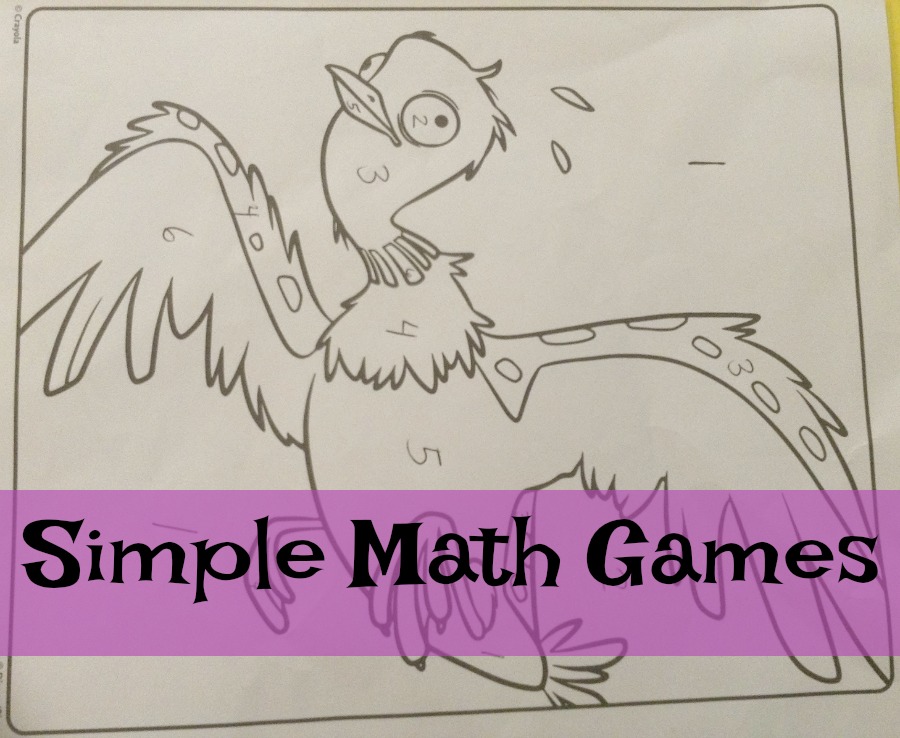
How to Play Simple Math Coloring Game
I made up a simple Math coloring game that uses dice. My kids are not the type of kids who generally like to color, but they enjoyed playing this fast paced game. What I did was take two coloring pages, and numbered different portions of the pages with the numbers 1 thru 6. Then each child was given a die. They were given the instructions of rolling their dice, and whatever number came up, they were to color one section of their picture with that number. The first child to finish coloring his or her entire picture would be the winner. Boy, oh, boy, my “non-coloring children” became coloring machines. They were throwing those dice and coloring up a storm trying to be the first person finished. We used large dice that I purchased at a dollar store. The next time, to add more learning to the activity, I am going to give each child two dice, and then have them sum the numbers on their dice. Then they’ll color the number on their page that is the sum of the dice.
So step 1 is to take any random coloring page, and number it from 1 thru 6 in the different sections of the picture. If you are going to have them work with sums, number the sections 2 thru 12. For each child, make sure that you number the same number of sections on each child’s coloring page to make the game as fair as possible. It’s not necessary to use the same picture for each child. Just make sure you have numbered the same number of sections on each child’s coloring page. So for example, pick 15 different sections to number in each child’s picture. Below is an example of me numbering a coloring page.
Then give each child a die. If you were going to be letting them figure out sums, give each child 2 dice, so that they can roll up to a sum of 12. Then let the race begin. Each time they roll the die, they color one section that has that number in it. My two children who played did not use the same coloring pages, but again, I numbered the same number of sections in each of their pictures.
So, there you go. A pretty simple way to have your kids practice number recognition or addition. My kids had fun racing to see who was going to be the first one finished. My son ended up winning this simple math game!
About Shenek Alston
Now, let me tell you a little about me. I’m a homeschooling mom to three kids ages 9, 5 and 2, and I have a PhD in Statistics. Before I met my husband, I planned to be a College Professor. Now I’m a homeschooling mom who blogs about ways to make math more fun. I also teach math for homeschoolers online. In my FREE ONLINE LIVE MATH lessons, I help kids with topics such a fractions, decimals, percents, and integers. If you are interested in learning more about these lessons please visit Make Math More Fun and have a great time making math more fun with your kids!
Cardboard Toilet Tubes turned Holiday Hats How many rolls of toilet paper do you go though each month? We've got to recycle that ca...
Follow us on Instagram
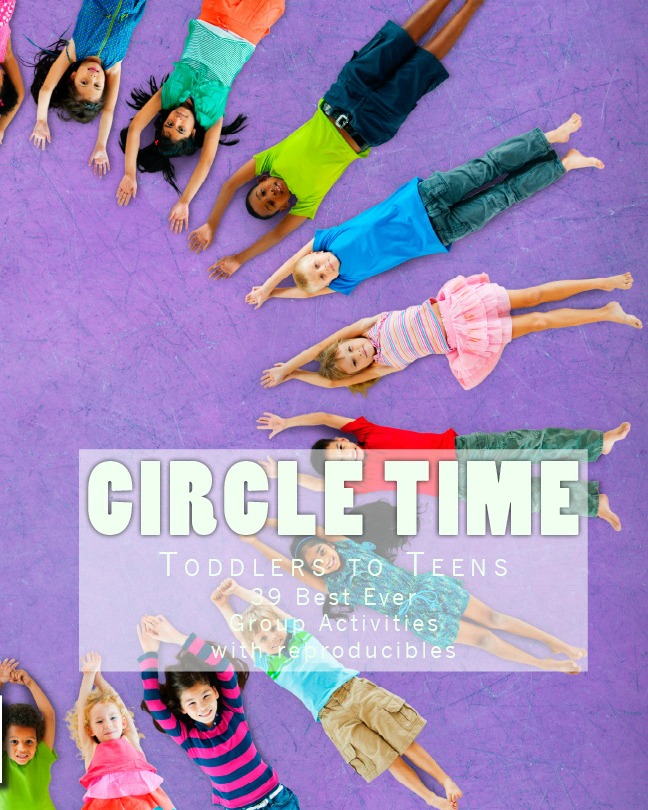
Get Circle Time Handbook
Can't remember all of the words to your favorite group game? Get the handbook with reproducible pages to copy and add to your clipboard. All of your favorite games right at your fingertips!


 , and they need a lot of convincing that this subject is worth spending tons of time on. So, what can we do to help them learn a subject that has gotten a bad wrap for being boring and tough at the same time?
  .
. . It’s amazing that our young children love spending time with us. I’ve heard that one day this may change, but for right now, one of the number one things my kids like to do, is to spend time with me. And they really enjoy it when we are able to play a fun game together during this time. A huge tip though is to keep things simple. As a homeschooling mommy who has other subjects to cover, lunch to fix, dinner to start prepping, errands to run, bills to send off, appointments to make, you already have a lot of things on your plate. So having
 . My kids are not the type of kids who generally like to color, but they enjoyed playing this fast paced game. What I did was take two