Showing posts with label Cake Recipe. Show all posts

Kitchen Kids: Tips for Donut Frosting and Recipe for Icing, Frosted Donuts and How to Make Maple Glaze

Easy tip for donut frosting and easy recipes for icing frosted donuts

You don't need an expensive icing tube or even a fancy bag; here's an easy tip for donut frosting and easy recipes for icing frosted donuts and a maple glaze recipe. Enjoy!


Doughnut Frosting Donut Frosting Frosted Donuts Recipes for Icing and glaze
Plastic Icing Bags with clothespins to keep 
the icing in place (works for toothpaste too).
You can purchase plastic cone/tube bags to use with recipes for icing or you can use plastic Ziploc baggies and cut a tiny hole (about 1'4") on one bottom corner then, roll it up as shown above. With this technique, you can use the tubes as a pen and write names with frosting. Use a larger opening to make and pipe ribbons and roses.


icing tips, recipes for icing, glaze donut recipe
Make maple glaze recipe.


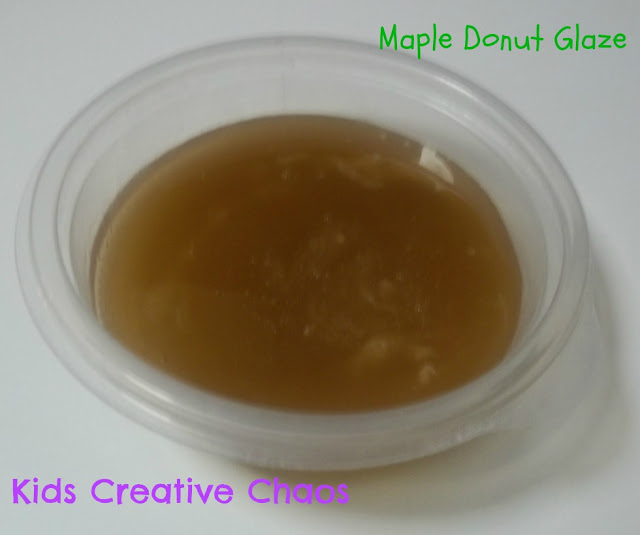
Make Maple Donut Glaze Doughnut


For the glaze:  1 C. Confectioner's Sugar, 2 Tbs. Hot Water, 1/4 C. Maple Syrup

How to make donut glaze: 

Blend confectioner's sugar, hot water, and maple syrup in a small bowl, drizzle over donuts.


For the frosting:  2 C. confectioners sugar sifted, 1/2 C. unsalted butter, 1/2 tsp. vanilla extract, 2 tbs. milk, food coloring (if desired).

How to make frosting: 

In a bowl with a hand mixer (electric mixer on low), beat the butter until well blended and smooth. Beat in the vanilla extract. With the mixer on low speed, gradually beat in the sugar. Add  milk and beat together. On high speed, beat frosting until fluffy (about 5 minutes).Now is the time to add a few drops of food coloring if desired. Keep in airtight container so confectioner's frosting doesn't dry out.  


Recommended:


Strawberry Cupcakes Recipe in Mini-Muffin Pan

How to Make Strawberry Cupcakes Recipe

This recipe makes Strawberry Cupcakes in a Mini-Muffin Pan. It yields enough cupcakes for a large group. Get creative with your mix-ins and infuse cupcakes with your favorite jamEnjoy! 


How to make strawberry cupcakes in a mini-muffin pan.

We had to come up with an item to take for a Teacher Appreciation Week pitch-in luncheon at Chick-a-Bitty and Bug's school. I knew I needed to bring in something that would feed over forty teachers and wouldn't require major refrigerator space. I thought if I could make this in my Mini Muffin Pan ( it makes twenty-four muffins at a time) and with one cake mix, I could make a little over forty-eight muffins!


Make Strawberry Cupcakes in a Mini- Muffin Pan to feed the whole gang.

Ingredients:

  • 1 strawberry cake mix 

If you can't find strawberry cake mix, Pillsbury and Betty Crocker make a white one- just add about one drop of red food coloring. 


  • Add 1 tsp. of strawberry extract


IMO, Strawberry cake mix is prettier, because it makes a pink cake with red speckles, plus you're putting in the white chips = very pretty! 

You can also as fresh strawberries to the white cake mix for a similar effect.

  • 1 tsp. strawberry extract 
  • ½ cup white chocolate chips
  • 1 (3 oz. box) cheesecake pudding mix
  • 16 oz. sour cream
  • ½ cup oil
  • 3 eggs 
  • Garnish: whipped topping and fresh strawberries. 
  • Preheat oven to 325 Degrees
  • Spray your pan lightly 
  • Whisk eggs and pudding mix together.
  • Add remaining ingredients, blend well.


Strawberry Cupcakes
White cake mix with fresh strawberries.

  • Using a medium or large ice cream scoop, (depends on how big you want your mini cakes) put in pan. 

How to infuse cupcakes and cakes.
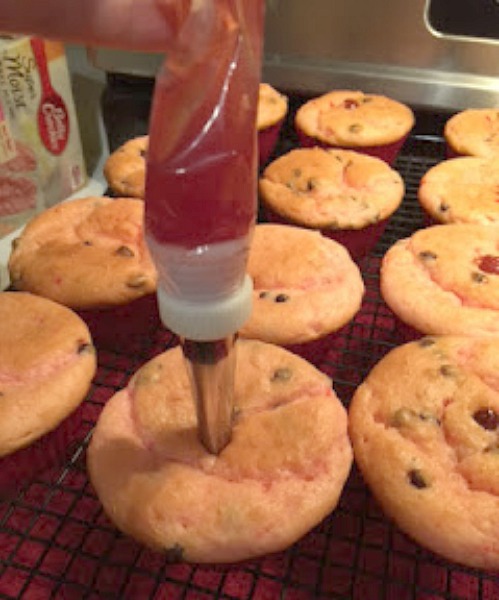
Infuse cupcakes with a jam filled icing tube.

  • Bake for 10-12 min. Let cool on cooling rack and remove from pan. Repeat until all the batter is used.
  • Once cupcakes are baked, use a frosting tube filled with jam to infuse. It is easy, just insert and squirt! Now, you are a gourmet baker!
Tip:  If there is extra batter for a third round but not enough to fill all cups, fill empty cups with a bit of water so it will not ruin and over bake the empty cups.

After everything is cool, use whipped topping to decorate top of mini-cakes. Add a sliced strawberry to put on top.

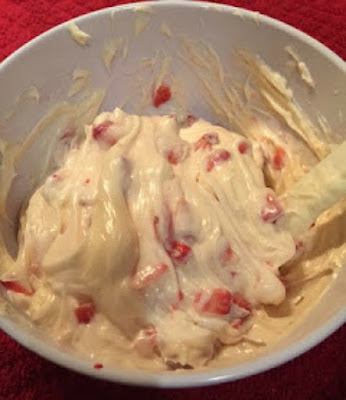
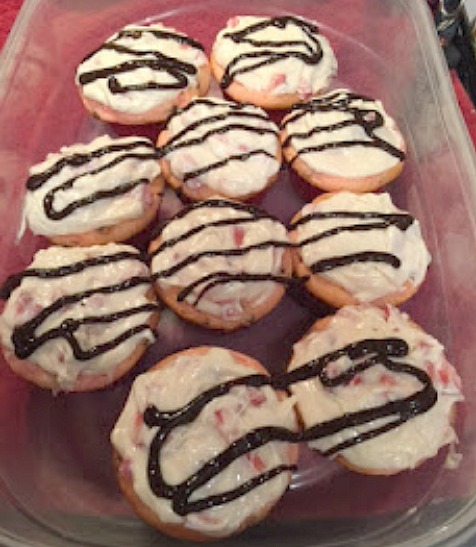
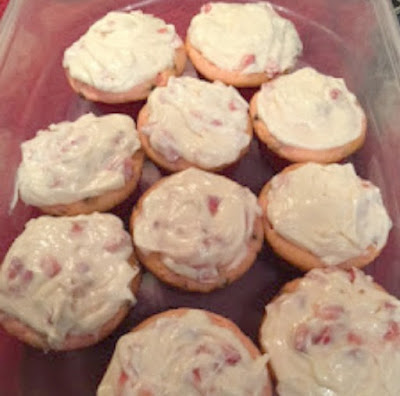
You can also frost with cream cheese frosting and drizzle with chocolate syrup as seen below.


Strawberry infused cupcakes with cream cheese frosting and chocolate drizzle.

Recommended:

More Recipes  from Kids Creative Chaos

Two Quart Batter Bowl*

Buy Frosting Tubes for Infusion*


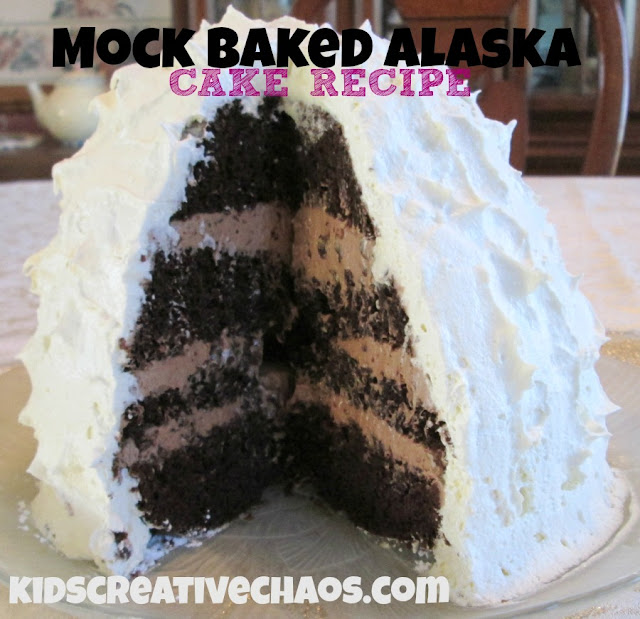
Mock Baked Alaska Cake Recipe

Baked Alaska Recipe with Optional Fillings

How do you make Baked Alaska Cake? What is Baked Alaska? Try this Mock Baked Alaska Cake Recipe adapted from Pampered ChefEnjoy!

This post contains Amazon Affiliate links.


Mock Baked Alaska Cake Recipe
Mock Baked Alaska Cake Recipe with optional fillings.

How to Make Baked Alaska Cake 


  • 1 package (18.25 oz) Devil's Food or Chocolate cake mix (plus ingredients to make cake)

  • 1 cup mini semi-sweet Chocolate Chips, divided

  • 1 package (8 oz) Neufachtel Cheese or Cream Cheese, softened

  • 1 cup powdered sugar

  • 1 container (16 oz) frozen whipped topping, thawed, divided.

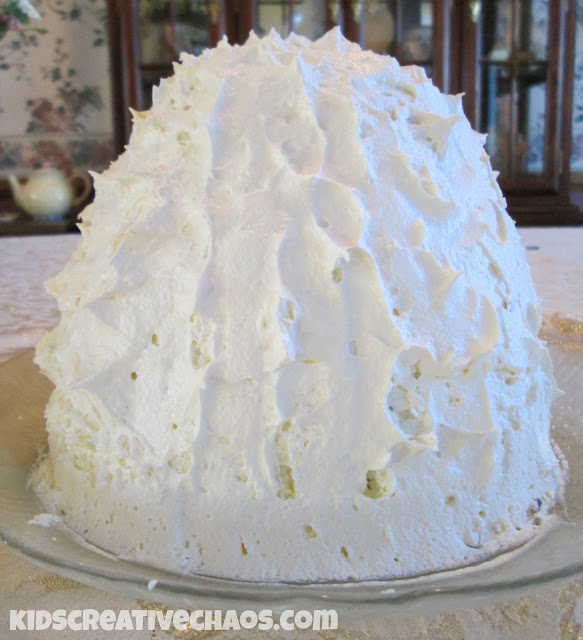
Baked Alaska Recipe with Optional Fillings
Baked Alaska Recipe with Optional Fillings.

Directions: 
Preheat oven to 325° F. Grease and flour Classic Batter Bowl.

Prepare cake mix according to package directions; pour into batter bowl. Bake 1 hour, 10 minutes to 1 hour, 15 minutes or until cake tester inserted in center comes out clean. 


Remove from oven to cooling rack; cool 15 minutes. Run spatula around outside of cake and gently turn out onto cooling rack, large end down.

Cool 3 hours. Using serrated bread knife, trim large end of cake to level. Place cake, large end down, onto cake plate. 


To slice cake into four equal layers, slice cake horizontally in half. Then, slice each half into two equal layers.

Chop 1/4 cup of the chocolate morsels using food chopper; set aside.  


Place remaining chocolate morsels in microwave, uncovered, on high 20-60 seconds or until melted and smooth, stirring after each 20-second interval. 

In clean Batter Bowl, whisk cream cheese until smooth using stainless steel whisk. Add powdered sugar; whisk until smooth. 

Stir in melted chocolate; mix well. Fold 2 cups of the whipped topping and chopped chocolate into cream cheese mixture using spatula. 

Using spreader or butter knife, spread bottom layer of cake with about half of the filling, forming a 3/4-inch layer.

Repeat with remaining layers and filling, ending with the top layer of cake. Spread any remaining filling over outside of cake to create a smooth surface. 


Frost cake with remaining whipped topping.

*To form decorative peaks, press spreader into topping and pull away. Repeat over entire surface of cake. For easier slicing, refrigerate cake at least 30 minutes.  


To easily cut cake into servings, cut cake into eight wedges from top to bottom using utility knife. 

Carefully insert spatula horizontally into each wedge, dividing into two equal portions. 

Options for Filling:

Red Kool-Aid Strawberry Splash: Omit chocolate morsels. Add 1/2 teaspoon unsweetened strawberry drink mix powder to cream cheese mixture. Stir 1/4 cup chopped strawberries into cream cheese mixture. Proceed as recipe directs. Use
 strawberry flavored whip cream or regular with red food coloring.

Christmas Green Mint Splash: Omit 1/2 cup melted chocolate. Add 1/4 teaspoon peppermint extract and 3-4 drops green food coloring, if desired, to cream cheese mixture. Proceed as recipe directs.


Recommended:


Pampered Chef: Kids in the Kitchen


Baked Alaska Recipes

Angie's Recipes


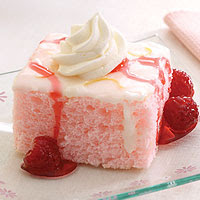
Microwave Strawberry Cheesecake Cake Recipe

Strawberry Cheesecake Recipe for Mircowave 

Angie's Corner: What could be better than a cake recipe you can microwave? Yes, please. This Strawberry Cheesecake CAKE recipe is microwavable. Enjoy!

Strawberry Cheesecake Recipe for Mircowave
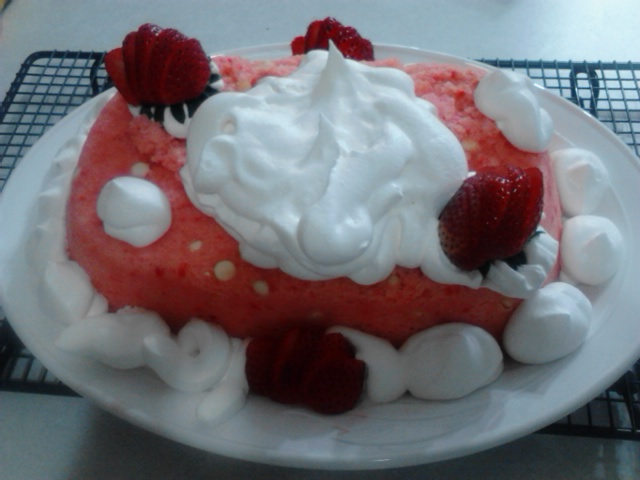
Mircowavable Strawberry Cheeesecake Cake Recipe with garnish.
Easy Strawberry Microwave Cheesecake Cake Recipe Pampered Chef
Microwave Strawberry Cheesecake 'Cake' Recipe.

Strawberry Cheesecake Microwave Cake Recipe

Ingredients:

1 strawberry cake mix (if you can't find strawberry- Pillsbury and Betty Crocker makes one you can use white, add red food color, (not much, like one drop) and add an extract tsp of strawberry extract.

The strawberry cake mix is prettier it has pink cake with red speckles, plus you're putting in the white chip is very pretty.


1 tsp. strawberry extract (only if you cannot find the strawberry cake mix)

½ cup white chocolate chips
1 (3 oz. box) cheesecake pudding mix
16 oz. sour cream
½ cup oil
3 eggs 

Garnish: whipped topping and fresh Strawberry Fans. 


  • 1. Spray your Stoneware Fluted Pan or Deep Covered Baker lightly and dust with flour (works best with Baker's Joy).
  • 2. Whisk eggs and pudding mix together in Classic Batter Bowl.
  • 3. Add remaining ingredients, blending well with Mix N' Scraper.
  • 4. Drop batter into Fluted pan and microwave on high 12-14 minutes. 
  • 1. (Watch your cake after 10 minutes if you microwave runs hot.) Works best if your have a turntable in your microwave. If not, rotate every 4-5 minutes. 
  • 5. Invert cakes immediately, but leave pan over the cake for 10 minutes. Cool. Garnish (Flour Sugar Shaker filled with powdered sugar, fresh strawberry fans made with your Egg Slicer Plus or Paring knife, fresh mints snipped with your Kitchen Shears) as desired.

How to Make Strawberry Fans:


To make the Strawberry fans gently slice a 3/4 of the way down and fan apart. Then with any leftover strawberries, put them in the Manual Food Processor and chop til desired sized and put in the center of cake, If using the fluted pan fill hole in center of cake first with leftover whipped topping before adding the strawberries

Recommended:

Fun Family Recipes


ADS DISCLOSURE: We've partnered with some wonderful advertisers who may sponsor blog posts or send us samples to test. Some companies pay us to review their products.

*We also use affiliate links, if you make a purchase we get a tiny commission. Kids Creative Chaos participates in the Amazon LLC Associates Program*, an affiliate advertising program designed to provide a mean for blogs to earn advertising fees by linking to Amazon properties, including, but not limited to, amazon.com, endless.com, myhabit.com, smallparts.com, or amazonwireless.com. We also offer Tapinfluence, Google Adsense, SoFab, and Izea ads here. Thanks so much for helping us keep the lights on! :)


Valentine's Day Dessert: Lemon Angel Food Cake Recipe from Pampered Chef

Looking for a light and refreshing dessert recipe for Valentines Day? This Lemon Angel Food Cake Recipe is Delicious

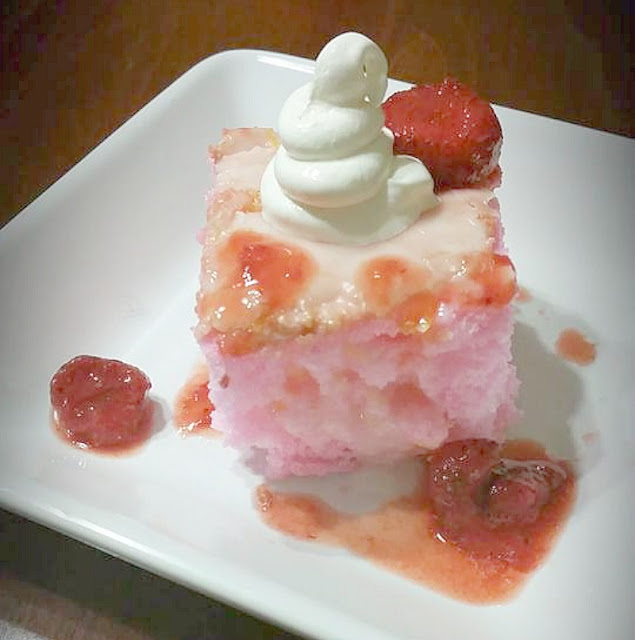
Angie's favorite Pampered Chef recipes: This dessert recipe for Valentine's Day is pink, pretty, and romantic. It is perfect for your next romantic Valentine's Day Dessert. Make this Lemon Angel Food Cake recipe to celebrate Valentine's Day or any special occasion. Enjoy!
 Valentine's Day Dessert Lemon Angel Food Cake
Ours: Valentine's Day Dessert Lemon Angel Food Cake.

Valentine's Day Recipe Lemon Angel Food Cake Pampered Chef
Theirs: Pampered Chef's Lemon Angel Food Cake.

How to Make Lemon Angel Food Cake

Ingredients:

5 drops red food coloring
1 pkg (16 oz or 430 g) angel food cake mix
3 lemons
2 cups (500 mL) powdered sugar
2 cups (500 mL) thawed frozen fat-free whipped topping
1 pkg (10 oz) frozen raspberries or strawberries in syrup, thawed.

Directions:

1.  Preheat oven to 350°F (180°C). For cake, add food coloring to amount of water specified on package. Prepare cake according to package directions. Pour batter into Rectangular Baker . Bake on center rack 35-40 minutes or until top is golden brown, cracked and center is slightly sunken. (Do not underbake.) Remove baker from oven; invert onto Stackable Cooling Rack. Without removing baker, let stand until completely cool (about 1 1/2 hours).

2.  Poke holes in cake about 1 1/2 in. (4 cm) deep and 1/2 in. (1 cm) apart with large fork. Zest lemons using Zester/Scorer to measure 1 tbsp (15 mL) zest. Juice lemons using Juicer to measure 1/3 cup (75 mL) juice. In Small Batter Bowl, combine sugar, juice and zest; whisk until smooth. Pour glaze over cake, spreading evenly. Let stand 30 minutes or until glaze is set.

3.  Attach open star tip to Easy Accent(R) Decorator; fill with whipped topping. Garnish each serving with whipped topping; top with raspberries.

Yield:  15 servings

U.S. Diabetic exchanges per serving: 2 1/2 fruit, 1 starch (3 1/2 carb)

Make it a family Valentine's date night for the perfect Valentimes. (See what I did there?) You might also like to pair it with a Valentine Craft for Kids and a cute bedtime story like those below.


Recommended Reading:


Recipes from the Heart Cookbook*

More Recipes from Kids Creative Chaos


ADS DISCLOSURE: We've partnered with some wonderful advertisers who may sponsor blog posts or send us samples to test. Some companies pay us to review their products.

*We also use affiliate links, if you make a purchase we get a tiny commission. Kids Creative Chaos participates in the Amazon LLC Associates Program*, an affiliate advertising program designed to provide a mean for blogs to earn advertising fees by linking to Amazon properties, including, but not limited to, amazon.com, endless.com, myhabit.com, smallparts.com, or amazonwireless.com. We also offer Tapinfluence, Google Adsense, SoFab, and Izea ads here. Thanks so much for helping us keep the lights on! :)

Easy Pineapple Upside Down Cake Recipe with Pineapple Cartoon Clipart

This is an easy Microwavable recipe for Pineapple Upside Down Cake with some cartoons to boot.

Who lives in a Pineapple at the bottom of cake? Not Spongebob, it is a Pineapple Upside Down Cake! This recipe is easy and microwaveable. Enjoy!
Easy Pineapple Upside Down Cake Recipe and cartoon clipart
Ya, know who'd like this?  
The one who lives in a cartoon Pineapple under the sea.

This is a fun recipe to make with the kids and actually easy enough for them to do on their own!  Although this is a recipe for The Pampered Chef stoneware product, Deep Covered Baker, if you have a microwave safe dish you can still use this recipe. :)


SpongeBob Cartoon Clipart Image
Spongebob says, "I'm so excited.  
I can't wait to eat this Pineapple Upside Down cake!"


1 cup brown sugar
1 can (20 ounces) pineapple slices, undrained
5 maraschino cherries, drained and halved
1/2 cup chopped nuts (optional)
1 package (18.25 ounces) yellow cake mix
3 eggs
1/3 cup vegetable oil

Crumble brown sugar into bottom of Deep Covered Baker. Drain pineapple, reserving juice; set aside. Arrange several pineapple slices over brown sugar in Baker. Chop any unused pieces and set aside.
Place a cherry half in center of each pineapple slice. Sprinkle with nuts (optional). Add enough water to reserved pineapple juice to measure 1 1/3 cups liquid. In Classic Batter Bowl, combine cake mix, pineapple juice, reserved chopped pineapple, eggs and oil; whisk until well blended and smooth. Pour over pineapple slices in Baker. Microwave on high, 10-12 minutes, until the top is set.
Allow to stand 5 minutes, then carefully invert onto a serving platter.
Cool slightly; garnish with whipped topping, if desired.

Recommended Reading:

Make a Mock Baked Alaska Cake

Kids Holiday Cookbook*


ADS DISCLOSURE: We've partnered with some wonderful advertisers who may sponsor blog posts or send us samples to test. Some companies pay us to review their products.

*We also use affiliate links, if you make a purchase we get a tiny commission. Kids Creative Chaos participates in the Amazon LLC Associates Program*, an affiliate advertising program designed to provide a mean for blogs to earn advertising fees by linking to Amazon properties, including, but not limited to, amazon.com, endless.com, myhabit.com, smallparts.com, or amazonwireless.com. We also offer Tapinfluence, Google Adsense, SoFab, and Izea ads here. Thanks so much for helping us keep the lights on! :)