Showing posts sorted by date for query jake's journey. Sort by relevance Show all posts

Jake's Art - Homeschool Weaving Lesson - Make your own Loom - DIY Arts and Crafts

How to make a loom for weaving scrap fiber: A Homeschool Art Lesson

Jake's Journey in Art goes under the sea in this DIY weaving Homeschool Art Lesson we learned to Renew. Enjoy!


How to weave for elementary make your own loom
Our loom has both warp and weft framework to better illustrate 
the concept to young children.

To weave a textile, threads (or scrap fabric) are woven on a frame called a loom. The first vertical threads on the loom are called warp threads. Threads that are woven horizontally in and out of the warp threads are called weft threads.


Cut notches in the cardboard frame to keep yarn in place.

Recycle a piece of cardboard from a cereal box or a foam tray to make your loom. You might also like Native American Paper Bag Dress

Cut small notches into the top and bottom of your cardboard(ours are about 1/2", but 1" works well). Make them about 1/2" inch apart. Alex Toys has a great PDF on weaving here.


Spongebob Fabric for Toddler bed tent.

Warp your loom with yarn or string by taking the thread and taping one end to the back middle of your board.  Now, starting with your first notch on the left, begin wrapping through each top and bottom notch without skipping a notch until you get to the right side of the board.  Only the warp frame is required.

Now your are ready to weave your weft. Cut or tear scraps of fabric into strips. Your strips of fabric should be about 1" thick and at least 12"  long. You will need about 20 strips. 


The cat enjoyed the tearing of fabric strips so much 
he needed a nap after playing with them.

For extra ease for smaller children, we added a weft frame as well. Now the scraps of fabric can be pulled through the little squares for guidance. Pull your scrap fabric under the first warp, over the next, and so on. The yarn guide will help younger children see any mistakes made.

When you have completed your weaving tie off all scraps in groups of two at the edges of your cardboard loom, then you can cut your your thread/yarn framework.


How to make a loom - Elementary Weaving Lesson Scrap Fibers Make your own
Spongebob has his eye on you.

This is an easy way to get littles started in weaving. It is also helpful to cut a piece of cardboard about 1" by 3" with a notch in the end. Attach your scrap fabric by inserting it in the notch and use as a tool to weave the fabric through the loom, this is called a shuttle.


Alex Toys Native American Bead Loom Kit for weaving bracelets.

Once you advance your skills, you can weave many beautiful projects. Alex Toys has a Native American Loom for weaving bracelets.  It is a professional quality loom that makes incredibly authentic bracelets.  We are working on our patterns and will share them soon.


Kid's room cartoon character theme (that way we don't have to worry about matching or new fads).Check out the automobile sun visor we used as a headboard. 
It is simply nailed to the wall.

Jake loved the idea of using his toddler tent cover as scrap fabric for this project. We renewed an item that was dear to his heart. It had been ripped from rowdy play and was no good as a tent, but we saved it anyway in hopes to repair it or transform it into a pillow or some other creative endeavor. The SpongeBob fabric was the perfect accent for his room. 


Yep, we need a hanging stick, but the kids love it.  
Use favorite t-shirts, pillow cases, or doll clothes for your scrap fiber.

To display your beautiful work of art weave a "weft" stick horizontally through the top row and hang on a wall.  Jake loved his creation and couldn't wait for the stick. He wanted to see how it looked right away, so we hung it by a nail. A little droopy, yes, but he loves it.

Did he love the process?  Not so much.  Much patience is a necessary requirement of weaving. So, Mommy made the loom, got it started and Jake weaved the inner pieces to gain an understanding of the process.  Mommy tied and cut it off making sure Jake watched and understood. This is somewhat time consuming, but the end results are worth it.


Mayhem saw the weaving on his wall and wanted it for her room. Score! This project journey ended on a very happy note.   


Recommended Reading:


Learning How to Weave*

Party Time: SpongeBob SquarePants*


ADS DISCLOSURE: We've partnered with some wonderful advertisers who may sponsor blog posts or send us samples to test. Some companies pay us to review their products.

*We also use affiliate links, if you make a purchase we get a tiny commission. Kids Creative Chaos participates in the Amazon LLC Associates Program*, an affiliate advertising program designed to provide a mean for blogs to earn advertising fees by linking to Amazon properties, including, but not limited to, amazon.com, endless.com, myhabit.com, smallparts.com, or amazonwireless.com. We also offer Tapinfluence, Google Adsense, SoFab, and Izea ads here. Thanks so much for helping us keep the lights on! :)


How to Make Salt Dough Recipe: Self-Portrait Ornaments

How to make Salt Dough Self-portraits as Ornaments

Did you ever wonder how to make salt dough? We made self portraits for a homeschool art project. I included how to make homemade clay and a few salt dough recipes. These mini-mes are a great companion project for a preschool or kindergarten learning body parts lesson. You can also make Christmas Tree Ornaments from Salt Dough. We played around with a variety of themes during our homeschool art lesson. Enjoy!


This post contains affiliate links for your convenience.*


How to Make Salt Dough Recipe Christmas Ornaments Decorations
Salt Dough Holiday Ornament Recipe.


Make a Halloween Tree with Homemade Dough Ornaments.


How to make salt dough self portraits Christmas Decorations
Self portraits from homemade clay and salt dough.


How to make dough Christmas ornaments
Make Christmas and Holiday ornaments by inserting straw to form a hole.

This recipe is for  how to make clay without cream of tar tar.


Salt Dough Recipe:


1 C. flour

1 C. salt


1/2 C. water


Mix together and knead.


When ready to cook, put on a baking sheet in 


oven at 100 degrees C/ 200 F for 2-3 hours.


Cooking is not necessary, leave your creations 


in a safe place to dry. We left these in a table drawer


and forgot about them.


When cool, paint or decorate with beads or candy.


Salt dough cookie faces.

You might also like how to make Homemade Clay with cream of tar tar.


We made these self-portraits about four years ago and forgot about them. They've sat in the end drawer of our dining room table ever since. They were never cooked nor painted.

Jake was about four years old and he hadn't met his elementary art teacher yet, but he still had an aversion to art. It was a sensory issue. He didn't like getting his hands dirty. He also worried about getting things on his clothes. If either of these happened, he would get very upset. I suppose this is where my love  of messy crafts was born.


I liked to be tidy as a small child too. I didn't play like the other kids on the playground, because I didn't want to ruin my leotards (today we call them tights) or get grass stains on my clothes. These things troubled me a great deal. So, I'd walk around the perimeter of the playground until the teacher blew the whistle. Little did I know, it was OCD. I've recovered, but some people don't appreciate it. The only way for me to stay sane is to embrace messy things. 


Yep, I didn't want Jake to struggle with the same wacky demons, so I encouraged sensory play.


Even now, he wants to hurry and complete the project so he can wash his hands. If we are mixing dough, he can't let it dry. You know, that crumbly, crackly feeling  on your hands? Mayhem and I like it. It's fun to let the dough dry and then scrape it off similar to letting school glue dry on your hands. I like seeing the fingerprints in the glue peelings. 


Jake? No way. I think this has a lot to do with his hatred of art, and then the teacher came along and made art a boring chore. 


He strives for self-inflicted perfection. He doesn't like the learning curve. He knows a lot. He is a gifted child. When he has to learn something new he is disappointed he didn't already know it. You can see the shame and the disappointment in his face. 


Recently, he had to take a Scantron test online, the test was smart. The more correct answers, the harder the questions. We told him to guess, but he refused. He labored over each question and made a very educated guess. In the end, he scored above average, but the test was torture. He cried with each question  for the first time aware he didn't have all the answers. 


Jake beginning his journey in art.


If only he could realize art works the same way, but it's better because there are no real answers in art. Beauty is in the eye of the beholder. I am the beholder here. I like his salt dough self-portrait the wavy hair and round face remind me so much of my happy, bouncy, little four year old.

Next week's journey, Animal Printmaking, proved very difficult for a neat freak. Smudges are a perfectionist's nemesis. Start here for Jake's Journey in Art 


Recommended Reading:

Air Dry Clay Projects

Minecraft Creeper Wood Carving Project

Christmas Dough Crafts

Salt Dough: More than 100 Projects! (American Girl Library)


KCC Kids Make Native American Art and Crafts in honor of the Wampanoag Indians contribution to Thanksgiving

Studying Native American Art and Crafts


Get crafty with Alex Toys and celebrate the Wampanoag Indians.  Without them, we'd have nothing to celebrate. Here are companion activities for your lessons on Native American History.


Native American Paper Craft Wampanoag Indians Paper Dress
Mayhem wanted to go outside and collect stones and leaves in her pouch like a real  hunter-gather. "Indian Dress" paper grocery bag tutorial.
What a fun word, Wampanoag. Here is a site with fun facts about the Wampanoag. We learned some Wampanoags are from Natick, Massachusetts where the Daddy was born.


Wampanoags today  See the real Mayflower here. See our version here.  Daddy is not Native American, but Mommy is related to Pocahontas about five different ways- her Indians are known as the Powhatan or Virginia Algonquian. One day, we'll write a post about this relationship.


Tie Dye Fashion Groovy Tote Kit from Alex Toys ~ Fun way to learn about dyeing clothing.
Alex Toys has great products for your Thanksgiving celebration or to help teach Native American ways and honor their contribution to our country in the classroom.

I wanted to teach dyeing with the Tie Dye Fashion Groovy Kit and teach weaving with their Native American Loom, but the projects seemed a bit daunting for a six year old, eight year old, and an OCD Mom. So, I kept  putting it off. 

We'll do that post next week. We can do it tomorrow. It just has to be done by Thanksgiving...


The Tie Dye kit by Alex Toys is awesome, super easy, and nearly mess free ~ we did most of it in a tub in the kitchen sink.


Soaking items to dye before tying off with rubber bands and twist ties.


Knotting off patterns with bands included in the kit and recycled bread bag twist ties.


Easy how to tie dye t shirts
Projects ready to dye. The included, Groovy Tote and some of our old, stained t-shirts.

How to tie dye and other native american indian crafts
I've done some tie-dyeing in the past, but this was so much easier. Although, the kit was for one tote bag we had enough dye to dye several things. I wish we had prepped more items. We decided to use some of the dye to make super messy, water color paintings in the sink.


Leave lots of white space for better contrast and to keep colors from bleeding together.
This is our only mess! How great is that?

Squirting dye on paper and blending with plastic spoon.


Secure your items in plastic bags for 24 hours.
Patience is a virtue. Enclose in plastic bags for 24 hours to set the dye, remove bands, lay flat to dry for another 24 hours, and then wash and dry.


The bag was included in the kit and we did three shirts and several paintings.
All bottles are still half full! This would be great for a birthday party or classroom. 
Tie Dye Paper Art  ~ Less Squeeze is Best
Tie Dye Paper Art ~ Learning Phase


The loom? Oh my the loom, it was far too daunting for this post. See our weaving experiences in Jake's Journey in Art ~  Home-school Weaving. 


Weaving is tedious work that takes time. Imagine if you were a Native American making clothing to keep warm.


Next month, celebrate the spirit of giving with Santa's Elves of Indy as we collect, wrap, and donate gifts for those needing a little extra help this Christmas season.

AlexToys.com donated these toys for our unbiased review.
Follow Me on Pinterest

How to Make Clay: Air Dry Clay, Homemade Clay Recipes for Home School Art Project

How to make clay is simple: Here are some recipes.

We've been crafting with Air-Dry clay. We purchased a clay kit and then we also made our own clay at home. It can be used with a Potter's wheel or shaped into free forms for home school art projects. Enjoy!

How to Make Clay: Air Dry Clay and Homemade Clay Recipe Home School Art Project
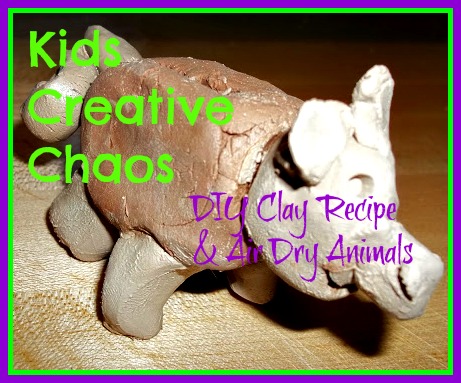
Air dry clay pig and diy homemade clay recipes.


Attach pieces by adding a little water to each piece. This is Jake's Pig (From Jake's Journey in Art). He enjoyed playing with the clay just enough to complete the assignment.


Alextoys.com sells boxes of air dry clay refills perfect 
for your animal  sculptures.

Clay is wonderful for Sensory play. In the homemade recipe below, just add some scented oils like vanilla or cinnamon.  TOUCH, SMELL, TASTE (I don't recommend it), SEE- hmm... When it dries you can gently tap it onto the table for SOUND encompassing all senses or get CREATIVE and make a rattle/maraca or a base for a drum just stretch tissue paper over the top and attach with a large rubber band.


Mayhem made many animals and embellished each one.


 Get your Air Dry Clay Refill Pack  by Alex Toys.


The baubles in the photos above came with the air dry clay refill for the pottery wheel from Alex Toys.


How to make Homemade Clay Recipe:


Click here for how to make clay without cream of tar tar


Easy/recommended for preschool and early elementary


1 cup flour
1 cup water
2 tsp cream of tartar
 ¼ cup salt
1 tbsp vegetable oil
food coloring (optional)

Combine all ingredients in a medium-sized pot. Decide on a color  for the clay. Cook over moderate heat, stirring constantly. The dough will eventually become difficult to stir, and it will stick to the spoon. At this point, dump the dough onto wax paper. Allow it to cool for at least 15 minutes, and then knead it until it is smooth. Store the dough in a plastic container or a plastic bag when not in use. Refrigerate the clay when not in use.


Homemade Clay can be painted and it will last for years to come. Make cute Holiday Gifts: Think napkin rings, 3D wall hangings, necklace medallions, trivets, and pretty catch-all bowls.


Looking for Toddler or Preschooler Activities? 

Try this:  Sensory Dough playtime Activities.

Recommended Reading:

Craft a Minecraft Marshmallow Pig

Happy Pig Day! *

If You Give a Pig a Pancake*


ADS DISCLOSURE: We've partnered with some wonderful advertisers who may sponsor blog posts or send us samples to test. Some companies pay us to review their products.

*We also use affiliate links, if you make a purchase we get a tiny commission. Kids Creative Chaos participates in the Amazon LLC Associates Program*, an affiliate advertising program designed to provide a mean for blogs to earn advertising fees by linking to Amazon properties, including, but not limited to, amazon.com, endless.com, myhabit.com, smallparts.com, or amazonwireless.com. We also offer Tapinfluence, Google Adsense, SoFab, and Izea ads here. Thanks so much for helping us keep the lights on! :)


How to Make a Basic Color Wheel and Primary Art Lesson Homeschool

THE PRIMARY COLORS: ROYGBIV 

How to Make a Color Wheel Homeschool Art Lesson.

If you're following Jake's Journey in Art this homeschool art lesson isn't from 3rd grade art. We've been combining lessons and working on everything together to make it more like a classroom and easier for the teacher (me). This is the 1st grade Primary Color Lessons for homeschoolers, but we added a science component and more to make it more interesting for the older elementary kids too. Enjoy!

This post contains Amazon and other affiliate links for your convenience.


Sesame Street teaches Primary Colors.

Henri Matisse loves primary colors.


cute primary color wheel for preschooler or early elementary
Mayhem's second attempt (First Grade).
Preschool Color Wheel Ideas
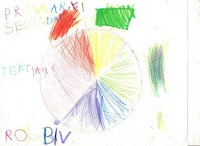
Mayhem's first attempt: a color wheel cat.
He has all the colors just not in the right position.
He got the letters but not the wheel.  The smudges are  two
primary marker colors blended to create the secondary  colors.

So, what is a technically correct color wheel?


Colorwheel Art Lesson


The colors of the RAINBOW or those that appear in a prism. Here is a fun scientific lesson in PDF form from Stargazers and NASA.

We studied the use of primary colors by the Masters like the Matisse pictured above, and then we chose a farm animal to trace with pencil and paint with only the primary and secondary colors.

Jake's bunny with primary and secondary color complements.

Jake was a champ when it came to the technical aspect of art. He reminded me of the cheat to remember the primary and secondary colors. Red, Yellow, Blue, Orange, Green, Indigo, and Violet better known as ROY G. BIV.  He also knew prisms reflect the light from the sun and radiate these colors. Although, he knew about the color wheel he didn't have a good grasp of the concept of contrasting or complementary colors.

We're going to explore this concept. Math and Science are everywhere in ART. So, my little genius, art critic is going to learn about the golden rule sooner than later. Funny how people tend to be one or the other, left or right brained. I'm taking on the challenge to prove it doesn't have to be either or.

Paint a Primary and Complementary Color Bunny Elementary Art
Mayhem's bunny. They both traced the bunny from an original drawn by me. Yep, she's 6, loves art and hates math.


Click the thumbnails below to catch up on our 
Homeschool Art Journey
 or start here with LESSON ONE.
From Wikipedia:
Complementary colors are pairs of colors that are of “opposite” hue in some color model. The exact hue “complementary” to a given hue depends on the model in question, and perceptually uniformadditive, and subtractive color models, for example, have differing complements for any given color.


The complement of each primary color (red, blue, or yellow) is roughly the color made by mixing the other two in a subtractive system:
  • red complements (blue + yellow) = green
  • blue complements (red + yellow) = orange
  • yellow complements (red + blue) = violet


Recommended Reading:


Jake's Art: Still Life Picture: Homeschool Lesson 3

Still Life Picture Cobalt Bottle Homeschool Art Project

Oh my, what a fun journey in Art we have embarked upon this homeschool season. This week's assignment Still Life PicturesGather some fruit and other interesting items, arrange them on a table, and draw them as realistically as possible. Well, let's just say it took all of our stressometers to the max. Enjoy!

Still Life Picture Apples and Cobalt Bottle
The Still life example looked similar to this one 
with a cobalt bottle and fruit.
As, Jake sat having a melt-down, I searched the web for famous examples of still life. The lesson does mention not everyone has a natural ability to do realistic drawings, but practice makes perfect.


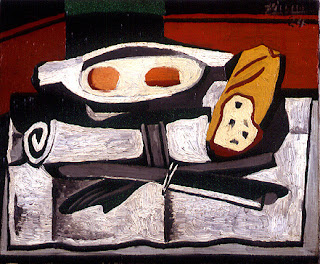
Picasso Still Life Painting
Picasso, Still Life with oranges.
Let me tell you, I've had years of practice. I cannot draw a realistic still life. So, I told Jake we would interpret our own realism like Picasso did in his interpretation. After all, everyone must start somewhere and the photographic images could stifle the most confident of young artists. I showed him many amazing still lifes. Examples are at the bottom of this post. He struggled with the contour drawings wanting to draw the entire table no matter how many times I explained, "Just pretend this is all you see."


This one depicts the entire surface of the table.
"Jake, please try again.  You are making this much too difficult.  Just draw a line to represent the table surface."  "I Can't!" He cried smashing his pencil down onto the table.

Still life on table with outline.

Still life with apple totem.


Still life third try.

Now, I didn't make him draft the outline five times. It was his perfectionist choice. I was ready to color-in the second one once he understood the concept of a horizon line, but he was compelled to continue the torture. His final drawing is below and quite lovely with its soft shadings, faint line of the table in the background and arrangement. (Nevermind the bottle lines showing through the fruit~choose your battles.)


In the meantime, his little sister (Mandy Mayhem) and natural born creative, drew this still life including the table, the windows, the painting on the wall, the wall, and some additional items she felt added to the picture.


 "I'm done Mommy. Can I do another one? I really like the Fishbowl Matisse, can I do one of those?"  Sure, Mayhem just do it quietly so Jake can concentrate.

Matisse Fishbowl Still Life Picture Goldfish
Matisse with Goldfish.

If only, Jake could concentrate. Remind your kids to relax!  Relaxation is the most important element of quality art. He has a special talent, but this project was very stressful for him.

The pictures below, especially Wassily Kandinsky,  gave him the courage to trudge ahead. We also found Paul Klee and Joan Miro still lifes. 

Everyone who studied art had to do a still life. Note the Paul Cezanne's skulls. So, paint what you enjoy. Make the project your own, but fulfill the assignment.


Warhol Still Life Image
Warhol Still Life
Cezanne Still Life Skulls
Cezanne Still Life
Picasso Still Life
Picasso Still Life

Kandinsky Still Life
Kandinsky Still Life
Picasso Still Life
Picasso Still Life

Matisse Still Life
Matisse Still Life


The still life was our worst struggle by far, but it was also a turning point. The next post is a much happier, carefree one. As Jake's journey continues you will see a calmer more reflective, budding young artist.


Remember these points:
A little encouragement goes a long way.

You don't have to erase in ART. The mistakes can make a Masterpiece.

Never tell your child or anyone else their drawing doesn't look real. It is art, a beautiful interpretation in the eye of the beholder. What if Picasso or Warhol stopped trying because they weren't successful? 

Andy Warhol is a fantastic example. Practice does make perfect but not necessarily photographic. Once he abandoned the notion he needed to be a "real artist" not a graphic artist; he finally became a Master of his own success.

Read more about Lesson one (Line - how do you feel about art.) and Lesson two (tunnel book perspective.)

And this one next (if you are following in order): Oh happy day: progress with watercolors and paper arts.


Recommended Reading:

Still Life with Bread Crumbs: A Novel*

Art of Still Life Drawing (Art of Drawing)*


ADS DISCLOSURE: We've partnered with some wonderful advertisers who may sponsor blog posts or send us samples to test. Some companies pay us to review their products.

*We also use affiliate links, if you make a purchase we get a tiny commission. Kids Creative Chaos participates in the Amazon LLC Associates Program*, an affiliate advertising program designed to provide a mean for blogs to earn advertising fees by linking to Amazon properties, including, but not limited to, amazon.com, endless.com, myhabit.com, smallparts.com, or amazonwireless.com. We also offer Tapinfluence, Google Adsense, SoFab, and Izea ads here. Thanks so much for helping us keep the lights on! :)