Showing posts sorted by date for query DIY. Sort by relevance Show all posts

Winter craft ideas for Kids: How to Make Snow for Pretend Sensory Play in Ice Age and Christmas Village

Make Fake Snow with Wax Paper

This winter craft idea for kids focuses on how to make snow for your Ice Age Dinosaurs. In this DIY, you'll use wax paper. Enjoy!


sensory winter activities for kids how to make fake snow diy for Ice Age Dinosaurs
Ice Age creative play with Dinosaurs, Diego, and
wax paper snow activity for kids.
We've shared many sensory activities for kids, but this winter one is the cat's meow! So, I've been saving a a bag of snow since my Grandmother passed away.  I inherited it with a few pieces of her snow village.  A few years ago, I used store bought snow for my village, as I wasn't ready to use hers or risk losing it around the cats and little ones. This year, I pulled it out and dumped it around my village.  It was as remarkable as I remembered. Enjoy!


And then, it wasn't... 

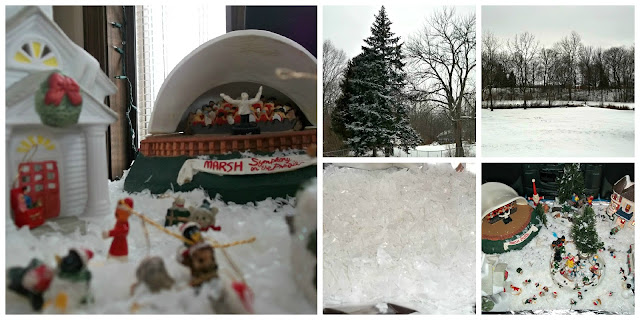
The cat kept climbing in it spreading it all over the floor. During the holidays, I brushed it under the table to clean up later. Later came, I began carefully picking up the pieces preparing to place them in a baggie for next year, when somehow the glistening bits of fake snow appeared more familiar than I'd ever known. This wasn't fake snow at all.  It was tiny pieces of shredded wax paper!  I made a collage with snowy scenes around my house so you can see how natural it looks.


Make Fake Snow out of Wax Paper.
Ice Age Dinosaurs, Sensory Snow Play.
Make Fake Snow with Wax Paper
Grandma's fake wax paper snow village versus real snow
covered pine trees in the landscape.

Sneaky Grandma, surprising me from the grave. I hadn't realized she was so creative. One year, on my parents twenty-fifth wedding anniversary, she volunteered to get SILVER vases for the table centerpieces.  She brought them just before the guests arrived, and I was astonished to see plastic glasses of some sort wrapped in aluminium foil. Not her crafty-ist moment. It felt a little tacky for what I had planned, but certainly creative. 

And now, the snow.

What an easy project for your snow globes, snowman in a jar, I -spy Christmas ornaments, or just for an ordinary day of creative play with plastic animals or Legos.  We decided to play Ice Age with ours.  I'll save Grandmas, just thinking how she took the time to craft it makes me smile.


So, grab your wax paper.  Do not cut it. Tear it into tiny shreds and store in a Ziploc bag for your kiddos. So easy, so fun and perfect for SENSORY PLAY!  Thanks, Grandma!


What will you pretend?


Recommended Reading:

National Geographic Little Kids First Big Book of Dinosaurs (National Geographic Little Kids First Big Books)*

Dinosaurs! by Gail Gibbons*


ADS DISCLOSURE: We've partnered with some wonderful advertisers who may sponsor blog posts or send us samples to test. Some companies pay us to review their products.

*We also use affiliate links, if you make a purchase we get a tiny commission. Kids Creative Chaos participates in the Amazon LLC Associates Program*, an affiliate advertising program designed to provide a mean for blogs to earn advertising fees by linking to Amazon properties, including, but not limited to, amazon.com, endless.com, myhabit.com, smallparts.com, or amazonwireless.com. We also offer Tapinfluence, Google Adsense, SoFab, and Izea ads here. Thanks so much for helping us keep the lights on! :)

What She's Wearing Wednesday: Pirate Princess Costume: Searching for Toy Treasure

Mayhem Loves to Engage in Pirate Pretend Play

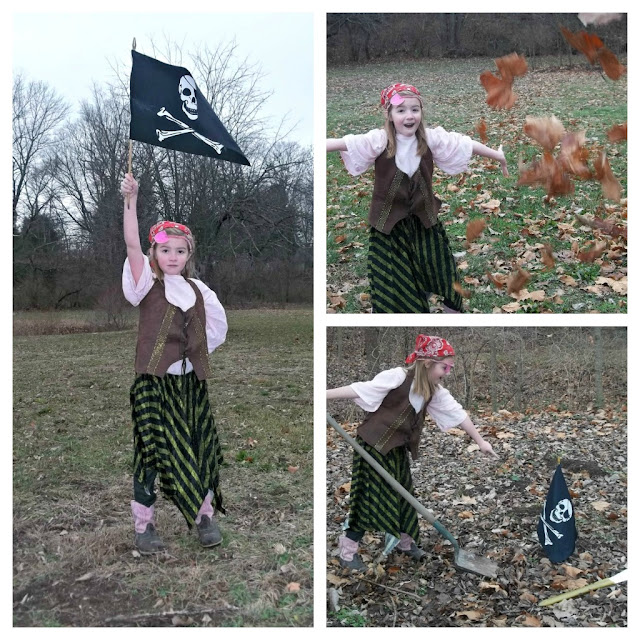
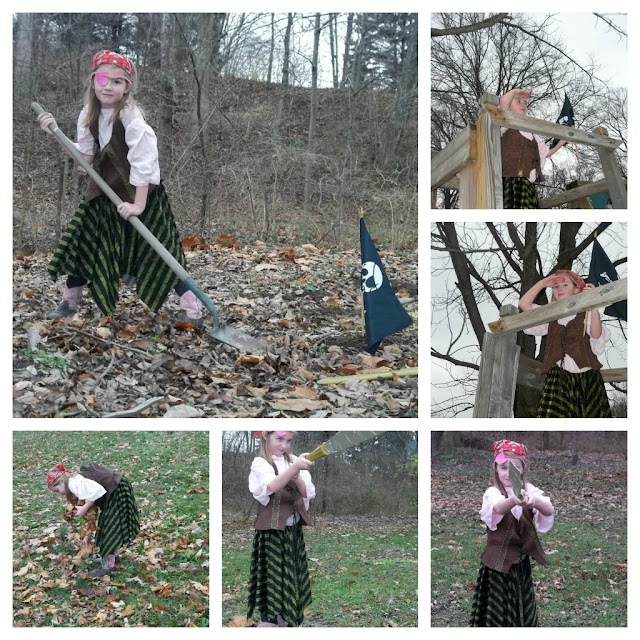
Homemade DIY Princess Pirate Costume? She's a whiz when you need to know how to make a costume from nothing. She threw on her beloved Pink Cowboy Boots , made a pink eye patch (think pipe-cleaner and foamies), and pulled a pink peasant shirt from the costume trunk. 
DIY Homemade: What She's Wearing Wednesday Pirate Princess Costume
Easy DIY Pirate Princess Costume.
Mommy added a vest and skirt from past years Halloween costumes and hoped to add a Princess crown. The girly crown was quickly vetoed, and we settled for a red bandanna headdress, homemade cardboard sword, pirate flag, and a shovel for treasure digging.


Pirate Princess for Outdoor Play
Pirate Princess for outdoor play.


She searched high and low for the perfect digging spot, collected "golden" leaves for treasure, and then staked her claim by positioning her pirate flag on the big red "X" on her trusty treasure map. 


It was hard work, but she knew it was worth it. You see, her treasure map described the treasure as this Princess Chest for Girls.


The Treasure chest closes up and makes a great carry along for car trips or quick visits to Grandma's house. Mayhem especially likes the animal figures included in the set. Tesco direct offers all kinds of great gift ideas for toys for girls and boys as wells as gifts for the entire family. 


Mayhem is busy digging up many more toys for her wishlist and letter to Santa on the Tesco toy page. We hope you enjoy all of her coming adventures in fun and fashion. In the meantime, dig into your own life, and go create some fun, family memories with an impromptu session of dress up and creative play.


Recommended Reading:

Things to Make at Home

Play Out: How to develop your outside space for learning and play

Simplicity Pattern Pirate Costume

7 Homemade Christmas Ornament Craft Ideas

Heirloom Ornaments and Decorations from our Family Tree

Our tree has lots of beautiful ornaments, expensive ones, antique family heirlooms, and decorations celebrating the kids' first Christmas. The best Christmas ornaments are those we make ourselves. They don't have to be embarrassing! These homemade ornaments are craft projects you can do as a family, and they will last for years to come. Enjoy!


This post contains affiliate links for your convenience.*

7 easy homemade handmade Christmas Ornament Decorations for the Tree


Fimo Clay is easier than salt dough, and it lasts longer than play dough. Many craft stores carry it. Just open, create, and insert hole in top with a straw. Voila! Quick, simple, holiday ornaments or package tie-ons.


7 Homemade Christmas Ornament Craft Ideas
One year, my niece made everyone beautiful 
homemade gift ornaments from Fimo clay.

Legend of the Christmas Tree Cardinal Decoration.
Christmas Tree Cardinal Legend.


The cardinal is considered the Christmas bird and is a reminder to Christians of their faith in Christ. This one is an old family heirloom, but you can make a homemade no-sew new one with felt and tacky glue. Cut two layers of the cardinal, stuff with scrap fabric or tissue paper, glue the seams together, and use Sharpies to draw the features.

Ever since I can remember, we've had a cardinal near the top of our tree.


Winter Snowflake Crochet Craft for Tree Ornament.
Handmade Winter Snowflake Crochet Craft for Tree Ornament.


Crochet a beautiful snowflake like my Grandmother did, then paint it with a glue/water solution or Modge Podge. You can also use Fabric Starch. Make a solution, place snowflake into bag, pour in liquid starch. Find How to DIY here.


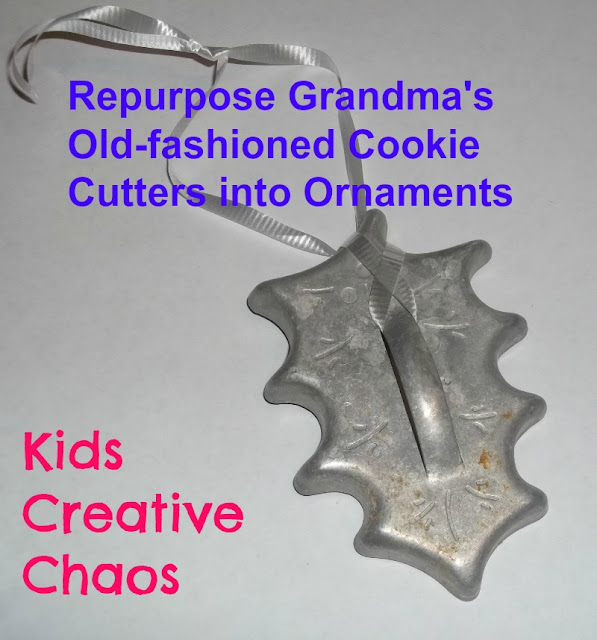
Old-fashioned cookie cutters make awesome Christmas Tree ornaments.
Old-fashioned cookie cutters make awesome 
Christmas Tree ornaments. Just insert a ribbon.

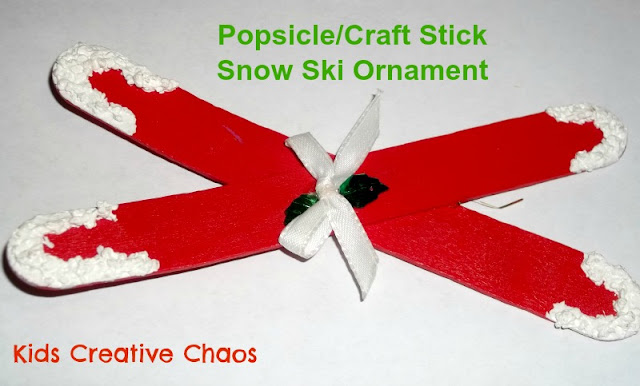
Ski Craft for Kids
Homemade Craft Stick Snow Ski Ornament Craft.
Perfect After-school or Scout project.

My Mother and Aunt used to make an ornament for all the cousins every Christmas. My Aunt made lots of crafts in 4-H programs. This one is a favorite that stood the test of time. 

Just paint two craft sticks with acrylic paint, hot glue them in the mid-point forming an "x", apply fake snow or white glitter paint to each end, and decorate with a bow. Holiday Snow Ski Ornament is a great Christmas craft idea for kids.


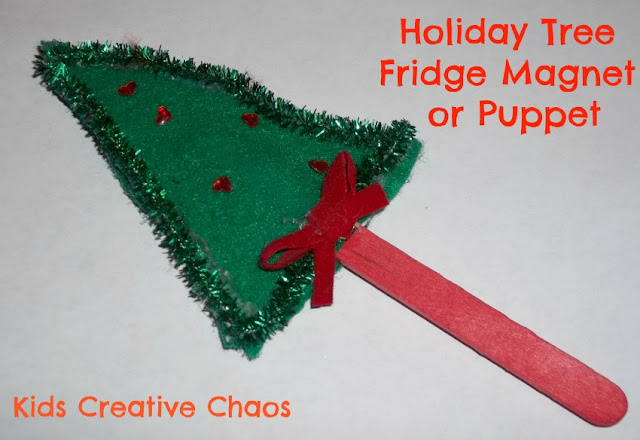
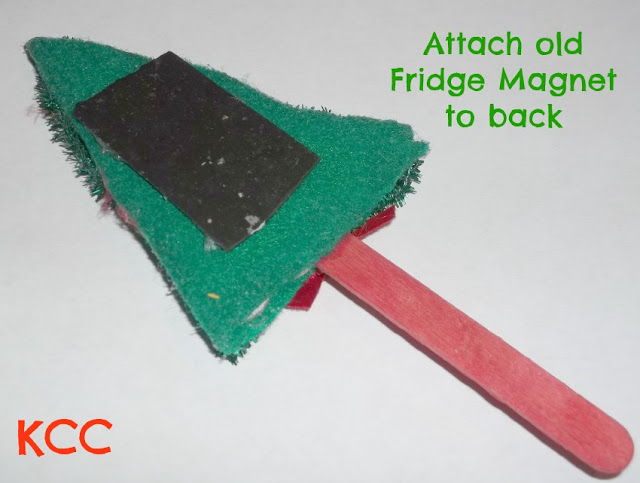
Christmas Tree Craft Stick Fridge Magnet or Holiday Puppet.
Homemade Christmas Tree Craft Stick Fridge Magnet or Holiday Puppet.

Get preschoolers and elementary kids crafting with this simple holiday decoration. I cut out two of various holiday shapes: Triangles, Circles, Stars. Then, place a popsicle stick between the layers and glue the edges together. 

Collect old advertiser fridge magnets, cut them up and repurpose them. You can attach to the back with tacky glue or glue between the layers to hide the magnet. 


A red triangle and pink circle make a great Santa Face. Let the littles decorate the ornaments with glitter, star stickers, and pipecleaners. Place low on fridge and let the little use them to make a holiday puppet show or give as gifts to the Grandparents!  :-)


Homemade Christmas Decoration Fridge Magnet
Homemade Christmas Decoration Fridge Magnet.

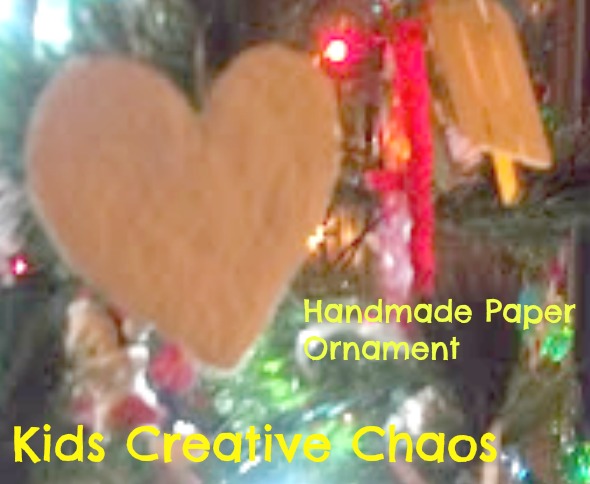
DIY Handmade Paper Pulp Heart Christmas Tree Craft Ornament
DIY Handmade Paper Pulp Heart Christmas Tree Craft Ornament.

Here is a fun link explaining how to make these ornaments or plantable paper seed cards. Great gift idea! My high school Art teacher (the spark of my creativity) gave these as gifts one year. 


Recommended Reading:

Christmas Party Games 

Heirloom Ornament Ideas for Tree

Little Christmas Decorations to Knit and Crochet*


ADS DISCLOSURE: We've partnered with some wonderful advertisers who may sponsor blog posts or send us samples to test. Some companies pay us to review their products.

*We also use affiliate links, if you make a purchase we get a tiny commission. Kids Creative Chaos participates in the Amazon LLC Associates Program*, an affiliate advertising program designed to provide a mean for blogs to earn advertising fees by linking to Amazon properties, including, but not limited to, amazon.com, endless.com, myhabit.com, smallparts.com, or amazonwireless.com. We also offer Tapinfluence, Google Adsense, SoFab, and Izea ads here. Thanks so much for helping us keep the lights on! :)


Jake's Art - Homeschool Weaving Lesson - Make your own Loom - DIY Arts and Crafts

How to make a loom for weaving scrap fiber: A Homeschool Art Lesson

Jake's Journey in Art goes under the sea in this DIY weaving Homeschool Art Lesson we learned to Renew. Enjoy!


How to weave for elementary make your own loom
Our loom has both warp and weft framework to better illustrate 
the concept to young children.

To weave a textile, threads (or scrap fabric) are woven on a frame called a loom. The first vertical threads on the loom are called warp threads. Threads that are woven horizontally in and out of the warp threads are called weft threads.


Cut notches in the cardboard frame to keep yarn in place.

Recycle a piece of cardboard from a cereal box or a foam tray to make your loom. You might also like Native American Paper Bag Dress

Cut small notches into the top and bottom of your cardboard(ours are about 1/2", but 1" works well). Make them about 1/2" inch apart. Alex Toys has a great PDF on weaving here.


Spongebob Fabric for Toddler bed tent.

Warp your loom with yarn or string by taking the thread and taping one end to the back middle of your board.  Now, starting with your first notch on the left, begin wrapping through each top and bottom notch without skipping a notch until you get to the right side of the board.  Only the warp frame is required.

Now your are ready to weave your weft. Cut or tear scraps of fabric into strips. Your strips of fabric should be about 1" thick and at least 12"  long. You will need about 20 strips. 


The cat enjoyed the tearing of fabric strips so much 
he needed a nap after playing with them.

For extra ease for smaller children, we added a weft frame as well. Now the scraps of fabric can be pulled through the little squares for guidance. Pull your scrap fabric under the first warp, over the next, and so on. The yarn guide will help younger children see any mistakes made.

When you have completed your weaving tie off all scraps in groups of two at the edges of your cardboard loom, then you can cut your your thread/yarn framework.


How to make a loom - Elementary Weaving Lesson Scrap Fibers Make your own
Spongebob has his eye on you.

This is an easy way to get littles started in weaving. It is also helpful to cut a piece of cardboard about 1" by 3" with a notch in the end. Attach your scrap fabric by inserting it in the notch and use as a tool to weave the fabric through the loom, this is called a shuttle.


Alex Toys Native American Bead Loom Kit for weaving bracelets.

Once you advance your skills, you can weave many beautiful projects. Alex Toys has a Native American Loom for weaving bracelets.  It is a professional quality loom that makes incredibly authentic bracelets.  We are working on our patterns and will share them soon.


Kid's room cartoon character theme (that way we don't have to worry about matching or new fads).Check out the automobile sun visor we used as a headboard. 
It is simply nailed to the wall.

Jake loved the idea of using his toddler tent cover as scrap fabric for this project. We renewed an item that was dear to his heart. It had been ripped from rowdy play and was no good as a tent, but we saved it anyway in hopes to repair it or transform it into a pillow or some other creative endeavor. The SpongeBob fabric was the perfect accent for his room. 


Yep, we need a hanging stick, but the kids love it.  
Use favorite t-shirts, pillow cases, or doll clothes for your scrap fiber.

To display your beautiful work of art weave a "weft" stick horizontally through the top row and hang on a wall.  Jake loved his creation and couldn't wait for the stick. He wanted to see how it looked right away, so we hung it by a nail. A little droopy, yes, but he loves it.

Did he love the process?  Not so much.  Much patience is a necessary requirement of weaving. So, Mommy made the loom, got it started and Jake weaved the inner pieces to gain an understanding of the process.  Mommy tied and cut it off making sure Jake watched and understood. This is somewhat time consuming, but the end results are worth it.


Mayhem saw the weaving on his wall and wanted it for her room. Score! This project journey ended on a very happy note.   


Recommended Reading:


Learning How to Weave*

Party Time: SpongeBob SquarePants*


ADS DISCLOSURE: We've partnered with some wonderful advertisers who may sponsor blog posts or send us samples to test. Some companies pay us to review their products.

*We also use affiliate links, if you make a purchase we get a tiny commission. Kids Creative Chaos participates in the Amazon LLC Associates Program*, an affiliate advertising program designed to provide a mean for blogs to earn advertising fees by linking to Amazon properties, including, but not limited to, amazon.com, endless.com, myhabit.com, smallparts.com, or amazonwireless.com. We also offer Tapinfluence, Google Adsense, SoFab, and Izea ads here. Thanks so much for helping us keep the lights on! :)

S.I.M.P. Squirrels in My Pants: Disney's Phineas and Ferb the BEST Live Tour Ever

What Does SIMP stand for? Ask Phineas and Ferb!

So, the show started out odd. I mean, way odd. We drove in only 45 minutes early and got a parking space directly across from the stadium for only $5, and it was nearly empty. That can't be good- right? I said nothing.

Banker's Life Fieldhouse.


My eight-year-old son feared Phineas and Ferb would just be people in costumes, so when the girl came out to prep the crowd he said, "Hey, this might not be so bad after all; I like it."  

I said nothing. 


She asked trivia, had them singing and dancing, and got everyone psyched- including Mr. Downer.


Getting psyched pre-show.


Then, a cartoon came on- Mr. Downer said, "Hey, this might be okay. I didn't know it was a movie."  

Again, I said nothing.
Phineas and Ferb for real.


Phineas and Ferb slid onto the stage straight out of the movie. Mr. Downer crossed his arms over his chest and said, "See! I was right after all. This is going to be dumb just like I said."

I said nothing.


We love Perry the Platypus.

But, when Perry and Dr. Doofenshmirtz hit the scene, I caught him leaning forward in his seat and smiling, of course; I said nothing.


Perry was a hit. Did I mention, we just love Perry?  Anyway, all was going well until a mash-up scene with giant beach balls golf balls. The entertainers actors tossed the balls out into the crowd. 

How fun! Everyone cheered and Mr. Downer smiled, but so did Daddy. He was having the best time; he sang all the songs; he batted the ball that finally came to our seats... did I mention he was having a great time?

Stupid Daddy, he batted the ball away. Mr. Downer was excited to hit it. It was clearly the highlight of the show. Little sister, Mayhem stood in her chair, and Daddy was oblivious. That was that; the ball never came back to us.

Sister cried and put her head under her chair. Brother crossed his arms over his chest and said, "That was the worst show ever!"

I said nothing, but I scowled at Daddy. He shrugged his shoulders, "What? I thought it was going to hit them on the head." Giant, cushy balloon Daddy, poor excuse.
Final Scene with lots of fun confetti.

Confetti, magical confetti. Did you know it has healing properties? Even as they tried to kick us out the kids collected confetti.


Oh, the confetti.
So, what was your favorite part of the show?  "I liked the confetti!"  Well, that's fair, I mean they spent a lot of money on the Monster Truck, performers, and those Squirrel Pants were pretty funny, (I'll be singing that song forever: "S-I-M-P. Squirrels in my pants. I've got squirrels in my pants.") but if you liked the confetti who am I to judge? 

Oh, wait. I only thought that; what I said was... 


Nothing.


Ringling Brothers Dragons.

Can't wait for Disney on Ice, Worlds of Fantasy with
Lightning McQueen and Buzz Lightyear.  

Bring a fat wallet for party favors.


The show was a little long for little ones, and it was a school night. Many seats were empty, but I think everyone must have been at the COLTS game. I mean, I liked the show. I thought it was fun. You should go- just don't let your Dad come.


Recommended:


How to Make Clay: Air Dry Clay, Homemade Clay Recipes for Home School Art Project

How to make clay is simple: Here are some recipes.

We've been crafting with Air-Dry clay. We purchased a clay kit and then we also made our own clay at home. It can be used with a Potter's wheel or shaped into free forms for home school art projects. Enjoy!

How to Make Clay: Air Dry Clay and Homemade Clay Recipe Home School Art Project
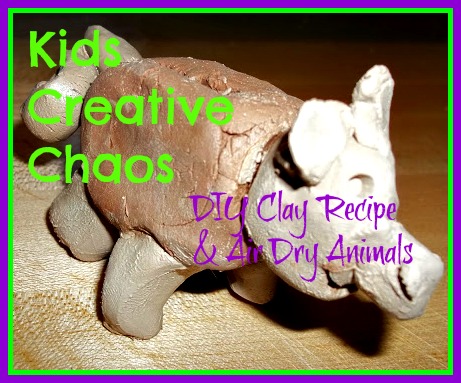
Air dry clay pig and diy homemade clay recipes.


Attach pieces by adding a little water to each piece. This is Jake's Pig (From Jake's Journey in Art). He enjoyed playing with the clay just enough to complete the assignment.


Alextoys.com sells boxes of air dry clay refills perfect 
for your animal  sculptures.

Clay is wonderful for Sensory play. In the homemade recipe below, just add some scented oils like vanilla or cinnamon.  TOUCH, SMELL, TASTE (I don't recommend it), SEE- hmm... When it dries you can gently tap it onto the table for SOUND encompassing all senses or get CREATIVE and make a rattle/maraca or a base for a drum just stretch tissue paper over the top and attach with a large rubber band.


Mayhem made many animals and embellished each one.


 Get your Air Dry Clay Refill Pack  by Alex Toys.


The baubles in the photos above came with the air dry clay refill for the pottery wheel from Alex Toys.


How to make Homemade Clay Recipe:


Click here for how to make clay without cream of tar tar


Easy/recommended for preschool and early elementary


1 cup flour
1 cup water
2 tsp cream of tartar
 ¼ cup salt
1 tbsp vegetable oil
food coloring (optional)

Combine all ingredients in a medium-sized pot. Decide on a color  for the clay. Cook over moderate heat, stirring constantly. The dough will eventually become difficult to stir, and it will stick to the spoon. At this point, dump the dough onto wax paper. Allow it to cool for at least 15 minutes, and then knead it until it is smooth. Store the dough in a plastic container or a plastic bag when not in use. Refrigerate the clay when not in use.


Homemade Clay can be painted and it will last for years to come. Make cute Holiday Gifts: Think napkin rings, 3D wall hangings, necklace medallions, trivets, and pretty catch-all bowls.


Looking for Toddler or Preschooler Activities? 

Try this:  Sensory Dough playtime Activities.

Recommended Reading:

Craft a Minecraft Marshmallow Pig

Happy Pig Day! *

If You Give a Pig a Pancake*


ADS DISCLOSURE: We've partnered with some wonderful advertisers who may sponsor blog posts or send us samples to test. Some companies pay us to review their products.

*We also use affiliate links, if you make a purchase we get a tiny commission. Kids Creative Chaos participates in the Amazon LLC Associates Program*, an affiliate advertising program designed to provide a mean for blogs to earn advertising fees by linking to Amazon properties, including, but not limited to, amazon.com, endless.com, myhabit.com, smallparts.com, or amazonwireless.com. We also offer Tapinfluence, Google Adsense, SoFab, and Izea ads here. Thanks so much for helping us keep the lights on! :)


Things to do with a Box: Homemade DIY Disney Perry the Platypus

How to make a Perry the Platypus Costume for Halloween

Got a box? Got an hour? Make a homemade costume for creative play, trick or treating, or a fun spontaneous parade. We saw an episode of Phineas and Ferb and Candace was wearing a Perry Costume. We had to make our own Perry the Playtpus Homemade Costume for Halloween. Enjoy!


This post contains Amazon Affiliate links.


diy how to make a perry the platypus costume for halloween
Perry the Platypus costume to make at home.
So, I was surfing Facebook and caught this photo of Candace dressed in a Perry the Platypus costume, and I immediately knew I'd be recreating it for the blog. What a great idea for creative play- Box recycling. I mean, who doesn't love a box?


Candace as Perry the Platypus.
Who indeed? Of course, the family cat loves a box.


How to make a Perry the Platypus Costume

First, I grabbed an old box. Then, I tried to match Perry's teal color with paint I had on hand. I got a drab teal by mixing blue + white + a dash of red.


I didn't want to go to the store. It was hurricane weather- even Indiana was cold and windy. So, I searched my stash of junk and found old paper plates, squished turquoise crepe paper garland, Styrofoam circles, and lucky me an old, beige fedora!


Start by taping an end to the back, and then line glue all around 
and attach the crepe paper.
Paint your beak orange.
Paint a mouth on one side.
Attach paper plate beak to inside with tape.
Cut out paper eyeball and wrap crepe over for eyebrows.


Finally...


  • Insert kid as Candace. 
  • Find Phineas and Ferb Friends. 

This took a couple of hours. Of course, you can always save time or effort and choose to buy costumes from fancy costume shops online such as kigurumi.co. but I loved that we had everything on hand and could recycle my craft supplies. Full Disclosure: I ran out of crepe, so I made sure to cover the front and let the sides go with just paint.


Recommended:


Phineas, Ferb, and Perry Fun Free PDF Activity Book


How to Make a Phineas Mask

No Sew Nativity Costumes


Disney 18" Perry, Folding Plush Pillow

Phineas and Ferb Reader #2: Perry Speaks! (Level 3)