Showing posts sorted by relevance for query paint. Sort by date Show all posts

Painting with Scissors Simple Cut Outs Matisse Abstract Art Project

 How to Paint Like Henri Matisse


Henri Matisse was best known as an abstract artist. He aligned himself with a small group of artists known as Fauvists or Wild Beasts. Unlike other painters during this era, he painted with bold colors and took risks with his art. Matisse called his cut paper art posters, painting and drawing with scissors  So, how do you paint like Henri Matisse?  With paper cut-outs, of course.

This post contains Amazon and other affiliate links for your convenience.

How to Paint Like Henri Matisse with Paper Cut Outs
 

The Cut Outs or Painting with Paper are part of the Matisse Jazz Series. Matisse created a few artists’ books, many were made in 1941 after he suffered with intestinal cancer. With this technique, he was able to stay in bed and still create art. 


Henri Matisse Paper Cut Outs Video for Students.


The painting of the figure with stars around it is one of the most well-known in his Jazz series. The book is made up of circus and theater theme posters made with cut and pasted brightly colored papers that are printed using a stencil technique known as pochoir. Most of the images in the Jazz series are done in primary colors. 

You may have seen a similar cut paper technique in a series of children's books painted and illustrated by Eric Carle. Carle was influenced by the works of Matisse and other abstract artists. Here's an art lesson on Eric Carle. You can also experiment with Eric Carle's technique of wet paper illustration with this lesson, how to paint like Eric Carle.


The Loyalist - Painting with Scissors Simple Matisse Abstract Art Project


With his cut paper art, Matisse invented a new form of art, the cut-out. He called this new art form drawing with scissors. He cut out various geometric and organic shapes and arranged them on his gouache painted canvas to illustrate his books. He also hand wrote about each image in cursive rather than using a type setting. This style is similar to today's scrap booking. You can create your own book that has meaning to your life with this simple, inspired by Matisse, technique.


Paint Like Matisse


Supplies Needed:

Mixed Media Paper,18 x 24"
Tempera or Acrylic Paint in primary colors
Wide Paint Brush
Brightly Colored Copy Paper
Glue Stick
Subject Matter that is Meaningful 


We decided to take inspiration from the Jazz poster's cover painting. Using the same primary color scheme, we added secondary colors in orange and violet. There are not lines or any drawing on the art work; everything is done in paper cut outs. Remember, it is abstract art! Use shapes and meaningful colors to represent your subject matter. Our paper painting represents a family pet. Our Cockatiel, Nebu, died at the age of twenty-three. Squinting your eyes while looking at a cockatiel will allow you to see his basic features, yellow spiked crest and orange cheek. The heart represents how close he was to our hearts, and the violet squiggles represent his wings in motion. They can also represent a flutter or the beating of his heart.


pictureofamalecockatielpetpaintlikeHenriMatisse


While you're planning your design think about the Elements of Art and the Principles of Design. How many can you use? Ours has color, line, shape, space, balance, movement, contrast, emphasis, and harmony. Do you see more? In the comments below, tell us what you see.

MATISSE ABSTRACT ART LESSON PLAN

Painting with Scissors and Paper Cut Outs:  How to Paint Like Henri Matisse

Step one:  Come up with a subject matter that means something to you.
Step two: Sketch it out in your sketch book.
Step three: Think about it in an abstract way.
Step four: Do a thumbnail sketch changing your drawing into basic shapes.
Step five: Paint your paper background in a primary color or black.
Step six: Cut out your shapes.
Step seven: Arrange your shapes on the paper. Think about the Principles of Design, especially balance and unity. Shapes should be abstract, and it shouldn't be immediately obvious what the picture represents (not realistic.) See our student examples below. No drawing! Remember, you are painting with paper.
Step eight: Paste them into position. Tip: Do not use school glue, it bubbles up. Glue sticks work best.
Step nine: That's it! It's that simple to paint like Henri Matisse!

These are student examples from the NCHS Intro to 2D Art class. You may not use these images or reproduce them anywhere else. They are for educational purposes only.


If you want to try this project with preschoolers or elementary students, you may also like to add some books to your Matisse art lesson plans. The books below make excellent companion books for a lesson on Henri Matisse's painting with scissors abstract poster series. Don't forget to read your students some Eric Carle books and remind them that he was influenced by Matisse.


Recommended Reading:

Henri's Scissors Children's Book 


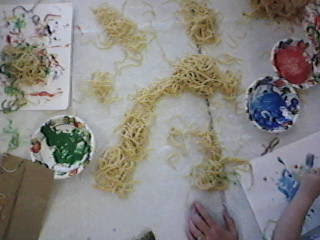
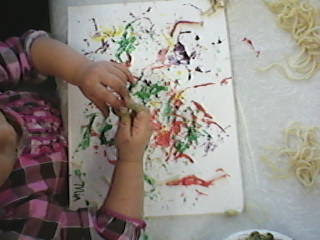
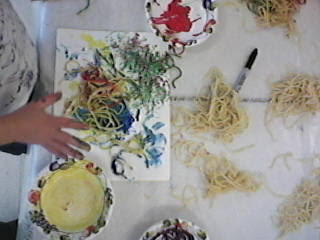
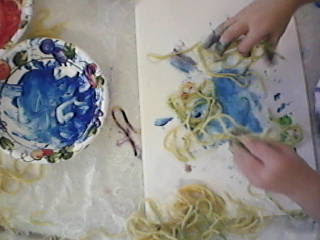
Edible Art: Sensory Play Paint with Spaghetti with Toddlers and Preschoolers

From our Sensory Play Messy Class for Preschoolers and Toddlers: Worm Painting with Spaghetti and Edible Paint Art

Sensory Play is a great way to help preschoolers learn. It also helps with disorders of the Autism spectrum when the child is allowed to explore the subject matter on their own without being pushed. This activity is messy, squishy, fun, and even edible! Enjoy!


Sensory Spaghetti game for kids and preschoolers.
Getting Started with Cooked Spaghetti
Spaghetti Painting or Worm painting
Inspired Modern Art. Worm Painting?


Sensory Play Edible Art Painting with Spaghetti for Preschool and Toddlers

Spaghetti Painting for Edible Art and Sensory Play.
Spaghetti Painting for Edible Art and Sensory Play feels like worms.

How to Make Spaghetti for Sensory Paint Play

  • Cook up a batch of Spaghetti
  • Strain it and pat it dry
  • Mix some Edible Paint (Vanilla Pudding Paint with Gel food coloring works best with the Noodles but you can also try kool-aid paint and  milk paint for other projects.)
  • Prepare to get Messy!
  • Swirl the Spaghetti in the paint, then onto your paper.
Since most in the class are toddlers, I paraphrase the words to get thru it quickly, paying a lot of attention to the photos and asking, "What is that?".  We paired this with the Children's Book, Cloudy With a Chance of Meatballs


Next, I gave each child a spaghetti noodle to study. Then, we stood up pretending we were squigly spaghetti noodles. Oops, spaghetti can't stand up, so we fell to the floor and squirmed like worms. We finished up with a game of Duck, Duck, Goose but why not try Worm, Worm, Catepillar?

Painting was a huge success. The sticky spaghetti is so fun, enjoy!

Recommended Reading:

Cloudy with a Chance of Meatballs

Worm Birthday Party Favors

Healthy Spaghetti Recipe

Worm Birthday Party Activity

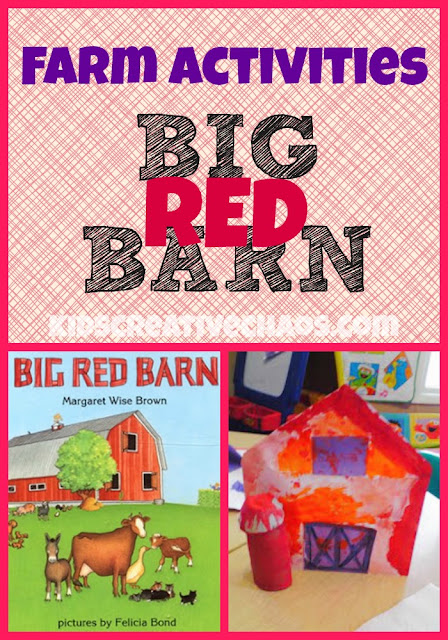
Farm Craft Fun with The Big Red Barn by Margaret Wise Brown

Make a Papercraft Barn for "The Big Red Barn" by Margaret Wise Brown 

This is a fun way to teach children about farm animals. Here is a simple craft for Preschool Curriculum: Make your own Big Red Barn and Silo with a paper envelope and cardboard toilet roll tube. Enjoy!


Farm Craft Fun Activities The Big Red Barn by Margaret Wise Brown
Farm Craft Fun with The Big Red Barn by Margaret Wise Brown.

We made this project in our Messy Class. What better way to make a mess than red paint?

Big Red Barn Activity Craft for preschool kids Margaret Wise Brown Farm Fun Cow
Big Red Barn Preschool Papercraft.

How to Make a Big Red Barn Paper Craft


You will need:

Greeting Card Envelope

Cardboard Toilet Paper Tube
Paint (Make your own Edible Recipe Here or Water Color Paints)
Cardboard Egg Cartoon
Markers
Construction Paper or Magazine
Glue (Make Edible Paste Recipe Here)
Margaret Wise Brown's The Big Red Barn Book


The Big Red Barn By Brown Farm Crafts and Activities
Perfect preschool Farm Book: The Big Red Barn.

Step one: SENSORY SKILLS
Open the flap on your envelope so it points to the ceiling when standing as pictured.

Step two: SENSORY SKILLS
Paint your envelope red or your favorite barn color. (Remember it is important to let little ones make choices.) Paint your Cardboard tube to match.
Cut out and Paint one egg carton cup with a contrasting color.

Step three: FINE MOTOR SKILLS: CUTTING 
While the paint is drying use construction paper or pictures from magazines to cut out animal shapes. You can trace the animals in the story on white paper and use them as shape templates for your littles to trace. Also, cut out barn doors.

Step four: SENSORY SKILLS
If you make your own edible glue this is a super fun, sensory experience. Paste doors onto barn as pictured. Attach Egg Cup to Cardboard Tube (SILO) and attach silo to envelope. You might want to add a piece of folded tape to secure the silo.

Step five: CREATIVE PLAY SKILLS 

This is my favorite part! Place your animal shapes in the envelope, read the story, and remove the animals making animal sounds as they appear in the story. 

Find a fun Snack for Goodnight Moon.


Recommended Reading:

Books about Farms for Kids: Little Blue Truck Board Book*

Big Red Barn by Margaret Wise Brown*

Margaret Wise Brown Ideas from Mommy and Me Book Club.*


Tip: Our Favorite Edible Paint Recipe is MILK PAINT.


ADS DISCLOSURE: We've partnered with some wonderful advertisers who may sponsor blog posts or send us samples to test. Some companies pay us to review their products.

*We also use affiliate links, if you make a purchase we get a tiny commission. Kids Creative Chaos participates in the Amazon LLC Associates Program*, an affiliate advertising program designed to provide a mean for blogs to earn advertising fees by linking to Amazon properties, including, but not limited to, amazon.com, endless.com, myhabit.com, smallparts.com, or amazonwireless.com. We also offer Tapinfluence, Google Adsense, SoFab, and Izea ads here. Thanks so much for helping us keep the lights on! :)


Plan a Ladybug Picnic Party & Learn about the Ladybug Life Cycle too!

A Ladybug Picnic Party is a Fun Way to learn about the Ladybug Life Cycle

Spring and Summer are the perfect time to throw a Ladybug picnic or Ladybug theme birthday party! We love to sneak in educational elements whenever possible, so we've come up with some fun Ladybug activities and added an educational one too. Learning about the Ladybug's life cycle is fun - Scroll down to find more Ladybug learning activities from Teaching Mama. Enjoy!


Plan a Ladybug Picnic Party & Learn about Life cycle too!
Plan a Ladybug Picnic Party and Learn about the ladybug Life cycle.
Online, you will find lots of different Ladybug tic tac toe games. Some are made of construction paper, others use painted rocks, blocks of wood, or even sticks.

Ladybug and Bumblebee tic tac toe and checkers game with walnuts
Collect walnut shells and paint them like ladybugs and bumble bees
for Tic Tac Toe and Checkers games.

We enjoy taking hikes around our property. It is like our very own nature park. So, on a recent hike, we collected broken Walnut shells to paint like Ladybugs and Bumble Bees in honor of the book, Ladybug Girl and Bumblebee Boy!

These are so cute and perfect to leave sitting out for an impromptu game of Ladybug Tic Tac Toe or Checkers. 

Ladybug Girl and Bumblebee Boy Party
Ladybug Girl and Bumblebee Boy Party.  Want your own? Let us know in the comments.
Just store your bugs in a woven basket, and leave them sitting on a table or bench as an invitation to play. We tossed in sidewalk chalk, so that kids can make a board anywhere they want! Sticks make a perfect natural Tic Tac Toe board.

Make and play Ladybug Tic Tac Toe and Checkers
Make and play Ladybug Tic Tac Toe and Checkers.
Playing games are a great way to build friendships and teach about compromise too! Read the book, LADYBUG GIRL AND THE BUMBLEBEE BOYthe theme is “friendship and compromise.” 

In the story, Lulu and her dog Bingo meet up with Sam on the playground and want to play together. Sam likes the sandbox but Lulu thinks the monkey bars are better. They just can’t agree…until Lulu asks, “Have you ever played Ladybug Girl?” Quickly, Sam becomes the brave Bumblebee Boy, and he and Lulu, a.k.a Ladybug Girl, are superheroes who save the playground from scary monsters and mean robots. New friends want to join their game too, and soon the Bug Squad is formed with Ladybug Girl, Bumblebee Boy, Dragonfly Girl, and Butterfly Girl using their imaginations to keep the playground safe.

make a Ladybug Tic Tac Toe game.
Gather walnut shells, paint, and brushes to make a Ladybug Tic Tac Toe game.

Paint walnut red to make a ladybug game.
Paint walnut red to make a ladybug.

Paint walnut yellow to make a bumblebee game.
Paint walnut yellow to make a bumblebee.


Hop over to Teaching Mama to print a ladybug life cycle printable activity the kids can make at the party!

Ladybug life cycle printable get details at TeachingMama.org
Ladybug life cycle printable available at TeachingMama.org

This is one of my all time favorite Sesame Street Videos: Ladybug Picnic.


Don't forget to leave a comment to enter to win Ladybug Girl items for your own party!


Recommended:

Ladybug Girl and Bumblebee Boy*

Things to do with Walnuts

Paper Ladybug Tic Tac Toe Valentine

Frog Birthday Party Ideas 


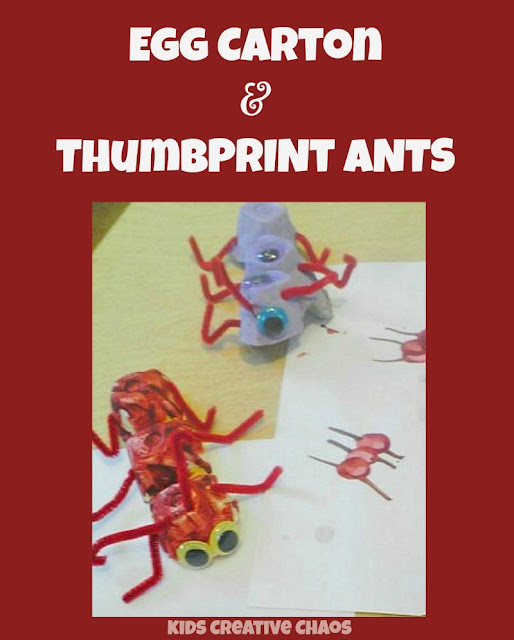
Egg Carton Ants Art Craft

How to Make Egg Carton Ants Craft

We love to make something from nothing! Perhaps, one of the first recycled craft projects (just behind the milk carton house) was the egg carton ants art craft. These cute little ants are fun for preschoolers to make, but they also work fine motor skills. So, what are you waiting for? Grab your egg cartons and get ready to make some ants. We've added a few more ant art ideas, so keep scrolling and Enjoy!

This post contains affiliate links for your convenience.*


Ten Easy Sensory Play Activities for Children

Easy Sensory Play Activities for Kids

Squishy, slimy, cold, hot, ooey, and gooey are a just few good words to describe Sensory Play Activities which help children of all sorts, but especially those with Sensory Processing Disorders. Enjoy!


sensory play activities for preschool and processing disorders
Sensory Play Based Learning Activities.

Splat! Release your inner Pollack:
Put on an old shirt, attach old white sheets to the walls and floors and get splatting. Don't be worried if it takes your child a while to warm up to the idea. Let them watch you or other kids enjoying the activity; before you know it your child will ease into the action. Some kids just like to watch. Their eyes are processing!


Wet! Release your inner Monet:

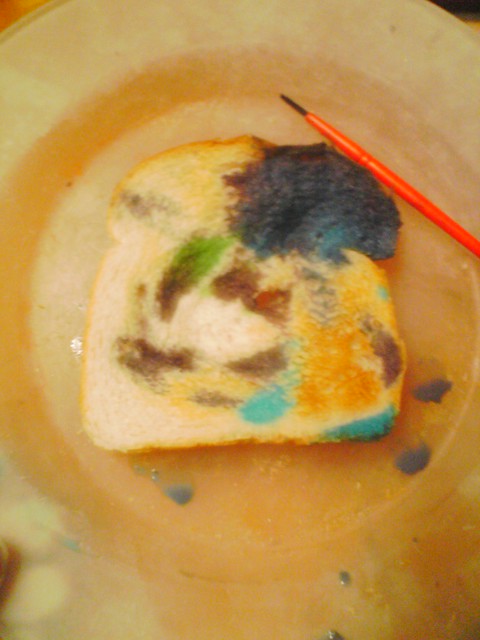
Play with your Food and Paint it with Milk Paint.


Milk paint on toast is fun edible art.
Milk paint on Toast. It is fun to eat!

Pound! Pretend You're a Chef:
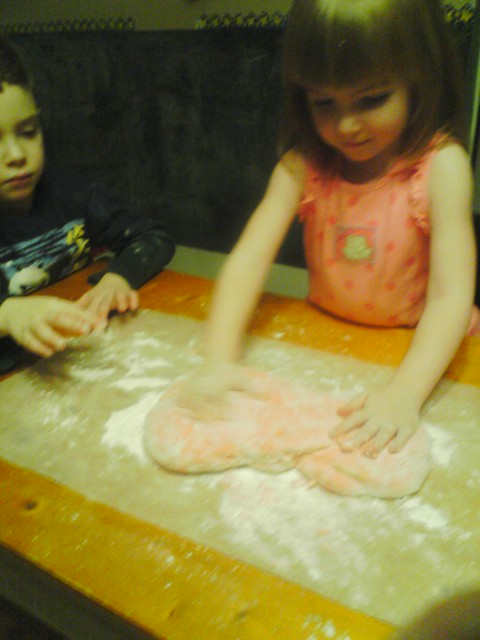
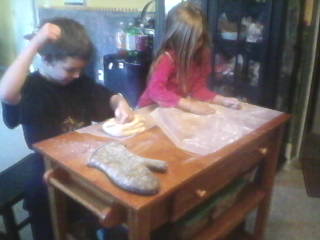
Bake some Homemade Pizzas or Dough-nuts ~Donuts then pound, roll, and flatten. Even everyday family activities can be sensory play.

Sensory Play with Baking Activities
Pound a pretzel.
Sensory Play with Baking Activities
Baking is the oldest form of sensory play.

Slimy! Sensory Egg Sparkly:
Decorate them, crack them, and eat them. This is a virtually mess-free way to decorate eggs for those who have issues getting their hands dirty. Try to touch the eggs and compare and contrast the un-decorated egg versus the one with sparkle. How does it feel?


Decorating Eggs is a Sensory Activity.

Bump! Baby Boppers:
It's like Sumo Suits and Bumper Cars all rolled into one.
Bounce into your buddy or roll around on the ground- bet you 
can't get up by yourself! We got these at orientaltrading.com 

Bopper Inflatable Bumper Cars
Bumper Rings.


Cold! Shaving Cream:
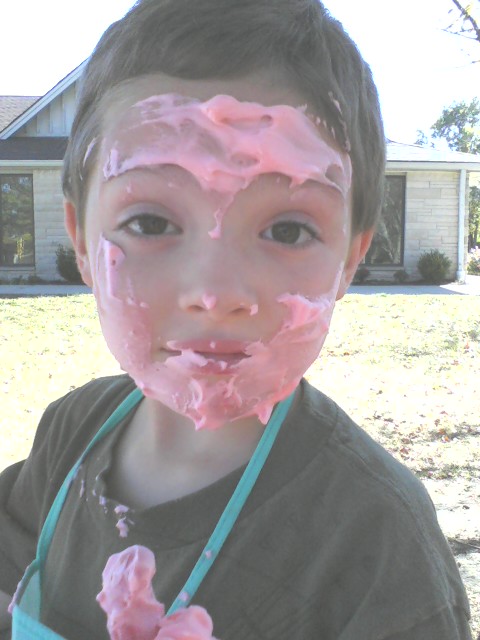
Shaving Cream, Food Coloring, and the Great Outdoors what could be better? I know, Cool Whip and Food Coloring. It works great as Sidewalk Paint too.


We made a shaving cream cake in our Messy Play Class for preschoolers.

Blow! Marshmallow Sensory Fun: Squishy, Soft, Suck in through a straw, Hold, Drop into a cup. Times Up ~ Most in Cup Wins.

Squish! Sensory Spaghetti with Edible Paint

Sensory Spaghetti Play Ideas

Think! Creative Play:  
Gone Fishin' with Rainbow Fish
and Ziploc Aquarium Squishy.


Things to do with Pool Noodles
Pretend to fish with Pool Noodles.


Packing Peanuts Sensory Play Activities
Packing peanuts are fun, but please be careful and never leave a child unattended. They are a choking hazard and if left alone, a child could suffocate in a large pile.


Tickle! Packing Peanuts:

More fun than a ball pit. Play in them or make a Snowy Craft.


Sensory Play Activities with Shaving Cream
Bearded with Shaving Cream Fun.


Recommended Reading:


ADS DISCLOSURE: We've partnered with some wonderful advertisers who may sponsor blog posts or send us samples to test. Some companies pay us to review their products.

*We also use affiliate links, if you make a purchase we get a tiny commission. Kids Creative Chaos participates in the Amazon LLC Associates Program*, an affiliate advertising program designed to provide a mean for blogs to earn advertising fees by linking to Amazon properties, including, but not limited to, amazon.com, endless.com, myhabit.com, smallparts.com, or amazonwireless.com. We also offer Tapinfluence, Google Adsense, SoFab, and Izea ads here. Thanks so much for helping us keep the lights on! :)


Jake's Journey in Art: Homeschool Printmaking Lesson with Foam Trays and Pencils

Homeschool Art Lesson in Printmaking

Jake's journey in art focuses on REUSE. Make your own prints with foam trays in this fun Printmaking lesson. This homeschool art lesson requires only a few supplies making it perfect for homeschool. Enjoy!


Reuse Foam Trays for Printmaking
Animal Prints with Foam Trays Piggy Art.

What fun! This is an incredibly easy way to teach the art of printmaking to young children. The assignment required choosing an animal to draw and first drawing it on paper by looking at the image upside down. If you draw an image upside down, you tend to focus less on the end product and more on each individual line. 

The idea is to make drawing perfectly less overwhelming, when turned right side up, it magically becomes a great drawing!


Homeschool Art Project How to make your own Prints with foam veggie trays
Printmaking Lesson: Messy Craft with Paint and Prints.

Hmm... Great theory. Jake drew his pig by copying the image with the right-side up, then he proceeded to complain profusely about how everyone's drawings were better than his. It took a great deal of coaxing to get him to draw the picture upside down. He felt it was a waste of time and "stupid". 

The battle ensued, he tried it, and the results were similar. That's good news and good news, I think. The good news is he tried it, saw it worked, and wasn't stupid, and the good news is he draws pretty good either way.

You will need: 
Foam Trays, Pencil, White Paper, and Acrylic Paint.

First, draw a picture of an animal on a piece of paper. Remember, if you are looking at an image, turn it upside down and draw it upside down first. Now, turn your image around, and check out your handi-work. This is practice.

The next step is to "draw" the image onto a foam tray. Make sure to press down hard to make a deep indentation into the foam. Now, cut the edges off your foam tray so it is a flat surface. It needs to be completely flat to make the print.


Lightly paint your foam image. You can use one color or several. Make a practice print on paper to remove some of the excess paint.

Then, carefully place your foam tray paint side down onto a clean sheet of paper. Press firmly, but do not move the tray or the image will smear. With a finger or hand on each end of the tray, carefully lift it from the paper to reveal your beautiful print. Wipe the tray clean, and experiment with new colors. 


Once they started making prints they didn't want to stop!

Tip:  The best prints are the ones made as the paint is starting to wear off the tray. This is a great way to make holiday or birthday cards. You can also cut them out and frame them as Christmas gifts.


Recommended Reading:


Kids Creative Chaos Cooks: Kitchen Kids Series: Holiday Recipes*


ADS DISCLOSURE: We've partnered with some wonderful advertisers who may sponsor blog posts or send us samples to test. Some companies pay us to review their products.

*We also use affiliate links, if you make a purchase we get a tiny commission. Kids Creative Chaos participates in the Amazon LLC Associates Program*, an affiliate advertising program designed to provide a mean for blogs to earn advertising fees by linking to Amazon properties, including, but not limited to, amazon.com, endless.com, myhabit.com, smallparts.com, or amazonwireless.com. We also offer Tapinfluence, Google Adsense, SoFab, and Izea ads here. Thanks so much for helping us keep the lights on! :)