Showing posts sorted by relevance for query jake's journey. Sort by date Show all posts

Homeschool Folk Art Lesson: Paper Craft Quilt Squares (Jake's Journey)

Make a Chicken or Rooster quilt square pattern with construction paper


We are officially chicken farmers! So, in this edition of Jake's Journey in Art we incorporated our Silver Wyandotte Chicks into the homeschool art project

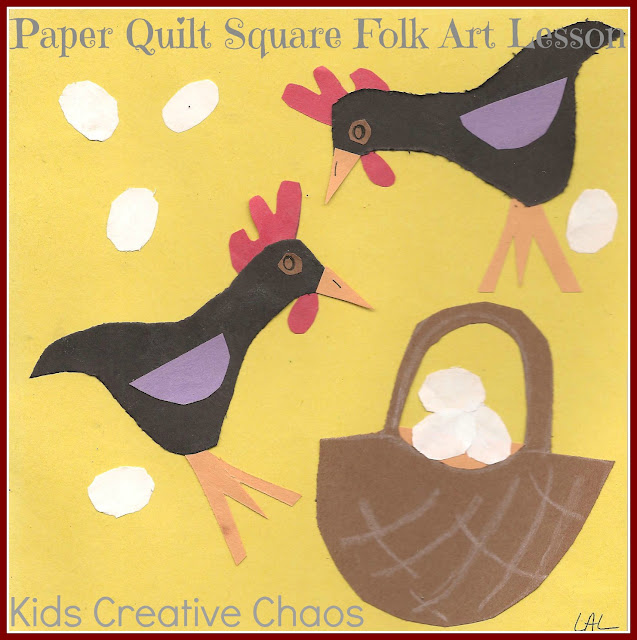
This paper craft is a pattern for an 8 x 8 quilt square. The assignment was to design a quilting pattern with shapes, colors, and a nice layout picturing a favorite activity. These squares depict egg collecting. You can cut simple shapes like these for your preschoolers or early elementary students and see what they create. Cartoon Chicken


Homeschool Folk Art Lesson Easy Paper Craft Quilt Squares Jakes Journey
Construction paper quilt square patterns.

When a bunch of people get together to make a quilt it is called a quilting bee. Quilts have been an important part of history. One of my favorite books is by Faith Ringgold, "Aunt Harriet's Underground Railroad in the Sky". The illustrations in the book are picture perfect for quilting. Quilts were sometimes used as welcome flags for runaway slaves. Many quilts depict important events. 


Books about quilting.

So, finally getting chicks is a very important event in our family. Each of us chose a different color for the background and then coordinated the other background colors into our design. If the daddy had made one, we'd have a perfectly symmetrical mini paper quilt to hang on the wall. Since he didn't, we're going to put our quilt squares in frames and hang them vertically near our front door.


Silver and Golden Laced Wyandotte Chicks at 6 days old
Gold and Silver Laced Wyandotte Chicks at  6 days old.


Chicken Quilting Squares Paper Craft
Paper folkart quilt square ideas.

Jake's quilt square is pictured above. He loves our chicks, but he is not a fan of art. However, he sat down with us and happily arranged the pieces on his background. Mommy cut out all of the shapes before we got started. This helped to set Jake's mind at ease. Of course, as usual, he complained everyone else's project was much better than his. I quickly explained American Folk Art was done by regular people without any training or even skill in some cases. Even so, it is sought after today and often sold for thousands of dollars. Probably, because it depicts their heart and home.


I like how his chicken is laying a pile of eggs, it has two visible feet, and the basket is full of eggs. I love that he enjoyed making this project, and he was happy to know they'll be on display in our dining room.
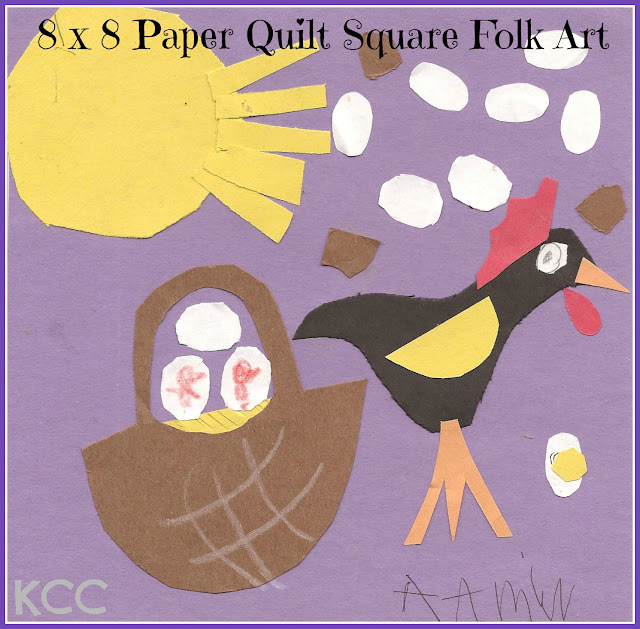


8 x 8 Quilt Square Pattern for Kids Chicken
Crafty First Grade Art Project: Make your own quilt square paper craft.
Mayhem got creative. She cut out a yolk, sunshine, brown eggs, and was the first to include hay in her basket. She even drew baby chicks inside the eggs (in case you couldn't recognize her efforts).


Making quilt squares with your kids is a fun way to discuss history, teach layout and design, and share a special moment in time. What's on your quilting square?


Recommended Reading:

7 Fun and Easy Projects Quilts for Kids by Kids Tips for Quilting with Children


Sign up for our free newsletter!

Jake's Journey in Art - Homeschool Lesson - 4 Watercolor Seascape (Wet on Wet)

Jake's Journey in Art: Watercolor Wet on Wet techniques for Homeschoolers

Kids Creative Chaos building Self-Esteem one art lesson at a time.


Lesson:  Choose one of the seascapes and one watercolor technique you've learned.

It was time for our next art lesson. Jake moaned and complained as usual, until I reminded him this week's lessons involved painting. "Yay! I like to paint. I never got to paint in art class."  Say what you say?  Catch up here. Art is about the journey, not the end result.

Homeschool Art Project How to paint wet on wet watercolor technique
Jake's seascape is on the left, Mayhem is on the right. She's added some embellishments.
Did you notice his attention to detail?  This is not a child who should despise art. Thankfully, we are making amazing progress.

Now, what Jake really meant to say was- I love it when I'm allowed to make a mess. He chose the sailboat scene and the wet on wet technique. Which is exactly as it sounds, paint water over your entire paper, dip your brush in water and the color, and let it bleed blend. Don't move it until it is dry.

We also did the salt painting technique and sprinkled salt on the wet sand area. When it dries it looks like real sand.

We first traced over the image to get a feel for it and then we lightly drew it in pencil on our watercolor paper. When painting with watercolors it is important to use the right paper. Copy paper will deteriorate with too much water. The fibers in the watercolor paper are designed to soak up the excess. Still, we laid out three layers of newspaper and had a roll of paper towels ready and waiting. Inevitably, someone always spills the water.


Our art table, okay, it is our dining room table. We never use it for that!

I am pleased to announce this assignment was our turn around lesson. In fact, his feelings about art have changed so much in a recent lesson on mask making he said, "Mommy, it is really awesome that I have a teacher who knows so much about art. You can teach me so many cool things!" (Insert tears here.)

I am quite skilled in the art of mask making. My highschool, art teacher, Mrs. Conway did a lesson on mask's with handmade paper. I made 3 or 4 different projects, entered them into an art contest and won some sort of an award. 

Oh my, I wish I could tell you what it was but a lot of time has passed since then.  After, I took a tiny scholarship to college and studied theatre design, art, and architecture. I've used the skills I learned in those classes to make many a mask for many a child in an after-school program, made some great mardi-gras costumes, and designed many theatrical props and sets. We'll post mask making 101 next week.

Hooray! Someone finally took notice.  My college journey was not a waste after all :-)

Okay, the real point is that Jake took notice. Chuckle-chuckle and all it took was some fancy paper curling around a pencil and a cool, paper snake. Mom's have mad skills, don't they. I'm gearing up to ask Jake to draw a new picture of how he feels about Mommy's art class-eh. Maybe I'll just take a photo of his expression.

Things are looking up!

Jake's Journey in Art Mask Making 101: Phineas Mask and African Art Mask for Mardi Gras

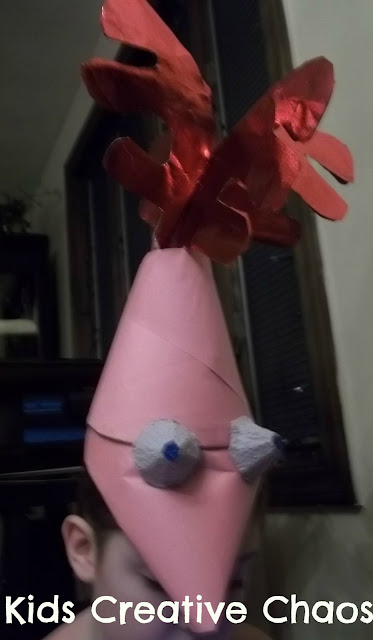
How to make a Phineas Mask for Mardi Gras or Halloween Costume. Tip: It starts with a birthday party hat.

This latest in a series of Jake's Journey homeschool projects teaches the art of Mask Making and formal balance. We included a tutorial to make an African Art Pende Mask and a Phineas mask which is a little more fun for kids. You might also enjoy this Mardi Gras Bird Mask. Enjoy!


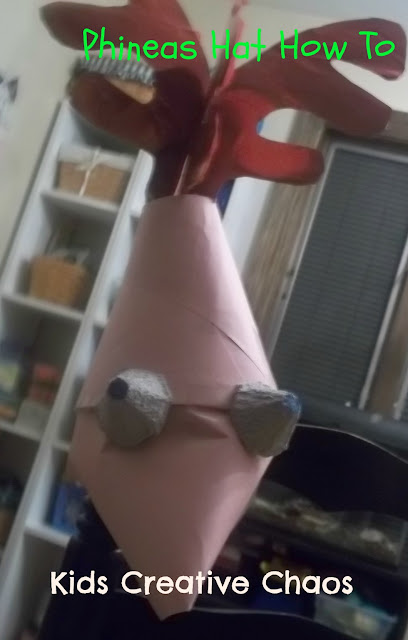
How to Make a Phineas Costume Mask Art Project
How to make a Phineas Mask 
for Mardi Gras, Halloween, or a Birthday Party Hat.


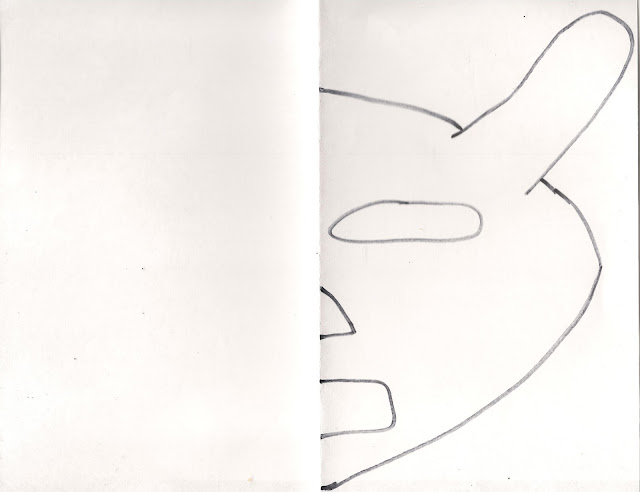
You need a cardboard birthday party hat, a cereal box, egg carton, gift bag, and construction paper. First, draw Phineas' hair (think reindeer antler.) Cut two sections, glue  a red gift bag (as pictured) or construction paper pattern onto the cardboard, let dry, and cut out. Cut a 2" slit in the center of the base of each hair piece, and slide them into each other. Next, cut about 1" off the top of the party hat. 


Draw pattern as pictured on paper folded in half.


Pattern for How to make Phineas and Ferb Hat Mask Costume
It should look like this, cut two.


Take the hair piece and insert it into the hole in the top of the hat. Secure on the inside with tape.  Now, take your birthday party hat and wrap it in pink construction paper and tape with clear tape where it overlaps. Grab a second piece of pink construction paper and holding it in a cone shape, insert it inside the base of the party hat and attach with tape. For this step, it is helpful to have another set of hands. Push the interior cone to the front and attach a hairband inside the hat. Cut out two egg holders from the egg carton, color the center for eyes and attach (hot glues works best) to the front of your hat/mask.  Place the headband on your head as shown in the above picture. Voila!

You might also like to make a Perry the Platypus costume from a cardboard box. 


How to make Masks for kids Phineas and African Art  Homeschool Projects
Make your own Phineas and Ferb Mask 
for a Costume from a birthday party hat.


Masks are a great way to teach the art of formal balance when both sides are exactly alike. Mask can look like animals, humans, or your favorite cartoon hero such as Phineas above. Make these masks to celebrate Mardi Gras.

Many tribes in African countries still use masks as part of their special occasions, or ceremonies.  Examples of Tribal African Mask  Jake chose the Pende Mask, "Panya Ngombe," which was hung above the door of the Chief's dwelling. It is a combination of human and buffalo features with incised triangular grids creating a checkerboard effect. 


Since, Jake seemed to enjoy this project, and the focus was on balance, I didn't split hairs when it came to neatness and creativity (always choose your battles).  Read more about Jake's Journey as a reluctant artist.  Anything to do with mythology, tribes, dinosaurs, he's all over it and loves to learn as much as possible, even if it means doing art!


Pende African Mask Homeschool Projects for Mardi Gras
Pende Mask.


Pattern for African Art Mask (Pende)
Right click to print the Pende Mask Pattern Printable 
(Fold your paper in half).


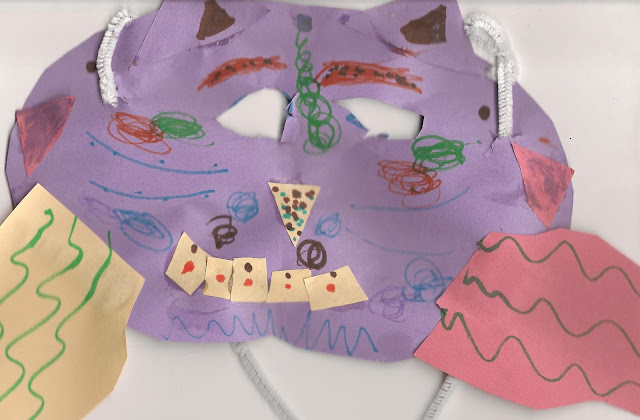
African Masks for Mardi Gras
Mayhem's "Cat/Person" African Mask.


Recommended Reading:


Poetry Out of the Mouths of Babes: Jake's Journey in Homeschool

Funny things kids say and write: kindergarten poetry

Kids kindergarten poetry lesson. Write a poem based on a book you've recently read. This is a fun exercise for a homeschooler's daily journal.

Funny things kids say or write - Jake's Journey.
"First-Time Baby", Jake's first poem.

My First-born, Straight A++, turned Six in July,
Mini-Adult wrote this beautiful piece of literature.

This was based on a pattern prompt for class, 
"The egg becomes a chicken, The Tadpole becomes a Frog."
Jake took the idea and ran.

Punctuation and Spelling as written. 
Jake describes it as his story but what an awesome poem.


"First-Time Baby"

By C. Jacob (Jake) Wells


First the baby then 2 days old.

Then grow some more then 1 month old.

Then grow some more then 1 yer old.

Then 5 yers old.

Then gorw some more and more and before you know it your a growup.

And your 32 and your 6 Feet tall.

and grow some more and now your 60.

And rite now your sleeping and now your 95

and inside and waching tv.

And now somethig sad happnns

now your dead

under your

gave stone

and that is

the end for you.


Just sayin' with corrections maybe this could win a Pulitzer or at least a poetry competition.

COPYRIGHT 2010 CJW


Recommended Reading:

The Wise Enchanter: A Journey Through the Alphabet

A Dog's Purpose

Jake's Journey in Art: Homeschool Printmaking Lesson with Foam Trays and Pencils

Homeschool Art Lesson in Printmaking

Jake's journey in art focuses on REUSE. Make your own prints with foam trays in this fun Printmaking lesson. This homeschool art lesson requires only a few supplies making it perfect for homeschool. Enjoy!


Reuse Foam Trays for Printmaking
Animal Prints with Foam Trays Piggy Art.

What fun! This is an incredibly easy way to teach the art of printmaking to young children. The assignment required choosing an animal to draw and first drawing it on paper by looking at the image upside down. If you draw an image upside down, you tend to focus less on the end product and more on each individual line. 

The idea is to make drawing perfectly less overwhelming, when turned right side up, it magically becomes a great drawing!


Homeschool Art Project How to make your own Prints with foam veggie trays
Printmaking Lesson: Messy Craft with Paint and Prints.

Hmm... Great theory. Jake drew his pig by copying the image with the right-side up, then he proceeded to complain profusely about how everyone's drawings were better than his. It took a great deal of coaxing to get him to draw the picture upside down. He felt it was a waste of time and "stupid". 

The battle ensued, he tried it, and the results were similar. That's good news and good news, I think. The good news is he tried it, saw it worked, and wasn't stupid, and the good news is he draws pretty good either way.

You will need: 
Foam Trays, Pencil, White Paper, and Acrylic Paint.

First, draw a picture of an animal on a piece of paper. Remember, if you are looking at an image, turn it upside down and draw it upside down first. Now, turn your image around, and check out your handi-work. This is practice.

The next step is to "draw" the image onto a foam tray. Make sure to press down hard to make a deep indentation into the foam. Now, cut the edges off your foam tray so it is a flat surface. It needs to be completely flat to make the print.


Lightly paint your foam image. You can use one color or several. Make a practice print on paper to remove some of the excess paint.

Then, carefully place your foam tray paint side down onto a clean sheet of paper. Press firmly, but do not move the tray or the image will smear. With a finger or hand on each end of the tray, carefully lift it from the paper to reveal your beautiful print. Wipe the tray clean, and experiment with new colors. 


Once they started making prints they didn't want to stop!

Tip:  The best prints are the ones made as the paint is starting to wear off the tray. This is a great way to make holiday or birthday cards. You can also cut them out and frame them as Christmas gifts.


Recommended Reading:


Kids Creative Chaos Cooks: Kitchen Kids Series: Holiday Recipes*


ADS DISCLOSURE: We've partnered with some wonderful advertisers who may sponsor blog posts or send us samples to test. Some companies pay us to review their products.

*We also use affiliate links, if you make a purchase we get a tiny commission. Kids Creative Chaos participates in the Amazon LLC Associates Program*, an affiliate advertising program designed to provide a mean for blogs to earn advertising fees by linking to Amazon properties, including, but not limited to, amazon.com, endless.com, myhabit.com, smallparts.com, or amazonwireless.com. We also offer Tapinfluence, Google Adsense, SoFab, and Izea ads here. Thanks so much for helping us keep the lights on! :)


How to Make a Basic Color Wheel and Primary Art Lesson Homeschool

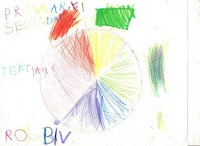
THE PRIMARY COLORS: ROYGBIV 

How to Make a Color Wheel Homeschool Art Lesson.

If you're following Jake's Journey in Art this homeschool art lesson isn't from 3rd grade art. We've been combining lessons and working on everything together to make it more like a classroom and easier for the teacher (me). This is the 1st grade Primary Color Lessons for homeschoolers, but we added a science component and more to make it more interesting for the older elementary kids too. Enjoy!

This post contains Amazon and other affiliate links for your convenience.


Sesame Street teaches Primary Colors.

Henri Matisse loves primary colors.


cute primary color wheel for preschooler or early elementary
Mayhem's second attempt (First Grade).
Preschool Color Wheel Ideas
Mayhem's first attempt: a color wheel cat.
He has all the colors just not in the right position.
He got the letters but not the wheel.  The smudges are  two
primary marker colors blended to create the secondary  colors.

So, what is a technically correct color wheel?


Colorwheel Art Lesson


The colors of the RAINBOW or those that appear in a prism. Here is a fun scientific lesson in PDF form from Stargazers and NASA.

We studied the use of primary colors by the Masters like the Matisse pictured above, and then we chose a farm animal to trace with pencil and paint with only the primary and secondary colors.

Jake's bunny with primary and secondary color complements.

Jake was a champ when it came to the technical aspect of art. He reminded me of the cheat to remember the primary and secondary colors. Red, Yellow, Blue, Orange, Green, Indigo, and Violet better known as ROY G. BIV.  He also knew prisms reflect the light from the sun and radiate these colors. Although, he knew about the color wheel he didn't have a good grasp of the concept of contrasting or complementary colors.

We're going to explore this concept. Math and Science are everywhere in ART. So, my little genius, art critic is going to learn about the golden rule sooner than later. Funny how people tend to be one or the other, left or right brained. I'm taking on the challenge to prove it doesn't have to be either or.

Paint a Primary and Complementary Color Bunny Elementary Art
Mayhem's bunny. They both traced the bunny from an original drawn by me. Yep, she's 6, loves art and hates math.


Click the thumbnails below to catch up on our 
Homeschool Art Journey
 or start here with LESSON ONE.
From Wikipedia:
Complementary colors are pairs of colors that are of “opposite” hue in some color model. The exact hue “complementary” to a given hue depends on the model in question, and perceptually uniformadditive, and subtractive color models, for example, have differing complements for any given color.


The complement of each primary color (red, blue, or yellow) is roughly the color made by mixing the other two in a subtractive system:
  • red complements (blue + yellow) = green
  • blue complements (red + yellow) = orange
  • yellow complements (red + blue) = violet


Recommended Reading:


How to Make Salt Dough Recipe: Self-Portrait Ornaments

How to make Salt Dough Self-portraits as Ornaments

Did you ever wonder how to make salt dough? We made self portraits for a homeschool art project. I included how to make homemade clay and a few salt dough recipes. These mini-mes are a great companion project for a preschool or kindergarten learning body parts lesson. You can also make Christmas Tree Ornaments from Salt Dough. We played around with a variety of themes during our homeschool art lesson. Enjoy!


This post contains affiliate links for your convenience.*


How to Make Salt Dough Recipe Christmas Ornaments Decorations
Salt Dough Holiday Ornament Recipe.


Make a Halloween Tree with Homemade Dough Ornaments.


How to make salt dough self portraits Christmas Decorations
Self portraits from homemade clay and salt dough.


How to make dough Christmas ornaments
Make Christmas and Holiday ornaments by inserting straw to form a hole.

This recipe is for  how to make clay without cream of tar tar.


Salt Dough Recipe:


1 C. flour

1 C. salt


1/2 C. water


Mix together and knead.


When ready to cook, put on a baking sheet in 


oven at 100 degrees C/ 200 F for 2-3 hours.


Cooking is not necessary, leave your creations 


in a safe place to dry. We left these in a table drawer


and forgot about them.


When cool, paint or decorate with beads or candy.


Salt dough cookie faces.

You might also like how to make Homemade Clay with cream of tar tar.


We made these self-portraits about four years ago and forgot about them. They've sat in the end drawer of our dining room table ever since. They were never cooked nor painted.

Jake was about four years old and he hadn't met his elementary art teacher yet, but he still had an aversion to art. It was a sensory issue. He didn't like getting his hands dirty. He also worried about getting things on his clothes. If either of these happened, he would get very upset. I suppose this is where my love  of messy crafts was born.


I liked to be tidy as a small child too. I didn't play like the other kids on the playground, because I didn't want to ruin my leotards (today we call them tights) or get grass stains on my clothes. These things troubled me a great deal. So, I'd walk around the perimeter of the playground until the teacher blew the whistle. Little did I know, it was OCD. I've recovered, but some people don't appreciate it. The only way for me to stay sane is to embrace messy things. 


Yep, I didn't want Jake to struggle with the same wacky demons, so I encouraged sensory play.


Even now, he wants to hurry and complete the project so he can wash his hands. If we are mixing dough, he can't let it dry. You know, that crumbly, crackly feeling  on your hands? Mayhem and I like it. It's fun to let the dough dry and then scrape it off similar to letting school glue dry on your hands. I like seeing the fingerprints in the glue peelings. 


Jake? No way. I think this has a lot to do with his hatred of art, and then the teacher came along and made art a boring chore. 


He strives for self-inflicted perfection. He doesn't like the learning curve. He knows a lot. He is a gifted child. When he has to learn something new he is disappointed he didn't already know it. You can see the shame and the disappointment in his face. 


Recently, he had to take a Scantron test online, the test was smart. The more correct answers, the harder the questions. We told him to guess, but he refused. He labored over each question and made a very educated guess. In the end, he scored above average, but the test was torture. He cried with each question  for the first time aware he didn't have all the answers. 


Jake beginning his journey in art.


If only he could realize art works the same way, but it's better because there are no real answers in art. Beauty is in the eye of the beholder. I am the beholder here. I like his salt dough self-portrait the wavy hair and round face remind me so much of my happy, bouncy, little four year old.

Next week's journey, Animal Printmaking, proved very difficult for a neat freak. Smudges are a perfectionist's nemesis. Start here for Jake's Journey in Art 


Recommended Reading:

Air Dry Clay Projects

Minecraft Creeper Wood Carving Project

Christmas Dough Crafts

Salt Dough: More than 100 Projects! (American Girl Library)


How to Make Clay: Air Dry Clay, Homemade Clay Recipes for Home School Art Project

How to make clay is simple: Here are some recipes.

We've been crafting with Air-Dry clay. We purchased a clay kit and then we also made our own clay at home. It can be used with a Potter's wheel or shaped into free forms for home school art projects. Enjoy!

How to Make Clay: Air Dry Clay and Homemade Clay Recipe Home School Art Project
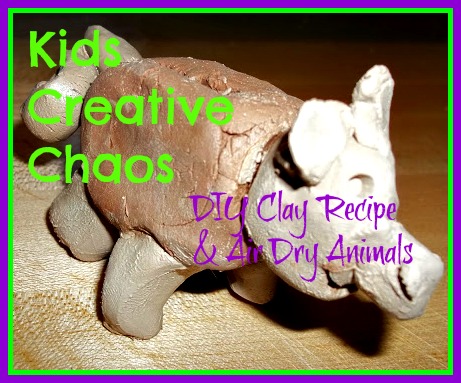
Air dry clay pig and diy homemade clay recipes.


Attach pieces by adding a little water to each piece. This is Jake's Pig (From Jake's Journey in Art). He enjoyed playing with the clay just enough to complete the assignment.


Alextoys.com sells boxes of air dry clay refills perfect 
for your animal  sculptures.

Clay is wonderful for Sensory play. In the homemade recipe below, just add some scented oils like vanilla or cinnamon.  TOUCH, SMELL, TASTE (I don't recommend it), SEE- hmm... When it dries you can gently tap it onto the table for SOUND encompassing all senses or get CREATIVE and make a rattle/maraca or a base for a drum just stretch tissue paper over the top and attach with a large rubber band.


Mayhem made many animals and embellished each one.


 Get your Air Dry Clay Refill Pack  by Alex Toys.


The baubles in the photos above came with the air dry clay refill for the pottery wheel from Alex Toys.


How to make Homemade Clay Recipe:


Click here for how to make clay without cream of tar tar


Easy/recommended for preschool and early elementary


1 cup flour
1 cup water
2 tsp cream of tartar
 ¼ cup salt
1 tbsp vegetable oil
food coloring (optional)

Combine all ingredients in a medium-sized pot. Decide on a color  for the clay. Cook over moderate heat, stirring constantly. The dough will eventually become difficult to stir, and it will stick to the spoon. At this point, dump the dough onto wax paper. Allow it to cool for at least 15 minutes, and then knead it until it is smooth. Store the dough in a plastic container or a plastic bag when not in use. Refrigerate the clay when not in use.


Homemade Clay can be painted and it will last for years to come. Make cute Holiday Gifts: Think napkin rings, 3D wall hangings, necklace medallions, trivets, and pretty catch-all bowls.


Looking for Toddler or Preschooler Activities? 

Try this:  Sensory Dough playtime Activities.

Recommended Reading:

Craft a Minecraft Marshmallow Pig

Happy Pig Day! *

If You Give a Pig a Pancake*


ADS DISCLOSURE: We've partnered with some wonderful advertisers who may sponsor blog posts or send us samples to test. Some companies pay us to review their products.

*We also use affiliate links, if you make a purchase we get a tiny commission. Kids Creative Chaos participates in the Amazon LLC Associates Program*, an affiliate advertising program designed to provide a mean for blogs to earn advertising fees by linking to Amazon properties, including, but not limited to, amazon.com, endless.com, myhabit.com, smallparts.com, or amazonwireless.com. We also offer Tapinfluence, Google Adsense, SoFab, and Izea ads here. Thanks so much for helping us keep the lights on! :)


How to paint like Eric Carle Homeschool Art Project Collage

How to Paint like Eric Carle Lesson for Kids

Don't you just love the illustrations of Eric Carle in children's books? Did you ever wonder how to paint like Eric Carle? This Homeschool Art Project takes some time, but it is worth the effort. Enjoy!


How to paint like Eric Carle techniques in Mixed Media


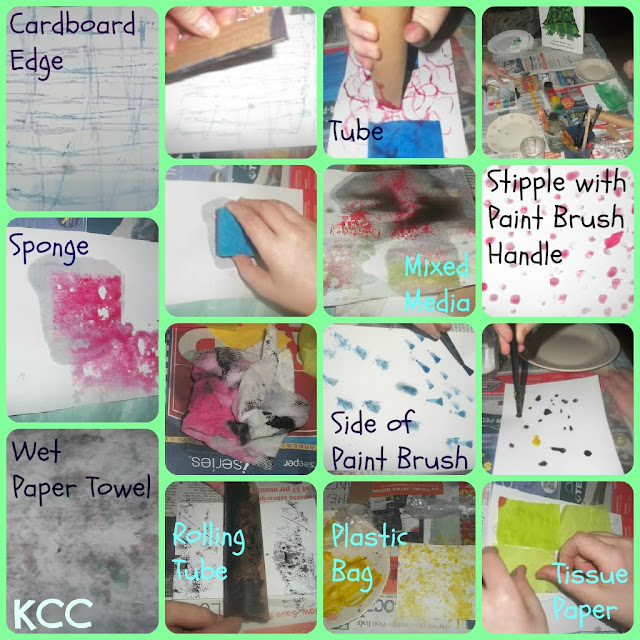
Use different household items to achieve varying patterns. I love how the piece of cardboard makes a herringbone pattern when crossed. The side of a paint brush looks like animal tracks. We even used the end of our paint brush to make stipple patterns. The dirty, wadded up paper towel made a glorious pink, green, and black impressionist style.


Homeschool Art Lesson How to paint like Eric Carle
Jake traced this on our light table 
and then cut his patterned papers to illustrate.


We cut 8 1/2 x 11 white paper into quarter
 and each child painted in each technique.


This is salt painting.


Homeschool Art use The Foolish Tortoise an Art and Writing Prompt
We made 16 different patterns with our paint.


Mayhem made 3D Elements in this
Eric Carle style illustration focusing on Giraffes.

Jake doesn't like to draw so we cut images out of coloring books, traced them and filled them in with bits of our pattern painting projects. Mayhem used a coloring book image but chose to draw many of her own designs. These techniques also work fine motor skills.


Homeschool Art Lesson: How to paint like Eric Carle

You will need watercolor or tempera paint, brushes, paper towels, salt, cardboard scraps, tissue paper, art paper, sponges, plastic bags, and  imagination.


Cut a piece of art paper into fourths. (We used several sheets as it was so much fun!)


Experiment with different painting techniques:


1. Salt Painting - paint with a color, sprinkle salt over it, allow to dry for a sparkly texture.
2. Stipple - use the end of a paintbrush to make dots.
3. Animal Tracks - flatten the brush on the paper to make tracks.
4. Tissue Paper - wet and use it to paint or glue a collage of colors onto your sheet.
5. Toilet Tube - use like a roller or hold upright and stamp circles or hearts with the end.
6. Sponge - cut a sponge into small shapes and blot on paper.
7. Paper Towel - use your dirty paper towel and blot on paper for a fun print.
8. Cardboard Edge - use the edge of the cardboard to make straight lines.
9. Plastic Bag - Tie a bread bag in a knot or wear it like a glove and dab it paint.


Let your paintings dry overnight (at least an hour.) Draw or trace your favorite animals, lay out your design on paper, take your squares, and cut them up to fill in the pictures (think puzzle pieces.) See the example above for ideas.


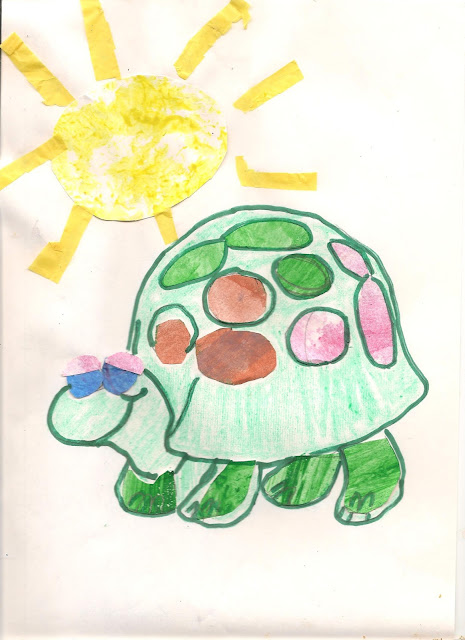
Jake complained about how horrible his turtle looked. Of course, I think it looks awesome. He enjoyed tracing the turtle. The idea of it looking perfect is very important to him. Flowing, organic art makes him crazy. As a gifted child, he needs and thrives on structure. 

Without structure, all chaos breaks loose. Perfectionism is an artist's worst enemy. Mayhem, on the other hand, sits down and lets her art tell her where it wants to go. Great artist come in both styles. We're working on Jake's rigid issues in Jake's Journey in Art. We'd love for you to join us!


Recommended Reading:


Eric Carle Favorite Animal

The Nonsense Show Book Review and Surrealist Art Ideas

The Art of Eric Carle