Showing posts sorted by relevance for query jake's journey. Sort by date Show all posts

Jake's Journey Homeschool Science Project: How to Build a Cave Model Diorama from a Cardboard Shoebox

How to Build a Cave Model Diorama from a Cardboard Shoebox and Construction Paper

Here's a Homeschool Science Project on Stalactites and Stalagmites. Make your own cave for a science fair diorama project. Make sure everything is labeled clearly. This was made for a third grade science project for a gifted class, but it is suitable for grades 3-8. Enjoy!


How to Make a Homeschool Science Diorama Model for a Cave Project
Learning about spelunking and cave exploration by building a cave diorama project.
Great model, eh? How is this not art? Jake had a fabulous time designing and crafting this model of a cave for his Homeschool Science portfolio. He enjoyed researching each term, but refused to write them out in a report form. He labeled each item and taped down a descriptive tag, but did not do a report. He despises the art form of handwriting (we are working on this too).

The cave words were particularly intriguing with speleothems (cave formations) and speleologists (scientist who explore caves) ranking at the top of his interest list. All of the spelunking terms are fun to say!

To make a shoebox model diorama like this one you will need:

  • shoe box or cereal box with the face cut off
  • construction paper
  • scissors
  • tape and glue
  • action figures
First, cover the inside of your cardboard box with an appropriate color of paper. Then, cut out cave formations (stalactites and stalagmites) leaving a little extra on the base. Fold this extra down like a flap, and glue or tape it to the top or bottom of your diorama. This makes it stay erect and sturdy.

Research the definition of various cave terms. Type these into a word program leaving several spaces between definitions, so they can be cut out for labels. Attach with tape or glue. This information should also be written into a companion report for your project to work toward an 'A' grade.

In Jake's model you can see the Cave Bacon which is a stalactite hanging from the "ceiling" of the cave. It looks like bacon with the side stripes of color. Cave Eggs cover the floor or ground as Stalagmites. These are round formations with circular rings of pattern. Cave Cauliflower and Soda Straws are pictured above, but you need something to research on your own, so get busy!

How can you remember which is which? Easy! Use this simple memory trick.

stalaCtite - look for the "C" for ceiling of the cave.

stalaGmite - look for the "G" for ground of the cave.


Recommended Reading:

Complete Caving Manual: Spelunking*

Don't Behave Like You Live in a Cave *


ADS DISCLOSURE: We've partnered with some wonderful advertisers who may sponsor blog posts or send us samples to test. Some companies pay us to review their products.

*We also use affiliate links, if you make a purchase we get a tiny commission. Kids Creative Chaos participates in the Amazon LLC Associates Program*, an affiliate advertising program designed to provide a mean for blogs to earn advertising fees by linking to Amazon properties, including, but not limited to, amazon.com, endless.com, myhabit.com, smallparts.com, or amazonwireless.com. We also offer Tapinfluence, Google Adsense, SoFab, and Izea ads here. Thanks so much for helping us keep the lights on! :)


Lesson 2 How to Make a Tunnel Book: Elementary Homeschool

Ideas for your next Homeschool ART Lesson: Summer Tunnel Book from Jake's Journey in Art

Working from crayons to Picasso. The art of the tunnel book. Learn how to make a tunnel book, it isn't as easy as it looks!

So, if you are following the story, you may remember we had a bad experience with an elementary art teacher. Might I just add- this occured at a 4 Star school.  I'm pretty sure she has tenure. Oddly, outside of the classroom (at least with adults) she was very personable. If you haven't read it click here for Lesson One - Art Expression.

The infamous Tunnel Art Book. Oh my!  Even with my art and architecture background, I had difficulty following the instructions for this one. We watched a video, we looked at samples, and still it just wasn't clicking for me.  Perhaps, I over complicated it.

Well, my struggling Art-hater truly hated this one. If I couldn't explain it- why should he bother trying, right?  So, we sat it aside for a day, and then a week, and then a little bit longer. I tried to make my own by cutting out a frame and gluing the sides together, but it was so much trouble. I refused to make another one, so we used it as the tunnel for Jake's book.

Cut and pasted the important pieces so we can keep it in a scrapbook.

Turns out, I had NO IDEA what I was doing, but Jake drew some nice trees for the background even though he complained the entire time.  When he finished, he complained some more, "Mine isn't as good as yours.  Amanda's trees look better than mine. I cannot do this; I hate art!"


So... apparently somewhere along the way, I missed am important step.  The next day, the little one and I tried one last time. The sides are sheets of paper folded in half, and at the half way mark we glued (and taped) the frames for the tunnel effect.  I scribbled some pictures, and she drew some beautiful creatures and a background, and we attached some to each interior frame. These did not stand on their own; and they are extremely flimsy, or our construction paper is just way too thin. 

elementary homeschool art tunnel books

Anyway, we tried our best, and that is what really counts- right?  Hopefully, our failures will help you have a successful Tunnel Art Book.  In two years, when the little one gets the same lesson; we'll refer back to this post and try with thicker paper.  I'm thinking CARDBOARD sides.

The Little's background and other fun items.

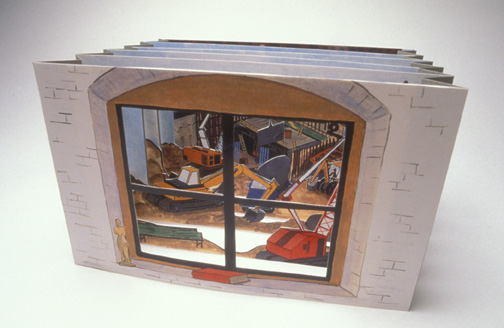
Here is a link to an entire site about tunnel books.  Hope this helps spark your creativity!

And... here is their closest example to the way our assignment was described.

How to make a tunnel book
Too cool ~ It is a construction site!  Photo from Popular Kinetics Press


Recommended:


Green Light at the End of the Tunnel: Learning the Art of Living Well Without Causing Harm to Our Planet or Ourselves*


Bridges and Tunnels: Investigate Feats of Engineering with 25 Projects (Build It Yourself)

Jake's Art - Homeschool Weaving Lesson - Make your own Loom - DIY Arts and Crafts

How to make a loom for weaving scrap fiber: A Homeschool Art Lesson

Jake's Journey in Art goes under the sea in this DIY weaving Homeschool Art Lesson we learned to Renew. Enjoy!


How to weave for elementary make your own loom
Our loom has both warp and weft framework to better illustrate 
the concept to young children.

To weave a textile, threads (or scrap fabric) are woven on a frame called a loom. The first vertical threads on the loom are called warp threads. Threads that are woven horizontally in and out of the warp threads are called weft threads.


Cut notches in the cardboard frame to keep yarn in place.

Recycle a piece of cardboard from a cereal box or a foam tray to make your loom. You might also like Native American Paper Bag Dress

Cut small notches into the top and bottom of your cardboard(ours are about 1/2", but 1" works well). Make them about 1/2" inch apart. Alex Toys has a great PDF on weaving here.


Spongebob Fabric for Toddler bed tent.

Warp your loom with yarn or string by taking the thread and taping one end to the back middle of your board.  Now, starting with your first notch on the left, begin wrapping through each top and bottom notch without skipping a notch until you get to the right side of the board.  Only the warp frame is required.

Now your are ready to weave your weft. Cut or tear scraps of fabric into strips. Your strips of fabric should be about 1" thick and at least 12"  long. You will need about 20 strips. 


The cat enjoyed the tearing of fabric strips so much 
he needed a nap after playing with them.

For extra ease for smaller children, we added a weft frame as well. Now the scraps of fabric can be pulled through the little squares for guidance. Pull your scrap fabric under the first warp, over the next, and so on. The yarn guide will help younger children see any mistakes made.

When you have completed your weaving tie off all scraps in groups of two at the edges of your cardboard loom, then you can cut your your thread/yarn framework.


How to make a loom - Elementary Weaving Lesson Scrap Fibers Make your own
Spongebob has his eye on you.

This is an easy way to get littles started in weaving. It is also helpful to cut a piece of cardboard about 1" by 3" with a notch in the end. Attach your scrap fabric by inserting it in the notch and use as a tool to weave the fabric through the loom, this is called a shuttle.


Alex Toys Native American Bead Loom Kit for weaving bracelets.

Once you advance your skills, you can weave many beautiful projects. Alex Toys has a Native American Loom for weaving bracelets.  It is a professional quality loom that makes incredibly authentic bracelets.  We are working on our patterns and will share them soon.


Kid's room cartoon character theme (that way we don't have to worry about matching or new fads).Check out the automobile sun visor we used as a headboard. 
It is simply nailed to the wall.

Jake loved the idea of using his toddler tent cover as scrap fabric for this project. We renewed an item that was dear to his heart. It had been ripped from rowdy play and was no good as a tent, but we saved it anyway in hopes to repair it or transform it into a pillow or some other creative endeavor. The SpongeBob fabric was the perfect accent for his room. 


Yep, we need a hanging stick, but the kids love it.  
Use favorite t-shirts, pillow cases, or doll clothes for your scrap fiber.

To display your beautiful work of art weave a "weft" stick horizontally through the top row and hang on a wall.  Jake loved his creation and couldn't wait for the stick. He wanted to see how it looked right away, so we hung it by a nail. A little droopy, yes, but he loves it.

Did he love the process?  Not so much.  Much patience is a necessary requirement of weaving. So, Mommy made the loom, got it started and Jake weaved the inner pieces to gain an understanding of the process.  Mommy tied and cut it off making sure Jake watched and understood. This is somewhat time consuming, but the end results are worth it.


Mayhem saw the weaving on his wall and wanted it for her room. Score! This project journey ended on a very happy note.   


Recommended Reading:


Learning How to Weave*

Party Time: SpongeBob SquarePants*


ADS DISCLOSURE: We've partnered with some wonderful advertisers who may sponsor blog posts or send us samples to test. Some companies pay us to review their products.

*We also use affiliate links, if you make a purchase we get a tiny commission. Kids Creative Chaos participates in the Amazon LLC Associates Program*, an affiliate advertising program designed to provide a mean for blogs to earn advertising fees by linking to Amazon properties, including, but not limited to, amazon.com, endless.com, myhabit.com, smallparts.com, or amazonwireless.com. We also offer Tapinfluence, Google Adsense, SoFab, and Izea ads here. Thanks so much for helping us keep the lights on! :)

Preschool Sensory Play Activities: How it all got started!

Sensory Messy Play and Preschool Activities

We've had many great years teaching messy play and preschool classes for The Play Connection and hope the future will send even more blessings our way. Here are our top sensory and messy play preschool activities from 2013. What a blast from the past!


This post contains affiliate links.

Sensory Messy Play and Preschool Activities


Here is a listing of our top posts of 2013. Many offer great ideas for fun, preschool activities, clip art, and lots of fun for kids! Enjoy!


  1. Christmas Eye Candy: Photos of Christmas Trees in Snow Clipart
  2. Angie's Homemade Artisan Bread Recipe
  3. New Year Preschool Party Ideas and Activities for Kids
  4. Lots of Snowmen and Marshmallows Christmas Crafts and Activities for Kids
  5. Fun for Kids with Phineas and Ferb Printables
  6. Lots of photos of Bread Clipart
  7. Cute Valentine Clipart and Free Printables for Kids Classroom Valentines
  8. 9 New Year Activities for Kids with games for kids too
  9. Marshmallows: Fun for kids SENSORY game great for preschoolers
  10. The Tooth Fairy Sagas: Free Toothfairy clipart and true Mommy Drama
  11. Activities for Kids: Make your own snow for Sensory play fun for kids
  12. Birthday Party games for Kids and Moms on a budget
  13. Our new Series Made the cut! Creative Country Sayings and Inspirational Quotes

Activities for pre school Pre K Kids Creative Chaos Lora Langston Edible Crafts fun for kids
Memories from 2008 - 2012.

Here's my favorite Homeschool Lesson from 2013.

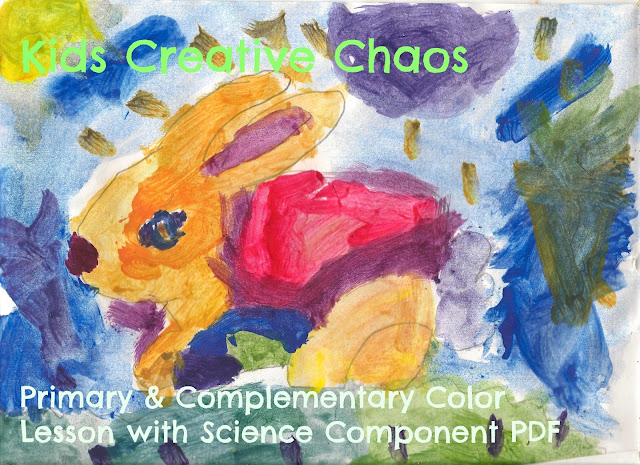
Primary and Complementary Color Homeschool Art and Science Lesson.


(Pre K to Elementary)
There are many Homeschool Lessons in this series, so make sure you click the labels under each post. (Still Life, Water Coloring for Kids, Weaving, Self-Portrait activities, Building Models for Science, Christmas Gingerbread House how to diy, Color Theory Lessons, Primary Colors, and even some History  along the way - it's art to me how we've designed our lives throughout the years. I hope you will follow along on the journey.)


We published a Kitchen Kids Cookbook with mix and make recipes for kids. We helped fund raise for Santa's Elves of Indy, we started Homeschooling through INCA (Indiana Connections Academy,) and we moved to a house in the country. 


2013 holds many dreams as we look forward to gardening, raising chickens, goats, and hopefully bunnies and alpacas, get that YA novel published, and share a few of the many stage plays and skits for kids I've written over the years. Bring it! I am excited to get started :-) 


What does your future hold? Leave a comment and let us know.


Follow us on Pinterest (Kids Creative Chaos and Pin it! Online Scavenger Hunt for Pre school Curriculum) and Google +  Can't find us on Twitter? Check the right sidebar for a link we're @playconnection


Recommended Reading:

Fun with Messy Play: Ideas and Activities for Children with Special Needs

Play Out: How to develop your outside space for learning and play


Jake's Art: Still Life Picture: Homeschool Lesson 3

Still Life Picture Cobalt Bottle Homeschool Art Project

Oh my, what a fun journey in Art we have embarked upon this homeschool season. This week's assignment Still Life PicturesGather some fruit and other interesting items, arrange them on a table, and draw them as realistically as possible. Well, let's just say it took all of our stressometers to the max. Enjoy!

Still Life Picture Apples and Cobalt Bottle
The Still life example looked similar to this one 
with a cobalt bottle and fruit.
As, Jake sat having a melt-down, I searched the web for famous examples of still life. The lesson does mention not everyone has a natural ability to do realistic drawings, but practice makes perfect.


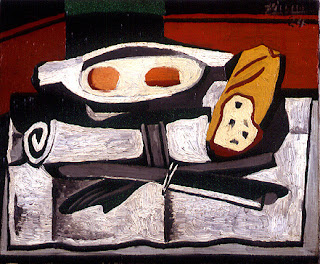
Picasso Still Life Painting
Picasso, Still Life with oranges.
Let me tell you, I've had years of practice. I cannot draw a realistic still life. So, I told Jake we would interpret our own realism like Picasso did in his interpretation. After all, everyone must start somewhere and the photographic images could stifle the most confident of young artists. I showed him many amazing still lifes. Examples are at the bottom of this post. He struggled with the contour drawings wanting to draw the entire table no matter how many times I explained, "Just pretend this is all you see."


This one depicts the entire surface of the table.
"Jake, please try again.  You are making this much too difficult.  Just draw a line to represent the table surface."  "I Can't!" He cried smashing his pencil down onto the table.

Still life on table with outline.

Still life with apple totem.


Still life third try.

Now, I didn't make him draft the outline five times. It was his perfectionist choice. I was ready to color-in the second one once he understood the concept of a horizon line, but he was compelled to continue the torture. His final drawing is below and quite lovely with its soft shadings, faint line of the table in the background and arrangement. (Nevermind the bottle lines showing through the fruit~choose your battles.)


In the meantime, his little sister (Mandy Mayhem) and natural born creative, drew this still life including the table, the windows, the painting on the wall, the wall, and some additional items she felt added to the picture.


 "I'm done Mommy. Can I do another one? I really like the Fishbowl Matisse, can I do one of those?"  Sure, Mayhem just do it quietly so Jake can concentrate.

Matisse Fishbowl Still Life Picture Goldfish
Matisse with Goldfish.

If only, Jake could concentrate. Remind your kids to relax!  Relaxation is the most important element of quality art. He has a special talent, but this project was very stressful for him.

The pictures below, especially Wassily Kandinsky,  gave him the courage to trudge ahead. We also found Paul Klee and Joan Miro still lifes. 

Everyone who studied art had to do a still life. Note the Paul Cezanne's skulls. So, paint what you enjoy. Make the project your own, but fulfill the assignment.


Warhol Still Life Image
Warhol Still Life
Cezanne Still Life Skulls
Cezanne Still Life
Picasso Still Life
Picasso Still Life

Kandinsky Still Life
Kandinsky Still Life
Picasso Still Life
Picasso Still Life

Matisse Still Life
Matisse Still Life


The still life was our worst struggle by far, but it was also a turning point. The next post is a much happier, carefree one. As Jake's journey continues you will see a calmer more reflective, budding young artist.


Remember these points:
A little encouragement goes a long way.

You don't have to erase in ART. The mistakes can make a Masterpiece.

Never tell your child or anyone else their drawing doesn't look real. It is art, a beautiful interpretation in the eye of the beholder. What if Picasso or Warhol stopped trying because they weren't successful? 

Andy Warhol is a fantastic example. Practice does make perfect but not necessarily photographic. Once he abandoned the notion he needed to be a "real artist" not a graphic artist; he finally became a Master of his own success.

Read more about Lesson one (Line - how do you feel about art.) and Lesson two (tunnel book perspective.)

And this one next (if you are following in order): Oh happy day: progress with watercolors and paper arts.


Recommended Reading:

Still Life with Bread Crumbs: A Novel*

Art of Still Life Drawing (Art of Drawing)*


ADS DISCLOSURE: We've partnered with some wonderful advertisers who may sponsor blog posts or send us samples to test. Some companies pay us to review their products.

*We also use affiliate links, if you make a purchase we get a tiny commission. Kids Creative Chaos participates in the Amazon LLC Associates Program*, an affiliate advertising program designed to provide a mean for blogs to earn advertising fees by linking to Amazon properties, including, but not limited to, amazon.com, endless.com, myhabit.com, smallparts.com, or amazonwireless.com. We also offer Tapinfluence, Google Adsense, SoFab, and Izea ads here. Thanks so much for helping us keep the lights on! :)


These are a few of MY favorite things: cute pictures for Pinterest

My Favorite things include adorable baby bunny picture and Christmas tree in snow

Not necessarily in any order, (I've been suffering from writer's and crafter's block lately, so if I have to organize them it will turn into the post that wasn't). My favorite things include baby bunnies, a spider, and Christmas Trees. Enjoy!


Christmas tree in snow with colored lights for Pinterest.
Christmas tree in snow with colored lights.

1. Snow covered Christmas Lights on Evergreen Trees.LOVE how the light glows under the snow.


Cute puppy for Pinterest.
Can you smell the puppy breath?

2. Puppy Breath. 'Nuf said.


Book by Robert Kraus How Spider Saved Halloween.
Book by Robert Kraus, How Spider Saved Halloween.

3.  Halloween! Inspired by my favorite book ever. I LOVE the illustrations. I love the story about bullying. Kraus writes several books in the Spider series. Check my pages above for more info.


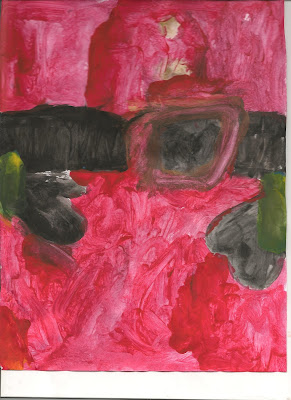
Santa painting for kids to make.
Jake's journey in art started here.

4.  Inspired Art. My son comes from a line of artists, but art isn't his thing. He is a straight A+ student- except for an A- in art. When my daughter and I paint and craft, he plays computer games. The other day, he sat down and painted this portrait of Santa!  


He used the entire page. It is truly amazing - "A Kid's Perspective of Santa". His Uncle designed the characters and worked on 'Call of Duty' Black Ops for Activision (among other things).  

If the Presidency thing falls thru, I think he might just have a back-up plan. I  LOVE that it isn't just a picture of Santa in the middle of the paper.


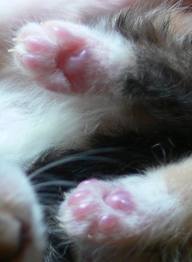
kitty paws for Pinterest.
Kitty paws.

5. Kitty Paws. Especially, touching my chin.


Hot Air Balloon photos.
Hot Air Balloons.

6. Hot Air Balloons. 
Here is a local Balloon Voyage anyone can experience.


Bunny ears, I adore this picture! :)

7. Toddlers. I think we are 3 and 5 here. Wow, 4 and 6 is so different. See that Balloon in the background? It's the Energizer Bunny which brings me to...


Easy no sew Joseph and Mary costumes from choir robes.
Cute Baby Bunny.

8. Bunnies. I just LOVE them. I miss my sweet fuzzy, cuddle bunny. Kids, cats, turtle, bird = no time for baby bunnies.  Maybe when the kids leave the nest. Wait, I'll be how old? 


Reminiscing is good too.


*This is one of my very first POSTS. If any of these images are yours, please let me know so I can give proper credit. 


Recommended Reading:


Birthday Party Game for Kids

Leo the Late Bloomer*

A Wish to Be A Christmas Tree*


ADS DISCLOSURE: We've partnered with some wonderful advertisers who may sponsor blog posts or send us samples to test. Some companies pay us to review their products.

*We also use affiliate links, if you make a purchase we get a tiny commission. Kids Creative Chaos participates in the Amazon LLC Associates Program*, an affiliate advertising program designed to provide a mean for blogs to earn advertising fees by linking to Amazon properties, including, but not limited to, amazon.com, endless.com, myhabit.com, smallparts.com, or amazonwireless.com. We also offer Tapinfluence, Google Adsense, SoFab, and Izea ads here. Thanks so much for helping us keep the lights on! :)