Showing posts sorted by relevance for query WAter. Sort by date Show all posts

When is Chinese New Year? It's the Year of the Water Snake Printable Coloring Page

When is Chinese New Year? It's the Year of the Water Snake

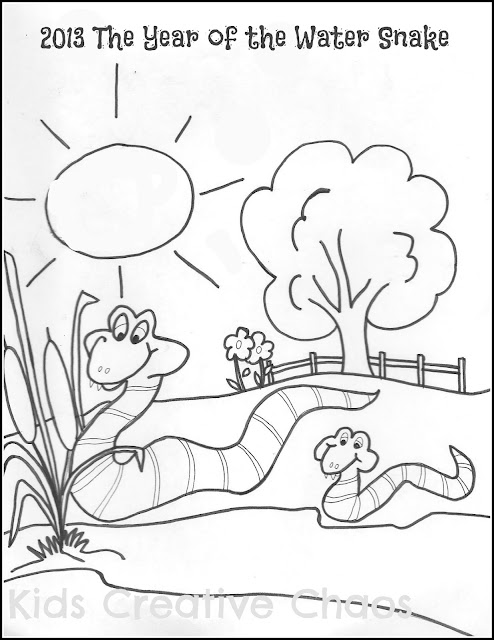
2013 Chinese New Year was Sunday, February 10. What animal is it? Nope, they don't do a Chinese Dragon every year. 2013 is the year of the Water Snake. What year is 2016? 2016 is the year of the Monkey. Here's a free printable snake coloring sheet. Enjoy!

When is Chinese New Year 2014? It is the year of the horse!

Snakes are revered, but not as much as the dragon. The snake is poised said to posses great wisdom, morality, and generally be financially secure. On the down side, a snake can be jealous and fickle.

When is Chinese New Year? Year of the Water Snake Printable Coloring Page
2013 is the year of the Water Snake. Right click to save to your computer and print or click here to print Snake Coloring Page PDF.

Find a Circus Dragon printable here.


ADS DISCLOSURE: We've partnered with some wonderful advertisers who may sponsor blog posts or send us samples to test. Some companies pay us to review their products.

*We also use affiliate links, if you make a purchase we get a tiny commission. Kids Creative Chaos participates in the Amazon LLC Associates Program*, an affiliate advertising program designed to provide a mean for blogs to earn advertising fees by linking to Amazon properties, including, but not limited to, amazon.com, endless.com, myhabit.com, smallparts.com, or amazonwireless.com. We also offer Tapinfluence, Google Adsense, SoFab, and Izea ads here. Thanks so much for helping us keep the lights on! :)


Easy Beer Cheese Dip for Pretzels Recipe

Beer Cheese and Pretzels Recipe


This homemade Easy Beer Cheese Dip for Pretzels Recipe is delicious! You'll feel like you're eating restaurant or bar food at home. Who can resist the warm baked goodness of homemade soft pretzels? Beer Cheese and pretzels are the perfect fall snack. Enjoy!


This post contains affiliate links.

Easy Beer Cheese Dip for Pretzels Recipe


How to Make Beer Cheese Recipe


Ingredients:
2T butter
2T flour
1/4 t salt
1 c beer
1/2 c milk
1/2 t ground mustard
1/2 t garlic powder
1/2 t paprika
1/4 t pepper
2 - 2 1/2 c sharp cheddar cheese, shredded
Hot sauce to taste (optional)

Directions:
Melt butter in a saucepan over medium heat. Add flour. Whisk, while heating, until mixture is golden brown, 1-2 min. While continuing to whisk, gradually add the beer. Cook, with stirring, until mixture partially thickens. Add milk; continue to whisk until mixture reaches desired consistency. Remove from heat. Stir in mustard, garlic powder, pepper and cheese. Stir until cheese has melted. Adjust seasonings as desired.


Homemade soft pretzels for beer cheese recipe
Homemade Soft Pretzels.


Homemade Soft Pretzels for Beer Cheese Recipe


Ingredients:
1 1/2 c. lukewarm water
1 package active dry yeast
1 t salt
1 T brown sugar
1/4 c butter, melted
4 c flour
8 c boiling water
1/2 c baking soda
1 egg, beaten and diluted with 1 t water
coarse salt


pretzel dough recipe


Directions:
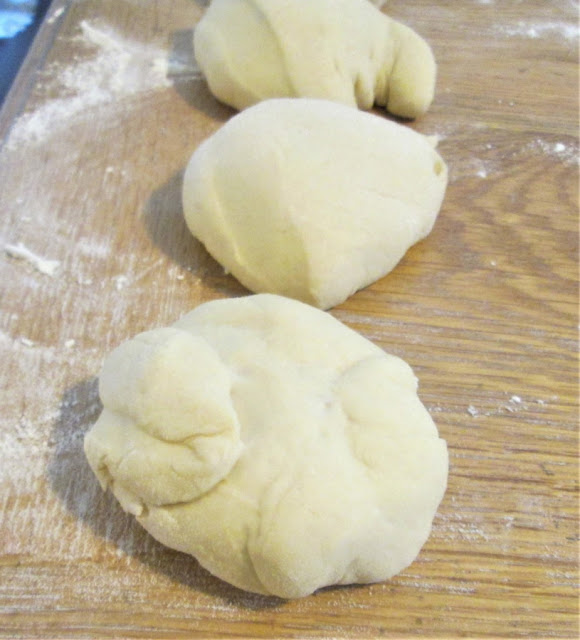
Dissolve yeast, salt, and sugar in warm water. Allow the mixture to sit until the yeast begins to foam or bubble. Add the melted butter, followed by the flour, 1 c at a time. The dough should be workable and not sticky. Knead the dough on a floured surface for several minutes. Place the dough in a greased bowl,  cover with plastic wrap, and allow to rise in a warm place for about an hour or until doubled in size.


how to roll pretzel dough
How to roll pretzel dough.


The perfect homemade pretzel.


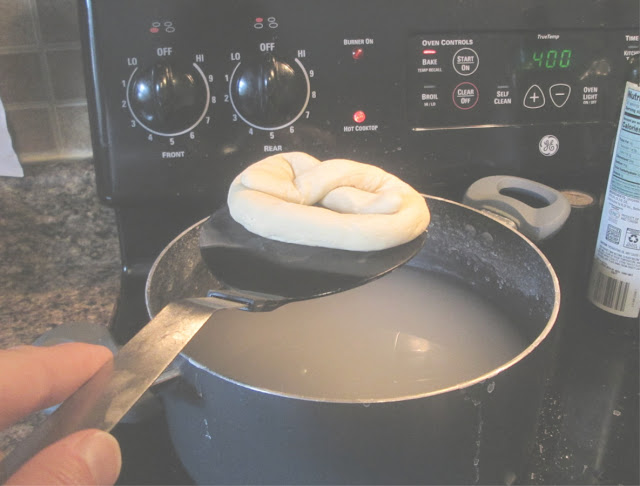
While the dough is rising, boil water and add the baking soda. Stir until dissolved. The baking soda bath with be used to give the pretzel a puffy dough with a golden and shiny crust.  You should also assemble a few handy tools:  a tape measure, a large flat spatula, your baking sheet, and parchment paper. The parchment paper is not essential, but it will make the pretzel much easier to remove from the baking sheet.

How to Make Pretzel Shape Pretzels at Home
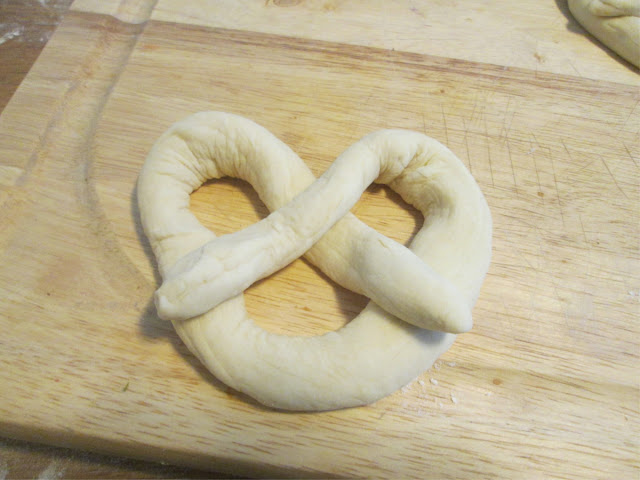
Divide the risen dough into 10 equal pieces. Roll each into a 20 inch rope. To form the pretzel shape, bend the rope into a "smile" shape. Cross the ends slightly. Grab the cross and fold it towards you, bringing it down to meet the front loop of the pretzel.
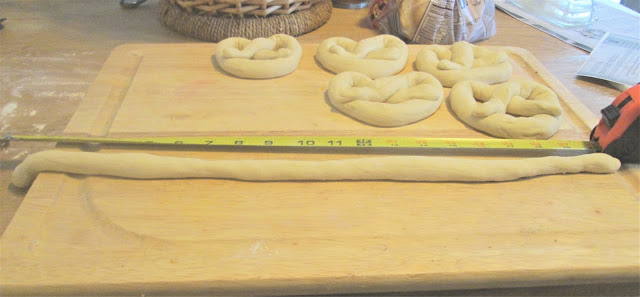

How to Make Pretzel Shape Pretzels at Home
How to Make Pretzel Shape Pretzels at Home.


Preheat the oven to 400 degrees F. Using your large spatula, place each pretzel individually in the baking soda bath. Allow it to sit in the bath 30 seconds to 1 minute, making sure the top gets wet as well. Carefully remove the pretzel with your spatula and place on the baking sheet. Once the sheet is full, bake for 10-12 minutes. Repeat as needed until all pretzels are baked.
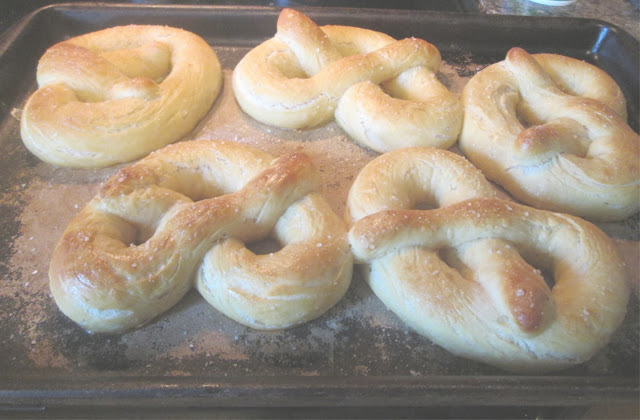


Hand twisted, homemade baked pretzels.


Recommended Reading:

How to Make Butternut Squash Soup

Don't have time to make them? Just buy Bavarian Soft Pretzels and Beer Cheese Dip on Amazon.

Oldies but Goodies to do with the kids
Make Heart Shaped Pretzels with Kids
Pound out a Pretzel Cornucopia


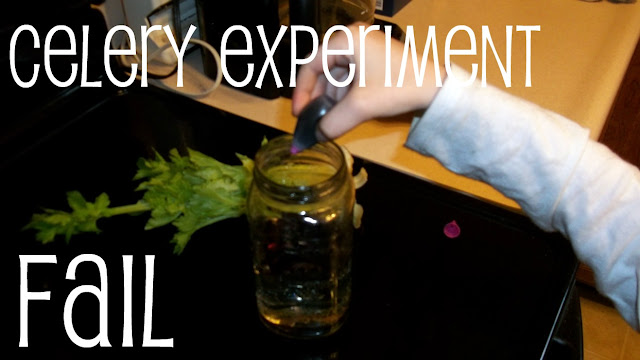
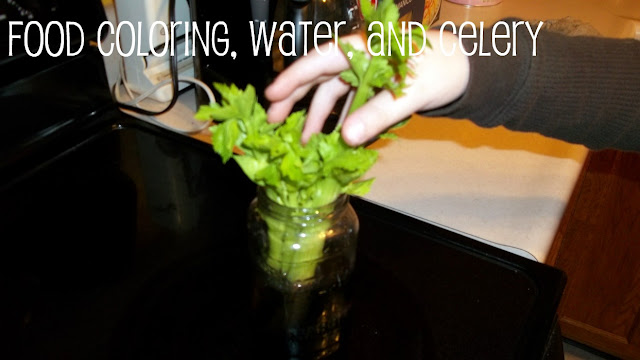
Craft Fail: Kid's Science Celery Experiment

Celery Experiment: How do plants drink water? 

Good question. We never found out! This celery science experiment for kids is easy and educational if you do it right. It proves why it is important to carefully follow instructions. So, how do plants drink water?  Enjoy!

Celery Science Experiment for Kids
Celery Science Experiment: 
Grab a glass of water, insert a few drops of food coloring.

Celery Food Coloring Experiment
Stick in the celery and wait twenty-four hours.

My fellow Kid-Bloggers have been posting those beautiful colored carnations and various plants soaking the water up through their stems and coloring the tips of their leaves or petals.

First, ours started to die and turned brown. Then, I moved it to the window-sill. We've watched it everyday for three weeks. Along the celery stalk you can see very faint purple lines that stop long before reaching the leaves. I added more water. This celery is going to sprout roots before the leaves take color.

We'll keep it going until it rots or colors. Science or BUST. 

TIP: Wanna know why we failed?  

Yep, I didn't follow the instructions and cut legs in my celery. Do that first!

Recommended Reading:

How to color celery science experiment for science success.

Scientific Explorer My First Mind Blowing Science Kit*

Pass the Celery, Ellery!*

 Celery Book
Pass the Celery.


Gift ideas for Call of Duty Fans

Call of Duty Gift Ideas

Do you have a Call of Duty Fan in the house? These gift ideas for Call of Duty Fans are sure to please even the most discriminating gamer. Enjoy!


Gift ideas for Call of Duty Fans Video Gamers
Gift ideas for Call of Duty Fans and Video Gamers.


Gift ideas for Call of Duty Fans Gaming Headphones
Gift ideas for Call of Duty Fans: Gaming Headphones.


  • Gaming Headphones* - These WIRELESS gamer headphones by Polk Audio Striker are for the Xbox, they also have headphones for other gaming systems. There's also a RETRACTABLE, flexible MICROPHONE for ingame chatting. If you purchase it through Amazon* and you are a PRIME MEMBER*, you'll get FREE SHIPPING!

Call of Duty Sentinel Task Force Jacket
Call of Duty Sentinel Task Force Jacket.


Call of Duty Sentinel Task Force Jacket* Whether your COD fan is a boy, girl, man, or woman, they need to keep warm! This cozy Call of Duty Hoodie with kangaroo pockets will make you their favorite gift giver this season! These run a little small, so order the next size up.

Gift Ideas for Gamers: Call of Duty Water Bottle
Gift Ideas for Gamers: Call of Duty Water Bottle.


Deluxe Video Gamer Chair for Call of Duty Fans
Deluxe Gamer Chair.


  • Deluxe Gamer Chair* - This ain't your baby brother's gaming chair, no siree! It has a wireless receiver and RCA cables and outputs. Use it for relaxing and listening to music too. Includes padded headrest and arms.


Ultimate Gamer Desk for Computer Gamers
Ultimate Gamer Desk.


  • Ultimate Gamer Desk* - Just say, "Awesome". This is so cool! Everything your gamer needs within arms reach. Includes Charging Station, Speaker Trays, Storage Drawer, Table-top Reinforcement Bar, Monitor Stand, 2 Controller Hooks, Game Storage Rack, Wire-management Trim Plates, Rear Power-strip Holder, Headphone Hook & Cup Holder. 


Recommended:

Coloring Pages for Call of Duty Fans

Call of Duty Craft for Kids

Call of Duty Birthday Party Ideas


ADS DISCLOSURE: We've partnered with some wonderful advertisers who may sponsor blog posts or send us samples to test. Some companies pay us to review their products.

*We also use affiliate links, if you make a purchase we get a tiny commission. Kids Creative Chaos participates in the Amazon LLC Associates Program*, an affiliate advertising program designed to provide a mean for blogs to earn advertising fees by linking to Amazon properties, including, but not limited to, amazon.com, endless.com, myhabit.com, smallparts.com, or amazonwireless.com. We also offer Tapinfluence, Google Adsense, SoFab, and Izea ads here. Thanks so much for helping us keep the lights on! :)


Jake's Journey in Art - Homeschool Lesson - 4 Watercolor Seascape (Wet on Wet)

Jake's Journey in Art: Watercolor Wet on Wet techniques for Homeschoolers

Kids Creative Chaos building Self-Esteem one art lesson at a time.


Lesson:  Choose one of the seascapes and one watercolor technique you've learned.

It was time for our next art lesson. Jake moaned and complained as usual, until I reminded him this week's lessons involved painting. "Yay! I like to paint. I never got to paint in art class."  Say what you say?  Catch up here. Art is about the journey, not the end result.

Homeschool Art Project How to paint wet on wet watercolor technique
Jake's seascape is on the left, Mayhem is on the right. She's added some embellishments.
Did you notice his attention to detail?  This is not a child who should despise art. Thankfully, we are making amazing progress.

Now, what Jake really meant to say was- I love it when I'm allowed to make a mess. He chose the sailboat scene and the wet on wet technique. Which is exactly as it sounds, paint water over your entire paper, dip your brush in water and the color, and let it bleed blend. Don't move it until it is dry.

We also did the salt painting technique and sprinkled salt on the wet sand area. When it dries it looks like real sand.

We first traced over the image to get a feel for it and then we lightly drew it in pencil on our watercolor paper. When painting with watercolors it is important to use the right paper. Copy paper will deteriorate with too much water. The fibers in the watercolor paper are designed to soak up the excess. Still, we laid out three layers of newspaper and had a roll of paper towels ready and waiting. Inevitably, someone always spills the water.


Our art table, okay, it is our dining room table. We never use it for that!

I am pleased to announce this assignment was our turn around lesson. In fact, his feelings about art have changed so much in a recent lesson on mask making he said, "Mommy, it is really awesome that I have a teacher who knows so much about art. You can teach me so many cool things!" (Insert tears here.)

I am quite skilled in the art of mask making. My highschool, art teacher, Mrs. Conway did a lesson on mask's with handmade paper. I made 3 or 4 different projects, entered them into an art contest and won some sort of an award. 

Oh my, I wish I could tell you what it was but a lot of time has passed since then.  After, I took a tiny scholarship to college and studied theatre design, art, and architecture. I've used the skills I learned in those classes to make many a mask for many a child in an after-school program, made some great mardi-gras costumes, and designed many theatrical props and sets. We'll post mask making 101 next week.

Hooray! Someone finally took notice.  My college journey was not a waste after all :-)

Okay, the real point is that Jake took notice. Chuckle-chuckle and all it took was some fancy paper curling around a pencil and a cool, paper snake. Mom's have mad skills, don't they. I'm gearing up to ask Jake to draw a new picture of how he feels about Mommy's art class-eh. Maybe I'll just take a photo of his expression.

Things are looking up!

Grandma's Homemade Applesauce: Life is Good in the Kitchen, The Heart of the Home

Miss Old-Fashioned, Homemade Applesauce like Grandma Used to Make?

When I think about childhood memories, my mind often wanders to the kitchen. The Food Network has a program dedicated to life in the kitchen, "The Kitchen" features host, Katie Lee, surrounded by beautiful LG Electronics. The Kitchen is fully equipped with LG Appliances from the Refrigerator and the Ovens to the Microwave and the LG Cook-top. It is the perfect place to make Grandma's homemade applesauce. Enjoy!


This post contains affiliate links for your convenience.*


Grandma's Homemade Applesauce Recipe: Life is Good in the Kitchen, The Heart of the Home
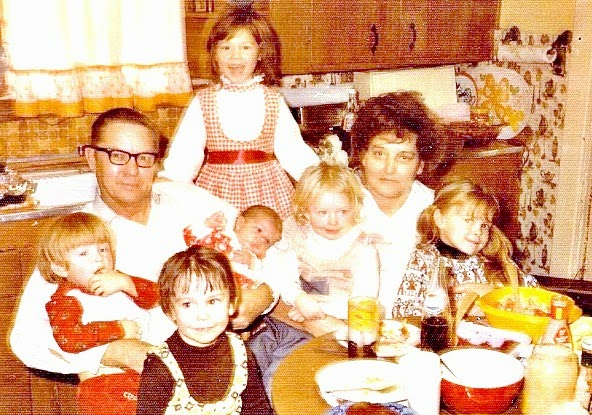
My grandparents and the cousins circa 1975.
Grandma's Homemade Applesauce traditionally made by my Aunt Verna.

I remember peeling and coring apples on an old appliance that attached to the kitchen table. After we used the apple-corer-peeler, everything went into what could have just as easily been a torture device, but somehow we weren't frightened by it. 

We begged to have a go at peeling the apple and then placing the pieces in the apple grinder. As an adult, I realize it is far less complicated to grab a knife and just peel my apple. The grinder we used is now obsolete, but these memories have stuck with me. Recently, my mother reminded me that my grandparents moved from the family homestead when I was just 9 years old. Funny, those times in Grandma's kitchen feel like yesterday.

We'd go to an orchard or a friend's house and pick our own apples and then bring them back to make "Grandma's Homemade Applesauce." Grandma's kitchen was tiny and crowded with Grandma, my mother, three aunts, and all the little cousins running in and out the backdoor. The table took up all of the free space in the kitchen with just a small, one person width around the perimeter. It didn't matter. No one seemed to notice. It was good to be so close to each other, working together to create something to share with the entire family. Each time, we ate the applesauce, we'd remember this day. I love the homemade applesauce to this day, but we no longer make it this way.

If I'm lucky, my aunt will share some of her special sauce with me. My kids like it, but they have no idea why it tastes so good to me. Memories are made in the kitchen. Life is good in the kitchen. We all need to spend more time around the table, getting to know each other, learning new skills, and enjoying the heart of the home.

I'm sharing Grandma's Homemade Applesauce Recipe and process, so you can make your own kitchen memories. I want you to experience how good life is in the kitchen.


Old-Fashioned Homemade Freezer Applesauce


6-8 Tart Apples, washed, peeled, and quartered. (Red & Golden Delicious work well-

or your favorite, just know that some apples are softer and/or sweeter than others)

Freezer Bags

1 Tbs. Lemon Juice

1 Tbs. Butter

1 Cinnamon Stick or 1 tsp. Cinnamon

1 Tbs. to 1/2 C. Water

1/4 C. Sugar per Pound.

In large sauce pan, begin with 1 Tbs. Water, Apples, Cinnamon, and Lemon Juice. Depending on your apples you will use more or less water. Many apples don't need any water added at all. Bring to a boil and then cover and cook over low heat until desired consistency. Some people prefer chunky applesauce, so for that the cook time is less.

Stir in butter and sugar to taste, if desired.

Grandma used a food mill to strain the applesauce. You can use a blender, food processor, or leave them as they are.

Remove from heat and let cool.

Spoon into freezer bags leaving 1/2 - 1" head space.

Flatten and stack to freeze.

Applesauce is good for at least 1 year frozen and 2 weeks once thawed and opened.

Tell us your kitchen story at Mom ConfessionsLG Home Appliances are your partner in creating memorable cooking experiences and “Life’s Good” moments in the kitchen.


*This is a sponsored conversation written by me on behalf of LG. The opinions and text are all mine.


Recommended:


How to Make Snow Cones or Sno Cones or Ice Cones or Shaved Ice Slushy Slush Puppy

Make a Snow Cone with Shaved Ice


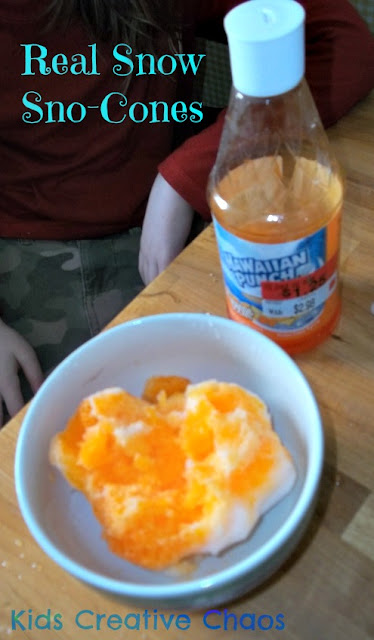
So how do you make an Ice Cone? I mean it's just ice and syrup, right? Isn't a slushy the same thing?  What is a Sno-cone; is it really made out of snow?  Well, we made one from real snow.  It's springtime in Indiana, so anything goes.  Here's a list of everything you never wanted to know about the tasty shaved ice treat.


How to make a rainbow slush for a kids party Pinterest
Rainbow Slushy Popsicle Ice.

Wikipedia defines snow cones as a North American variation of shaved ice commonly served in paper cups. Shaved ice is finely crushed ice. Hawaiian's call it Shave Ice. Baltimorians call them Snowballs.


Slushies are all about freezing water. Snow is frozen water, right?


Homemade Snow Cones from Snow how do you make syrup?
Authentic Snow Cones.
We cheated. We scooped up some Indiana snow and added the Hawaiian Punch syrup we found on clearance at Walmart. They put it on clearance when snow is in season, go figure. This was the easiest snow cone recipe ever. Start with clean snow. 

Mayhem leaves out collecting bowls whenever they are predicting snow. Was it good? Um... yes. It is softer than shaved ice, and oh so perfect for a snow cone. Just like the real thing, if you live in Baltimore.


Snow cone syrup: Get this, the first flavor of syrup for shaved ice was EGG CUSTARD. Apparently, during the American Industrial Revolution  New York ice houses started selling ice to Florida. When the truck passed through Baltimore, kids started asking for free samples. Each time the truck came through they got their wish. The mothers decided to flavor the ice. Since eggs, butter, and sugar were readily on hand, they made egg custard flavor shaved ice. Of course they did. Yep, Baltimorians invented this tasty treat. Later during the Great Depression, it was an inexpensive snack earning the Baltimore Snowball the name "Hard Times Sundae".


The Hawaiian's added a scoop of ice cream at the bottom of a cup and poured a little milk on top. Thank Hawaii for the rainbow colors too. Thank India for Salt and Pepper flavored shaved ice popsicles known as Kala Khatta. Hmm... I'll just stick to the colored, sugary syrup.


When I was a kid, growing up in Indiana the Slush Puppie was the cat's meow. What a treat to get a $1.00 from Grandpa and head into the corner store for a Slush Puppie.


Slush Puppie Snow Cones Sno Cones Shaved Ice Shaved Recipes
Slush Puppies.

Snow Cone Syrup Recipes (How to Make)


You need Sugar, lots of it, for a healthier alternative you could try Clear Corn Syrup or Light Maple Syrup. That's funny right there. For a healthy alternative how about ice and food coloring.


2 C. Sugar, 1 packet Kool-aid Drink Mix, 1 C. Water


Stir sugar and water together in a saucepan (or substitute one of the syrups above). Bring to a boil. Boil for 1 minute. Remove from heat. Stir in Kool-aid. Cool and store in a recycled glass bottle. Wait for a snow storm or use one of those nifty ice shaving contraptions or use the crushed ice from your fridge dispenser. Now pour the syrup over the ice. Tada! You should start your own snow cone biz 'cause you are officially a pro.


Recommended Reading:


Snowmen at Night*


Kids Creative Chaos Cooks: Kitchen Kids Series: Holiday Recipes*


How to Make a Bottle Bloom into a Flower: Recycled Projects

Use your old plastic bottles to create a fun flower project for kids:  Bottle Bloom

Things to do with a Plastic Bottle. This is a special guest post written by my very creative brother, Jamie. Watch how he makes a plastic bottle into a flower  in this fun, recyled activity project. We'll be unveiling many cute coloring sheets for kids and lots of fun projects little boys will love. Welcome Jamie in the comments below the post. Enjoy!

Things to do with plastic water bottles.
Wondering what to do with all those empty plastic bottles? 
Make them bloom into something new.

Looking for things to do with plastic bottles? Have you ever seen an old plastic water bottle bloom into a beautiful flower? Take your recycled items to a new level, and give them new life with our fun, recycled project ideas for kids. Use this as a companion project for a science lesson on naming the parts of a plant.


Supplies Needed to make your bottle bloom.

This is a fun way to turn those constantly piling up plastic bottles into a cute craft that anyone can make. All you need is a pair of scissors, a glue gun, and a straw. Well, of course, you will need a bottle.


Cut the bottom off of  the bottle.

How to make a flower from a plastic water bottle:

  • Cut the bottom of the bottle off near the end.
  • Carefully space and then cut out leaves from the remaining bottle.
  • Use a cap full of glue to secure the straw in the bottle's cap. You need to use a lot of glue to anchor the finished flower. 
  • Now, glue the bottom of the bottle to the top of the straw.
  • Finish with your choice of paint. We chose water colors- not the best coverage but an interesting look. If you want your paint finish to last use an acrylic or even spray paint made for plastics.    

Cut the leaves from the bottle.
Be careful not to cut them all way off, leave the sides (leaves attached near the lid).

Attach the straw with lots of glue.
Glue bottom of the bottle to the other end of the straw.

How to Make a Bottle Bloom into a Flower: Recycled Projects
Make an entire flower patch in minutes!

Make a whole flower patch in just minutes!


Recommended Reading:

Sand Art Bottles with Rice

The Everything Kids' Science Experiments Book*

The Adventures of a Plastic Bottle: A Story About Recycling (Little Green Books)*


ADS DISCLOSURE: We've partnered with some wonderful advertisers who may sponsor blog posts or send us samples to test. Some companies pay us to review their products.

*We also use affiliate links, if you make a purchase we get a tiny commission. Kids Creative Chaos participates in the Amazon LLC Associates Program*, an affiliate advertising program designed to provide a mean for blogs to earn advertising fees by linking to Amazon properties, including, but not limited to, amazon.com, endless.com, myhabit.com, smallparts.com, or amazonwireless.com. We also offer Tapinfluence, Google Adsense, SoFab, and Izea ads here. Thanks so much for helping us keep the lights on! :)


Edible Scratch and Sniff Paint: Watercolors for Kids Kool-aid Recipe

How to make Water Color Paint Recipe

There are so many things you can do with Kool-aid. Here is a simple recipe for Edible Paint! Scratch and Sniff water colors for preschool and toddler kids.


Edible Scratch and Sniff Paint Watercolors for Kids Kool-aid Recipe
Edible Watercolor Kool-Aid Paint Recipe.

How to make edible paint 
(scratch and sniff watercolor paint): Ice Cube Tray or Styrofoam Egg Box, Several Flavors of Kool-Aid Packets, Water Dropper, Tiny Mixing Spoon, Paint Brushes, Paper, Kids.

Fill Each square 1/2 Full with Kool-Aid Powder, Add A few Drops of Water, Mix with spoon until it looks like Watercolors, Have kids paint cards, coloring book pages, etc. The Paints Should be thick- these are a little too watery. Add Salt for shine and texture!


Edible Watercolor Kool-Aid Paint Recipe


Allow to dry overnight and then... SCRATCH and SNIFF!  
Makes Great Greeting Cards. Here's another fun edible art project to do with kids: Monkey Treats


Recommended:

Crayola 4ct Washable Fingerpaints Primary (Bold, primary colors in red, blue, yellow, and green)*


Loew Cornell 73 25-Piece Brush Set, Stencil Pack*


DIY Home Repairs, You can do it!

Solutions to these 3 Common Home Issues

While there is plenty of joy involved in becoming a homeowner, maintaining your home can prove a costly affair in many ways – especially if you have pets or children. Luckily, remedying any persistent home repair issue is easy when you know where to start. Here are some DIY solutions to the most common home issues that could pop up at any time. DIY home repairs? Yes, you can do it!


This post contains Amazon affiliate links.


DIY Home Repairs, You can do it! Common home issues you can fix on your own.

Damage to the roof 
If you're to prevent any lasting damage occurring on your roof, it's important to keep your roof shingles and your gutters in tip-top condition. Old and flimsy shingles can lead to nasty leaks, which can result in irreparable damage to your ceiling and the foundation of your home, while clogged, or broken gutters will not aid the water in flowing off the of the roof efficiently. The accumulation of water is certain to lead to the erosion of your roofing and, in time, significant leaking too. It can also lead to leaks in the walls and foundation, depending on your structure. The solution to this problem is to rope in the professionals to conduct repairs and to strive to call them back at least once a year to maintain the roof. That's how you can easily do it. If you want to do it yourself, check out the roof shingle repair video below. 


Don’t have the money necessary to get the job done and stuck with a bad credit history in your name? It may be time to consider loans for bad credit.  Sometimes, you just need a little extra help, right?

Clogged toilet
A clogged toilet can often mean the need to call on plumbers for assistance – which can tug at the purse strings. You'll probably be relieved to discover that there are a variety of other options available to you if you're trying to save your cash for other necessities. Of course, the first step is always to try your luck with a plunger. However, if that doesn't work, the next best thing is to try using some baking soda and vinegar. Yes, it really could be that simple!
Throw a cup of baking soda into the toilet bowl and leave for a minute or two. You can follow the baking soda with two cups of white vinegar. The vinegar naturally reacts with the baking soda, causing it to bubble – so add it bit by bit to avoid overflowing. Leave to sit once again for a few minutes before flushing the toilet. In many cases, the baking soda and vinegar concoction will be enough to loosen the clog and allow the water to move along smoothly. Bet you didn't know that! You can always try some Liquid Drano, but it's got a hefty price tag.

Need some extra help? Watch this video on how to unclog a toilet with a snake. You might not want, but you CAN do it!


Stains on your carpet
Whether your dog is the one responsible for the mud stains on your cozy woolen rug, or your youngest kid spilled juice all over the freshly vacuumed carpet, nothing can cause a homeowner stress quite like a bad stain on the carpet or upholstery! It feels so permanent. According to Wellness Mama, aside from using nasty chemicals to get rid of it, there are several natural stain removal solutions that you can try. For instance, you may choose to make a paste using warm water and baking soda. Apply it to the stain and leave to dry. Once thoroughly dry, you can vacuum up the residue, and the stain should lift along with it. If that doesn't work, watch the video on carpet stain removal below.


Now that you know how best to tackle the most common home repairs, there's no need to stress about these common home issues any longer, be confident that you can do anything you set your mind to do. Remember, you just need a positive attitude and some great YouTube videos on DIY home repairs!

Recommended:

Tips for Settling into your NEW HOME


Pin it!


how to fix common home repair issues you can do it youtube videos solutions


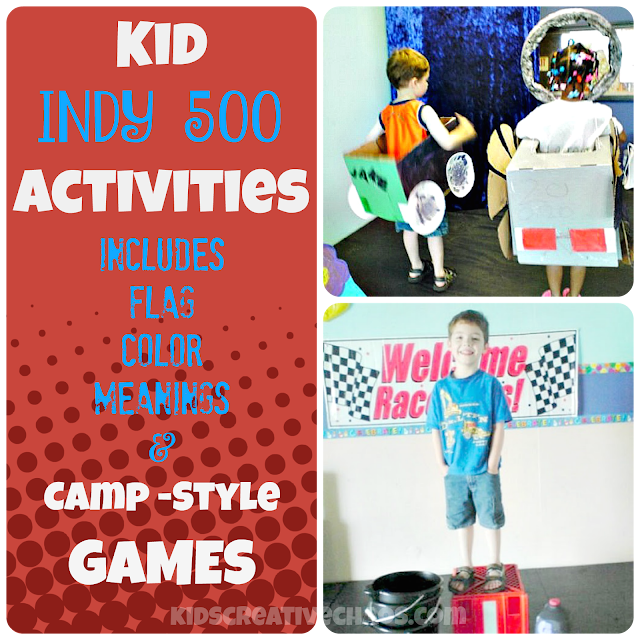
Plan an Indy 500 Race Theme for a Kid's Birthday Party or Special School Activity

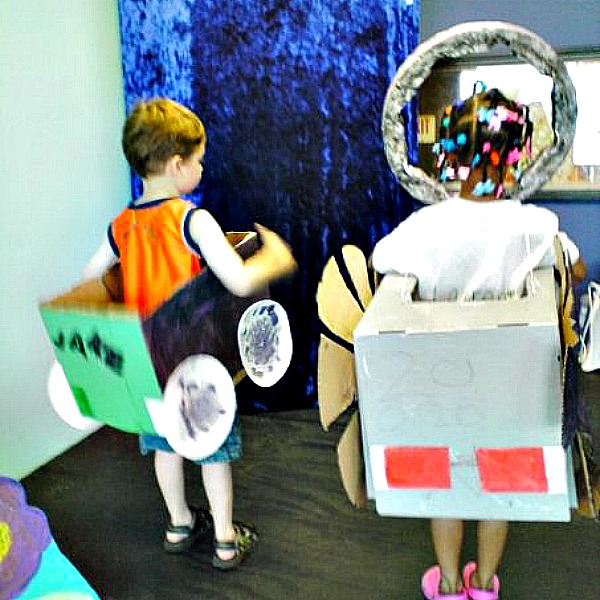
Indy 500 Theme Race Party with Cardboard Racecars

The Play Connection, Inc. (my alter ego) did lots of fun preschool activities that are great for a birthday party or for kids' outdoor pe games. Due to the proximity of Indianapolis, an Indy 500 racing theme is always popular in May. Plan Indy 500 kid activities for a fun field day at school, and make your own race cars from cardboard boxes. Enjoy!

This post may contain affiliate links for your convenience.*


Indy 500 Activities for Kids
Indy 500 Activities for Kids.


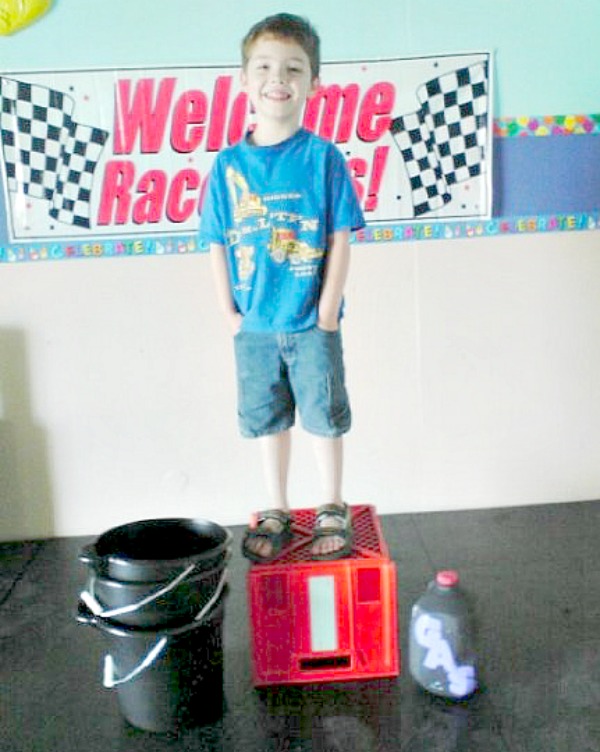
Use recycled household items as props  including a plastic milk jug for a gas can.
Use recycled household items as props- 
including a plastic milk jug for a gas can.


Ideas on how to plan an Indy 500 Race Birthday Party: 

  • Purchase inexpensive, large, black buckets to use in a pit stop race game. 
  • Recycle a milk jug, paint it black with spray paint or acrylics, and use duct tape or paint to spell out G-A-S.
  •  Turn a milk crate upside down to use as a Winner's Circle.
  • Hang a race banner (we got ours at the Dollar Tree).
  • Make 9 colored race flags for a realistic race experience.


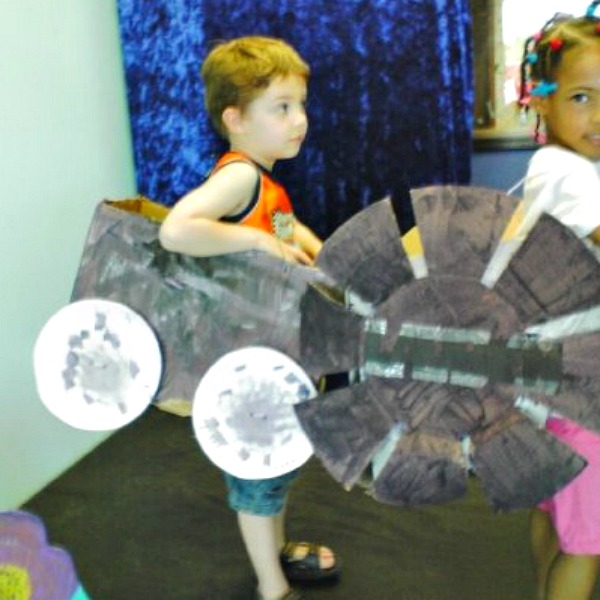
How to make cardboard Cars for party or pretend play.
Trick out your cardboard car with paper plate wheels or 
fancy, cardboard fan wheels.

Wondering 'what do the flags mean or stand for in the Indy 500 race'?  

  • Green means go! Of course, you already knew that! Just like shouting "Green Light", the green flag is waved to signal the start of the race. It is also used to for restarts after a caution flag.
  • Yellow flag signals caution for a hazard. It could be an accident, debris, rain, maybe a silly goose got loose on the track. The pace car hops on the track to lead the other cars in safety. When we play Red Light, Green Light, we use yellow to signal walk very slowly.
  • Red flag STOP! Do not pass go, do not collect $100 dollars. A red light means freeze in your tracks. It is for accident or rain conditions.  Head straight to the pits or stay parked. No repairs, tire changes, or gassing up allowed. In other words, no fair cheating!
  • Red flag with a yellow "X" means the pits are closed to all vehicles.
  • Black flag means a penalty to a car on the track. Don't break the rules! It's also used for mechanical failures.
  • Black flag with a white "X" black-flag penalty.  Your car isn't keeping score anymore.
  • Blue flag or blue flag with yellow diagonal stripe Get out of the way, slow poke, a faster driver is about to pass. We use a blue light in our game to signal to turn around and walk backward toward the finish line.
  • White flag the end is near! It's the FINAL lap.
  • Checkered flag  Hooray! We have a winner. This flag means the race is over.
For our race car game of Red Light, Green Light, we purchased dowel rods and squares of fabric from Joann's Fabrics. To attach, rub glue on the dowel, wrap one end of fabric around the dowel, and staple as close to the stick as possible.

Let the kids paint and decorate their cardboard box cars.
Lay out aluminum foil, tissue paper, paper plates, and colored duct tape.  
Let the kids' diy imagination run wild.

On your mark, get set, go! Mark off a track with chalk, tape, or use cornstarch paint in the grass. Get your flags ready to wave. Have parents or helpers use a stopwatch to track each child's time. No need to compete against others. Race around several times for your best lap. Now the fun begins!


How to Pretend Play Race Red Light, Green Light Game
On your mark, get set, let the games begin!

How to Play Pretend Pit Stop


Get parents and teachers involved with the fun. Before the game begins, designate a pit crew for each "driver". 


During a caution flag, have everyone pull into the pits. One member of the crew must run around the car 4 times checking pretending to check tires. 

Another crew member will take the pre-filled milk "Gas" jug (water) and pour it into the black bucket. 

Then, the crew members must use a funnel to re-fill the jug. Have the driver time the crew for even more giggles. When all the water is gone, the drivers can take off again.

Measure the water in the jugs to see which pit crew wins a prize. Just pour it back into the buckets, and see which one retained the most water (gas).


A game of Red Light, Green Light is fun around the track too.


Recommended Reading:

Things to do in Indiana: Indy 500 Race Activities for Kids

Eat My Dust! Henry Ford's First Race* 


Sign up for our free newsletter


ADS DISCLOSURE: We've partnered with some wonderful advertisers who may sponsor blog posts or send us samples to test. Some companies pay us to review their products.

*We also use affiliate links, if you make a purchase we get a tiny commission. Kids Creative Chaos participates in the Amazon LLC Associates Program*, an affiliate advertising program designed to provide a mean for blogs to earn advertising fees by linking to Amazon properties, including, but not limited to, amazon.com, endless.com, myhabit.com, smallparts.com, or amazonwireless.com. We also offer Tapinfluence, Google Adsense, SoFab, and Izea ads here. Thanks so much for helping us keep the lights on! :)