Showing posts sorted by date for query painting. Sort by relevance Show all posts

Kitchen Kids: Edible Mayflower Sandwich Snack for Thanksgiving Craft

Make a mini Mayflower Ship Sandwich Snack to celebrate the Pilgrims landing in America: Thanksgiving Craft for Kids

Get your kids in the kitchen for this edible Thanksgiving Craft. This snack craft is an easy, fun activity for afterschool or preschool class. It is fun to make an edible Mayflower ship craft. Enjoy!


Kitchen Kids: Edible Eatable Art Mayflower Sandwich Snack for Thanksgiving
Mayflower Edible Thanksgiving Craft.
You might also like this Fall Thanksgiving Craft, Painting with Pumpkins, Gourds, and other squash.


Attach cheese slices by making an eatable cream cheese paste on your Mayflower Sandwich Ship.


Edible Mayflower Ship Snack Activity for Kids to Make
Fruit Snack Passengers = Madagascar Penguins.

You need:

Hot dog buns 

Cheese Slices (Yellow and White)
Pretzel Sticks
Cream Cheese
Optional: Goldfish Crackers or Character Fruit Snacks

To make:


Hollow out the center of 1/2 of  bun.

Spoon in cream cheese.
Cut cheese slices diagonally into triangles.
Slide pretzel thru one side of slice to form a sail. 
Note: This doesn't work well with room temperature cheese, so we used cream cheese as a paste. Stick sail into the cream cheese. Use mini pretzels for steering wheel and life preservers. Insert Goldfish crackers tail end first to represent passengers. Serve with baked chips and pumpkin salsa. Eat. 

Recommended Reading:

Cranberry Thanksgiving (Cranberryport)*

Kids Creative Chaos Cooks (Kitchen Kids Book 1)*

Eatable Art Snacks for Kids


ADS DISCLOSURE: We've partnered with some wonderful advertisers who may sponsor blog posts or send us samples to test. Some companies pay us to review their products.

*We also use affiliate links, if you make a purchase we get a tiny commission. Kids Creative Chaos participates in the Amazon LLC Associates Program*, an affiliate advertising program designed to provide a mean for blogs to earn advertising fees by linking to Amazon properties, including, but not limited to, amazon.com, endless.com, myhabit.com, smallparts.com, or amazonwireless.com. We also offer Tapinfluence, Google Adsense, SoFab, and Izea ads here. Thanks so much for helping us keep the lights on! :)


How to make your own DIY Edible Face paint Ideas & Recipes & Build Self-Esteem: The Thing About Monsters is

How to make edible face paint and recipes for Toddlers and Kids of all Ages

Remember, You Can do it with Creative Play and a Can-do Attitude. Recently, we did a post about Monster Trouble (Our first KCC Kids Video) check out the fun here. SCROLL DOWN to see DIY Face Paint Recipes for face paint/makeup, lip gloss, sensory play and Witchy Me.


Monster Trouble?
Face Paint for Kids
Face Paint Kit by Alex Toys.

In the video in the post, a sneaky monster is made with items from our costume trunk/creative play stash and Alex Toys Face Paint Studio. Not once, have we posted pictures or recipes of our homemade and edible face paints. During our creative play and messy classes playing with face paint has been a staple. So, read on to discover many ways to create self-esteem, a fun day of creative play, how to make less of a mess, and enjoy the little time you have with your littles and not so little ones.
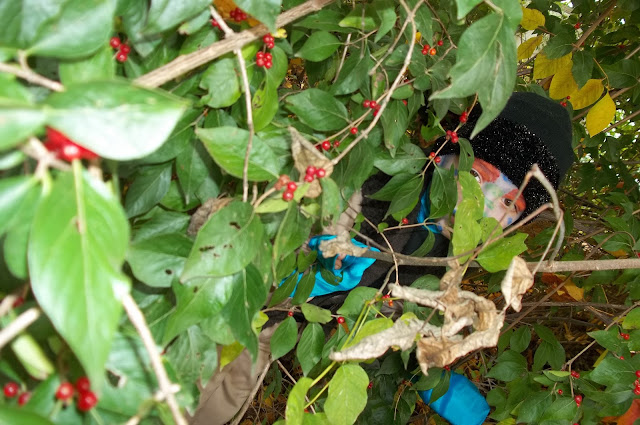

How to make edible face paint and recipes.
Sneaky Monster peeks out of the brush.


DIY Face Paint Recipe and Monster Face
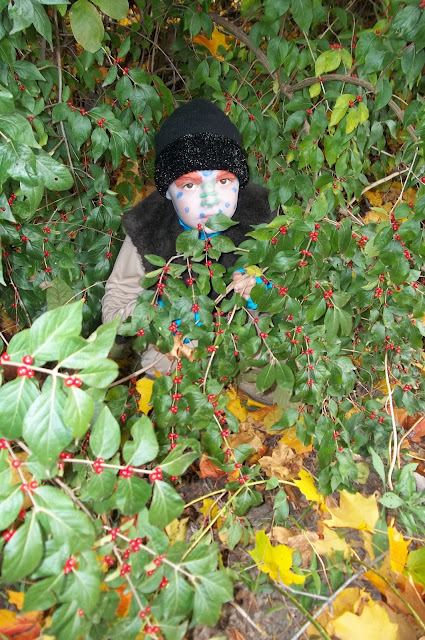
I see you and your Monster Face paint.
It's hard to see, but he was modeled after the Connect a giant Monster kits above from Alex Toys. The Monster has a purple and green nose and red and orange eyes. This is a great kit for your older kids. Give them a mirror and a book of silly face ideas and let them go wild! Creative Play is a great self-esteem builder. Let them try out different faces, remove the paint with a little water or vaseline on a cotton ball, and be sure to tell them how great it looks. No buts or maybe ifs allowed.


Homemade face paint.
What's that you say? You don't want to have to clean up the mess? Put them in an empty tub the mess will clean itself, but make sure your little Max Factor helps. They might complain, but cleaning up after themselves teaches responsibility and independence. I can do it! Yes, you might have to tidy up- just don't complain about it.  You don't want your child thinking they can't do anything. If they can't even clean up after themselves they'll stop trying! So, count to 10, take a deep breath, and then say, I love how you are learning to clean up after yourself; it makes me so proud!

Do you want to be remembered as the Mom with the spotless house or the Mom who was so fun and positive? Your choice, you decide.


how to make your own face paint recipe
Crazy Blue Face Paint Fairy.

How to Make your own Face Paint (Recipe):

Cold cream, Food coloring, Cornstarch, Egg Carton.

Start with 1 C. of cold cream (Noxzema type)
Slowly mix in 1/2 to 1 C. cornstarch until it is a smooth, creamy consistency.

Divide into an egg carton or muffin tin.
Add 1-2 drops of food coloring. Experiment with more or less and color combinations.

Use cotton balls or paint brushes to paint a masterpiece on your face.

Most colors will wear off quickly or wipe off easily with water due to the cold cream. Sometimes, yellow requires a little petroleum jelly to remove all the residue. 

With experimentation you can get professional results with these ingredients. It does dry and get crackly. Some kids don't like this sensation others think it's cool.
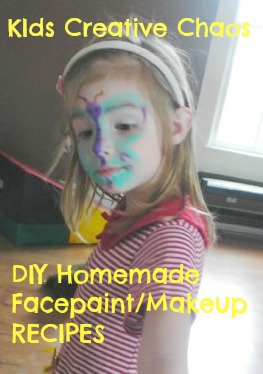
Homemade Face paint and makeup recipes for Toddlers and Preschool.
Homemade Face paint and makeup recipes.

Make your own Edible Face Paint for Preschoolers and Toddlers:

Caregivers, do you need 20 minutes of me time? This is AMAZING. If you don't want to leave the little alone in the bathroom spread an old, white sheet or vinyl tablecloth on the floor. Cornstarch, food coloring or colored drink mix, water, white flour, big spoons, and mixing bowls.

Start with 1/4 C. of flour
Mix in 1/2 C. of cornstarch or powdered sugar (think icing)
1/2 to 1 C. Cool Whip (Readiwhip doesn't work.)
Sift with fingers to mix and enjoy the sensory aspects.
Slowly add 1/4 to 1/2 C. water stir with spatula
Water and cornstarch make an interesting science experiment so make sure to add the flour and Cool Whip first. Mix to a creamy icing consistency ~ Spreadable.
Divide into egg carton and add food coloring or Drink Mix powder (Kool-Aid) works best.

The little will have a blast studying their face and admiring their handiwork  Let them remove their shirt and paint tattoos on their belly or  bugs on their hands. This is a fun way to teach babies eyes, nose, mouth, etc.

The ingredient measurements are guidelines. Warm water vs. cold, warm house vs. cool all of these can affect the makeup- experimentation is key.
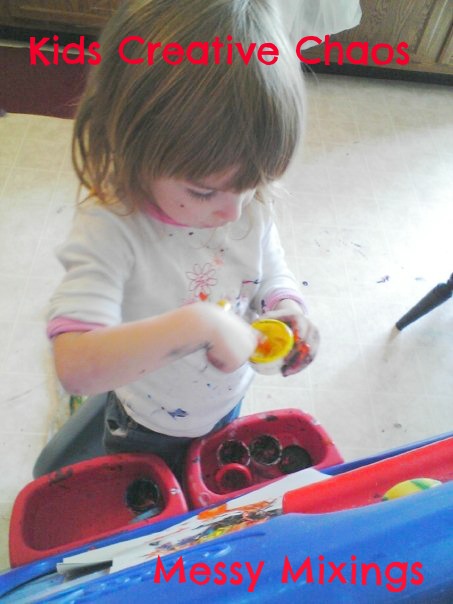
Mixing paint is great for fine motor skills and sensory learning.


Kid’s Yummy Lipstick Recipe:

Petroleum jelly, honey, maple syrup, or non-imitation vanilla, unsweetened drink powder for color and flavor.

Put Petroleum jelly into microwave safe dish

Microwave the petroleum jelly for 30 seconds to one minute until 

warm, remove and stir.

Add Kool Aid and Honey

Mix well
Spoon into gift containers, refrigerate.

Changing Hair Color:

Experiment with Conditioner or Petroleum Jelly and unsweetened drink powder, & Baby Powder. Spray Aqua Net to set the color. May take several washings to wash out. We found a YouTube Video here.


Happy Halloween and Haunting  or Go break a leg!


Recommended Reading:

Jake's Art: Still Life Picture: Homeschool Lesson 3

Still Life Picture Cobalt Bottle Homeschool Art Project

Oh my, what a fun journey in Art we have embarked upon this homeschool season. This week's assignment Still Life PicturesGather some fruit and other interesting items, arrange them on a table, and draw them as realistically as possible. Well, let's just say it took all of our stressometers to the max. Enjoy!

Still Life Picture Apples and Cobalt Bottle
The Still life example looked similar to this one 
with a cobalt bottle and fruit.
As, Jake sat having a melt-down, I searched the web for famous examples of still life. The lesson does mention not everyone has a natural ability to do realistic drawings, but practice makes perfect.


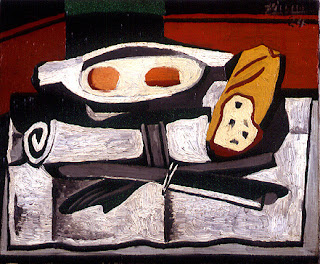
Picasso Still Life Painting
Picasso, Still Life with oranges.
Let me tell you, I've had years of practice. I cannot draw a realistic still life. So, I told Jake we would interpret our own realism like Picasso did in his interpretation. After all, everyone must start somewhere and the photographic images could stifle the most confident of young artists. I showed him many amazing still lifes. Examples are at the bottom of this post. He struggled with the contour drawings wanting to draw the entire table no matter how many times I explained, "Just pretend this is all you see."


This one depicts the entire surface of the table.
"Jake, please try again.  You are making this much too difficult.  Just draw a line to represent the table surface."  "I Can't!" He cried smashing his pencil down onto the table.

Still life on table with outline.

Still life with apple totem.


Still life third try.

Now, I didn't make him draft the outline five times. It was his perfectionist choice. I was ready to color-in the second one once he understood the concept of a horizon line, but he was compelled to continue the torture. His final drawing is below and quite lovely with its soft shadings, faint line of the table in the background and arrangement. (Nevermind the bottle lines showing through the fruit~choose your battles.)


In the meantime, his little sister (Mandy Mayhem) and natural born creative, drew this still life including the table, the windows, the painting on the wall, the wall, and some additional items she felt added to the picture.


 "I'm done Mommy. Can I do another one? I really like the Fishbowl Matisse, can I do one of those?"  Sure, Mayhem just do it quietly so Jake can concentrate.

Matisse Fishbowl Still Life Picture Goldfish
Matisse with Goldfish.

If only, Jake could concentrate. Remind your kids to relax!  Relaxation is the most important element of quality art. He has a special talent, but this project was very stressful for him.

The pictures below, especially Wassily Kandinsky,  gave him the courage to trudge ahead. We also found Paul Klee and Joan Miro still lifes. 

Everyone who studied art had to do a still life. Note the Paul Cezanne's skulls. So, paint what you enjoy. Make the project your own, but fulfill the assignment.


Warhol Still Life Image
Warhol Still Life
Cezanne Still Life Skulls
Cezanne Still Life
Picasso Still Life
Picasso Still Life

Kandinsky Still Life
Kandinsky Still Life
Picasso Still Life
Picasso Still Life

Matisse Still Life
Matisse Still Life


The still life was our worst struggle by far, but it was also a turning point. The next post is a much happier, carefree one. As Jake's journey continues you will see a calmer more reflective, budding young artist.


Remember these points:
A little encouragement goes a long way.

You don't have to erase in ART. The mistakes can make a Masterpiece.

Never tell your child or anyone else their drawing doesn't look real. It is art, a beautiful interpretation in the eye of the beholder. What if Picasso or Warhol stopped trying because they weren't successful? 

Andy Warhol is a fantastic example. Practice does make perfect but not necessarily photographic. Once he abandoned the notion he needed to be a "real artist" not a graphic artist; he finally became a Master of his own success.

Read more about Lesson one (Line - how do you feel about art.) and Lesson two (tunnel book perspective.)

And this one next (if you are following in order): Oh happy day: progress with watercolors and paper arts.


Recommended Reading:

Still Life with Bread Crumbs: A Novel*

Art of Still Life Drawing (Art of Drawing)*


ADS DISCLOSURE: We've partnered with some wonderful advertisers who may sponsor blog posts or send us samples to test. Some companies pay us to review their products.

*We also use affiliate links, if you make a purchase we get a tiny commission. Kids Creative Chaos participates in the Amazon LLC Associates Program*, an affiliate advertising program designed to provide a mean for blogs to earn advertising fees by linking to Amazon properties, including, but not limited to, amazon.com, endless.com, myhabit.com, smallparts.com, or amazonwireless.com. We also offer Tapinfluence, Google Adsense, SoFab, and Izea ads here. Thanks so much for helping us keep the lights on! :)


Jake's Journey in Art - Homeschool Lesson - 4 Watercolor Seascape (Wet on Wet)

Jake's Journey in Art: Watercolor Wet on Wet techniques for Homeschoolers

Kids Creative Chaos building Self-Esteem one art lesson at a time.


Lesson:  Choose one of the seascapes and one watercolor technique you've learned.

It was time for our next art lesson. Jake moaned and complained as usual, until I reminded him this week's lessons involved painting. "Yay! I like to paint. I never got to paint in art class."  Say what you say?  Catch up here. Art is about the journey, not the end result.

Homeschool Art Project How to paint wet on wet watercolor technique
Jake's seascape is on the left, Mayhem is on the right. She's added some embellishments.
Did you notice his attention to detail?  This is not a child who should despise art. Thankfully, we are making amazing progress.

Now, what Jake really meant to say was- I love it when I'm allowed to make a mess. He chose the sailboat scene and the wet on wet technique. Which is exactly as it sounds, paint water over your entire paper, dip your brush in water and the color, and let it bleed blend. Don't move it until it is dry.

We also did the salt painting technique and sprinkled salt on the wet sand area. When it dries it looks like real sand.

We first traced over the image to get a feel for it and then we lightly drew it in pencil on our watercolor paper. When painting with watercolors it is important to use the right paper. Copy paper will deteriorate with too much water. The fibers in the watercolor paper are designed to soak up the excess. Still, we laid out three layers of newspaper and had a roll of paper towels ready and waiting. Inevitably, someone always spills the water.


Our art table, okay, it is our dining room table. We never use it for that!

I am pleased to announce this assignment was our turn around lesson. In fact, his feelings about art have changed so much in a recent lesson on mask making he said, "Mommy, it is really awesome that I have a teacher who knows so much about art. You can teach me so many cool things!" (Insert tears here.)

I am quite skilled in the art of mask making. My highschool, art teacher, Mrs. Conway did a lesson on mask's with handmade paper. I made 3 or 4 different projects, entered them into an art contest and won some sort of an award. 

Oh my, I wish I could tell you what it was but a lot of time has passed since then.  After, I took a tiny scholarship to college and studied theatre design, art, and architecture. I've used the skills I learned in those classes to make many a mask for many a child in an after-school program, made some great mardi-gras costumes, and designed many theatrical props and sets. We'll post mask making 101 next week.

Hooray! Someone finally took notice.  My college journey was not a waste after all :-)

Okay, the real point is that Jake took notice. Chuckle-chuckle and all it took was some fancy paper curling around a pencil and a cool, paper snake. Mom's have mad skills, don't they. I'm gearing up to ask Jake to draw a new picture of how he feels about Mommy's art class-eh. Maybe I'll just take a photo of his expression.

Things are looking up!

Slurpin' for Worms Birthday Party Game for Kids and Moms on a Budget

Birthday's on a Budget: Party Game Ideas

No matter how much we would like to, most parents just aren't able to throw that ultra-expensive birthday party for kids every year, but that doesn’t mean your BIRTHDAY still can't be fun! Here is a great, cheap birthday game activity. You can switch up the theme. We went with Gummi Candy Worms, but you can use Gummy Bears too. Enjoy, this worm birthday game for kids!


This post contains affiliate links.


Fun Birthday Party Game for Teens: Slurpin' for Worms


You might also like to Paint with Worms (Spaghetti).


What you Need: 

Fun Paper Plates

Canned Whipped Cream
Albanese Gummi Worms or other small Gummy Candies 


*Please be mindful of small children and choking hazards.


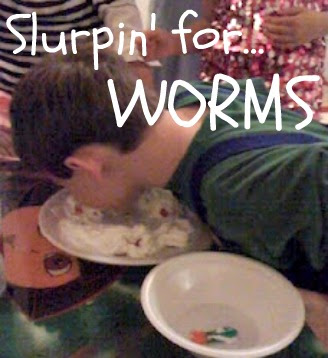
birthday games for kids Worm Birthday Party activity
Easy Kid's Game for Birthday Party: Worm Party Game.


How to Play Worm Birthday Game: 


  • You can play one at a time or all at once as a race- we have done both.
  • Place the same amount of objects on a paper plate for each participant. (10 kids = 10 plates)
  • Cover the items completely with whipped cream. (Try to make each plate exactly the same.)
  • Each player gets a whipped cream-covered plate and an empty plate.
  • Hands are placed behind your back and on "Go," players use only mouths to find items on plate, one at a time, and spit them onto empty plate.
  • The first player to find them all wins!
  • (If playing one at a time, the person with the quickest time wins.)

This is a great game for Summer Camp too.


Recommended Reading:


Group Games for All Ages

Worms! 

Worm Birthday Party Favors

Worm in Apple Healthy Party Snack

Sensory Spaghetti Painting (Feels like worms).

Follow us on Instagram for Daily Fun!


Easy Fun Teen Birthday Party Game Worms
Easy Fun Teen Birthday Party Game: Slurpin' for Worms.


Sensory Activities: Edible Straw Painting for Toddlers ~ Yum!

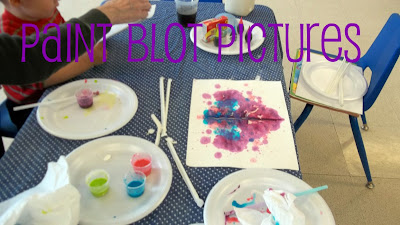
Edible Painting with Straws is Fun, Sensory Activity for Toddlers

Toddlers love to play with straws. One of the first milestones is learning to drink out of a straw. Blowing through a straw if also a fun, sensory experience for toddlers. This activity uses both. It is fun to watch them practice. Grab a cottonball to teach them to blow through the straw and then mix up some edible paint to make these cool, colorful blot pictures.

Edible Painting with Straws is Fun, Sensory Activity for Toddlers
Our paint isn't just edible; it is yummy too!
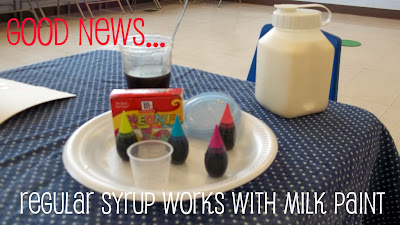
Yummy edible milk paint recipe
Neon food color, maple syrup, milk, and cornstarch. Mix in three equal parts syrup, milk, and starch. Add one or two drops of color.
Little ones learn to blow thru the straw vs. sucking ~ not as easy as it seems.
It makes great finger-paint too.

Recommended Reading:


Crafty Kids: Fun Projects for You and Your Toddler

Kid Sensory Science: Play Based Learning How to Garden with Kids with Egg Cartons: Investigating_Detective_Hands-On Messy Play

Investigating Detectives: Kid Sensory Science and Gardening with Egg Cartons

Sensory Play is a big buzz word. Back in the day, all my play time was sensory play. I'd run around outside, get filthy making mud pies and sand ice cream, dash through the sprinkler, plop in the bath, (where I swirled Dad's shaving cream into Mom's shampoo painting Picasso's all around the tub) and head to bed one truly happy camper. Make a sensory science egg carton garden with your kids!


Gardening is the best form of Sensory Play Based Learning How to garden with the kids with egg cartons
Gardening: The original Sensory Play Based Learning.

Today, lots of people don't like to let their kids get messy or to be seen in dirty clothes, the horror!


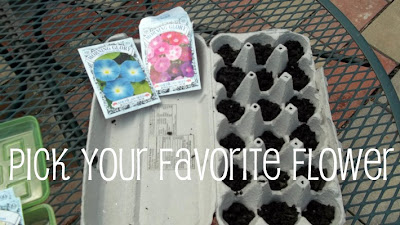
Use egg cartons to start seeds seedlings indoors
Start your seeds in egg cartons in doors in early spring.
I sweep the kitchen and bathroom floor several times a week, but you'd never know it. Anytime you stop by for a visit you'll find dried mud, bits of dandelions, grains of sand, tiny twigs, and a few dead bugs. And, at least two kids in dirty clothes. I often joke, I'm no Martha Stewart, but I'm no June Cleaver either. Ahem... If I had to pick a t.v. personality's home to compare ours too... I fear we resemble Roseanne the most, just not so crass.


Everyday is Sensory Play day! Last week, Jake was covered in mud he found in a hole in the backyard. I plan to make some mud paint for my next sensory post.

Amanda loves to investigate with her magnifying glass, ziploc baggies, and spoons from the kitchen drawer.


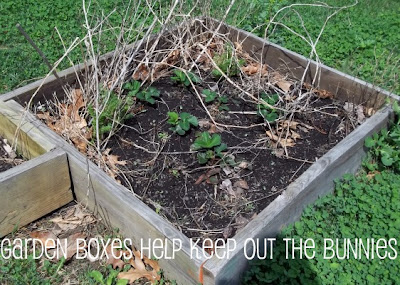
When our seedlings come up, we'll plant them in this little garden box we built together last year. We have healthy strawberry plants already!

Garden boxes to keep bunnies out rabbits
Keep bunnies out of your garden with raised garden boxes.

Science projects cover the front porch, 'Please watch your step.' Our favorite toys are anything we can find growing in the yard.  

Bonus = lots of free toys!

Kid Sensory Science: Play Based Learning How to Garden with Kids


A Whole lot of fun with the Tickle Me plant. 
By far, the best seed to plant with your kiddos!

If you want to follow our messy life, hop over to Kids Creative Chaos on Facebook and join the fun.


Recommended Reading:

Roots, Shoots, Buckets and Boots: Gardening Together with Children

Planting a Rainbow